My Guide to Bad Mass Airflow Sensor Symptoms and Cleaning
The Day My Car Decided to Quit
It was a really hot Tuesday afternoon. I was driving down the road near my home. Suddenly my car started to shake violently. I felt like I was caught in an earthquake. The steering wheel buzzed right in my hands. I could even smell a faint odor of unburned gas.
It was honestly a terrible day for this to happen. I had just purchased a brand new mechanics tool set for my garage. I guess the universe decided it was time for me to actually use it. My engine sputtered loudly at the next red light. It almost died completely right there in traffic.
I gently pushed the gas pedal when the light turned green. The car barely moved forward. It hesitated badly. It felt like the engine was thinking about moving instead of actually going. The car slowly rolled to the side of the street. After popping the hood, a wave of heat washed over my face, and it was clear the problem needed a fast answer.
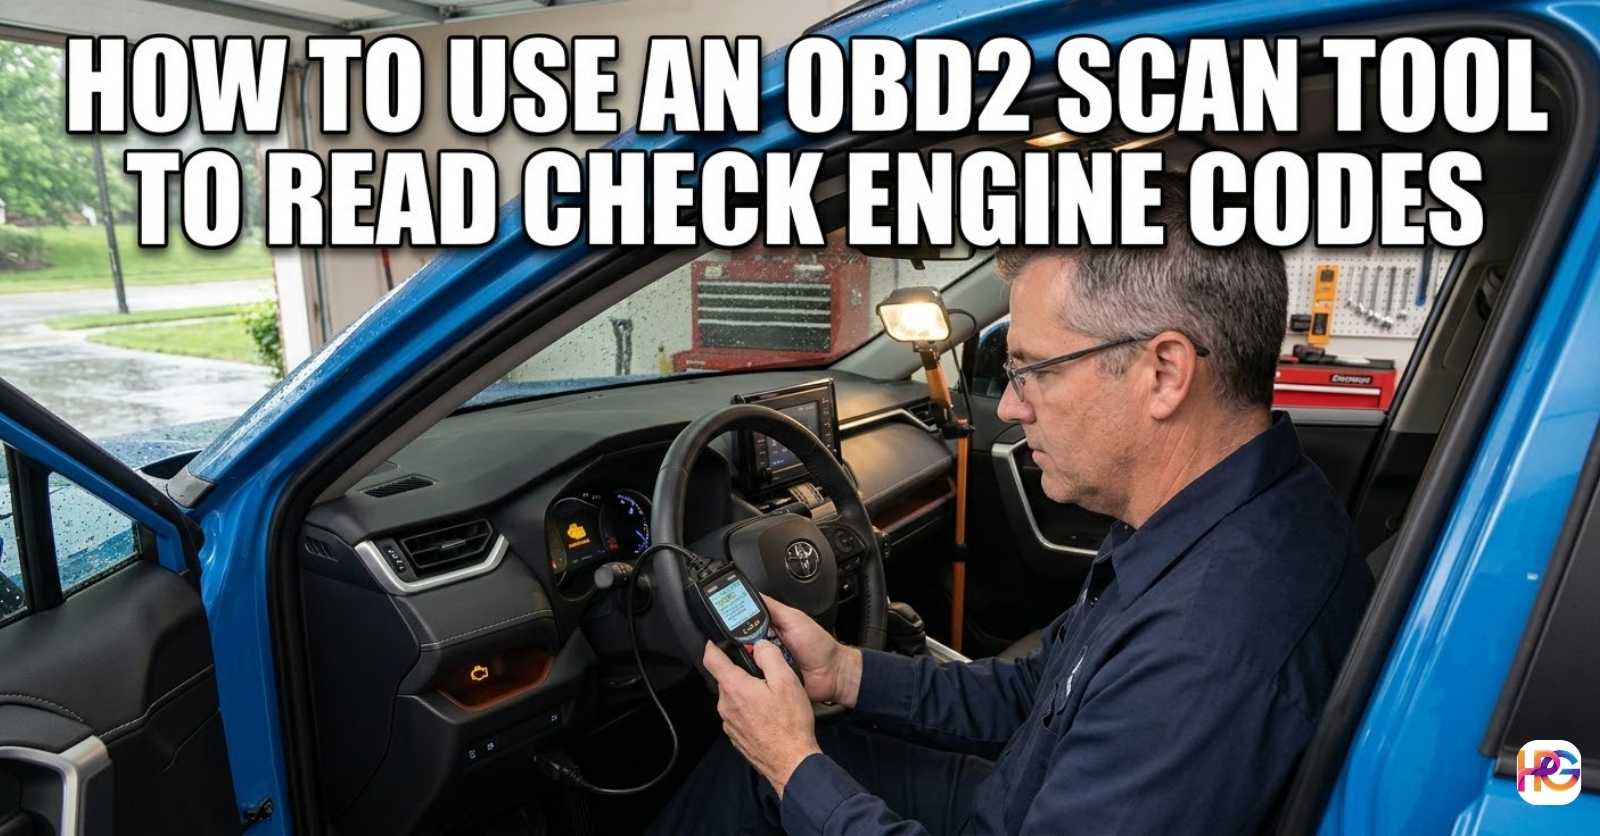
My simple car code reader came out of the glove box and plugged straight into the port under the steering wheel. The little screen gave me a code immediately. It read P0101 on the display screen. That specific code pointed straight to the mass airflow sensor. I had a tough choice to make. I could take it to a repair shop and pay a huge bill. Or I could try to fix it myself in my driveway. I chose the driveway.
What is a Mass Airflow Sensor Anyway?
Let me explain this part as simply as possible. Think of your car engine like a giant air pump. It needs fresh air to run properly. It also needs the right amount of fuel. The mass airflow sensor acts as the main breathing meter for your whole engine system.
It sits right after your main engine air filter. It lives inside a plain black plastic tube. Its only job is to measure all the outside air going into the engine block. It tells the main car computer exactly how much air is rushing in.
The computer takes that specific data. It then adds the exact right amount of liquid gas. When the mix is perfectly balanced, your car runs incredibly smooth. But things get very dirty under the hood over time. Fine dust gets past the paper air filter. Engine oil vapors sneak into the intake tube.
This sticky dirt covers the tiny delicate wires inside the sensor housing. The sensor basically goes blind. It sends totally wrong numbers to the main computer. The computer panics and dumps in way too much gas. Or sometimes it puts in too little gas. That exact moment is when all the bad car symptoms start to happen.
Top Symptoms I Noticed Before Fixing It
I want to share the exact warning signs my car gave me. You might actually be seeing these same weird things right now. Please do not ignore them. Your vehicle is desperately trying to tell you something is wrong. Here is exactly what I dealt with that week.
That Dreaded Check Engine Light
This is almost always the very first clear sign of trouble. A little yellow engine icon pops up on your dash display. It stares right at you while you try to drive. It can easily ruin your whole morning. My light came on without any prior warning.
I used my trusty code scanner right away. It showed a common lean code error. A lean code simply means the engine has too much air and not enough gas. The dirty sensor was lying to the engine computer. You might see trouble codes like P0100 or even P0171. If you see those numbers, this sensor is your top suspect.
Rough Idling and Severe Shaking
This was definitely the most scary part for me. I stopped completely at a local stop sign. The engine RPM needle dropped extremely low. The entire metal car frame shook. I honestly thought the motor was going to stall out completely.
I had to keep my right foot pressing the gas just a little bit. That was the only way to keep the engine alive. A healthy motor should sit perfectly still at a red light. You should barely even feel it running. My poor car felt like a broken old farm tractor.
Horrible Gas Mileage Drops
I happen to drive quite a lot during the week. Tracking my daily gas mileage is a habit of mine. Suddenly I found myself visiting the local gas station way too often. A dirty air sensor completely messes up the engine fuel mix.
The main computer usually dumps extra gas into the engine just to be safe. That extra unburned gas goes right out the back tailpipe. You end up basically throwing your hard earned money away. I noticed my average miles per gallon drop by a massive amount. It really hurt my wallet that month.
Hesitation When Pushing the Gas
Do you know that scary feeling when you try to pass someone on the highway? You push the gas pedal down firmly. The car should jump forward with power. My vehicle did not do that at all. It fell totally flat on its face.
The engine hesitated for a few long seconds. Then it suddenly jerked forward violently. It was not a smooth ride by any means. Feeling that lack of power was very unsafe. I did not want to pull into busy traffic with a car acting like that.
Grease Is Grease No Matter Where It Is
I spend a lot of time writing guides about keeping homes clean. Testing out air fryers and testing blenders is part of my daily life. Those kitchen gadgets get covered in nasty cooking oil quickly. Your car engine deals with the exact same kind of sticky mess. It is just a slightly different type of oil.
The gross dirty film that coats your kitchen cabinets is exactly like the film inside this car part. Outside air rushes in constantly. It brings fine road dust with it. Hot oil vapors from the running engine float around too. They literally bake right onto the hot sensor wire.
It forms a hard baked crust eventually. You cannot just wipe it away with a dry paper towel. You need a harsh chemical that cuts through baked grime fast. Just like you need a heavy duty soap for a filthy stove top. Thinking about it this simple way made the whole car project seem much less scary to me. It is really just basic deep cleaning.
The Tools You Need to Do This Right
You absolutely do not need a massive professional garage full of gear for this job. Gathering just a few basic hand things is all it takes. I grabbed my favorite new tool set from the shelf. I also picked up a highly specific spray cleaner.
Do not ever use random household cleaners for this task. I will talk much more about that danger later on. Here is a quick breakdown of exactly what I used.
| Tool Needed | Why I Used It | Rough Cost |
| Screwdriver Set | To remove the two small housing screws | Ten dollars |
| MAF Sensor Cleaner Spray | To safely melt away the baked dirt | Ten dollars |
| Clean Shop Towel | To rest the wet part on while drying | Two dollars |
| Code Reader | To clear the dash light later | Twenty dollars |
How I Clean My MAF Sensor Step by Step
I am certainly not a master mechanic. Fixing things around the house is just something I enjoy doing. If I can do this easy job, you can do it too. The whole process takes about thirty minutes from start to finish. I will carefully walk you through my exact daily process. I took my time and never rushed.
Step 1: Let the Engine Cool Down
This is a very crucial personal safety step. I parked my car deep in the driveway shade. Opening the hood wide let all the trapped heat escape. I waited a full hour before touching anything.
Engine bays get incredibly hot during summer drives. Burning your bare hands is a terrible idea. I also took a wrench and disconnected the negative cable on my car battery. Doing this keeps the fragile car computer completely safe from any weird electrical shocks. Being extra safe is always the best path.
Step 2: Locate and Unplug the Sensor
Looking right behind my square air filter box was easy. There was a thick black plastic air tube running to the engine. The little sensor was plugged right into the top of it. It had a small wire harness securely attached to the side.
I pushed the tiny plastic tab on the wire plug. Pulling it back gently released the lock. It popped right off without much fight. Sometimes these old plastic clips are super brittle. They can break easily if you pull too hard. Wiggling it loose slowly was the smartest move.
Step 3: Removing the Tiny Screws
My specific sensor had two very small screws holding it tightly in place. Grabbing my trusty screwdriver felt good. I carefully backed the metal screws all the way out. Putting them safe in a little magnetic metal tray saved me trouble.
You never want to drop these tiny screws down into a dark engine bay. They will quickly disappear forever into the black void. Once both screws were totally out, I grabbed the top plastic edge. Pulling the unit straight up worked perfectly. It slid out very easily.
Step 4: Spraying the Magic Cleaner
This was honestly the most fun part of the job. Taking the dirty sensor, I walked far away from the car paint. Spraying harsh chemicals near nice paint is always a bad idea. I held the plastic piece right over an old blue shop rag.
I took my fresh can of mass airflow sensor cleaner spray. Giving the deep inside of the housing ten quick sprays did the trick. I made totally sure the liquid hit the tiny wires hiding inside. The clear fluid quickly washed away all the gross black grime. Liquid dirt dripped right out onto my blue rag.
Step 5: The Crucial Waiting Game
Putting a wet electrical sensor back into a car is foolish. It will instantly ruin the whole expensive part. Setting the clean unit down on a dry towel was my next move. Letting it sit outside in the warm sun for twenty minutes was enough.
The special spray chemical actually dries up incredibly fast. I never touched the tiny little wires with my fingers. Using a rag to dry them inside is a huge mistake too. Blowing hard air on them is equally bad. Those little silver wires are as thin as human hair. They will snap easily if you poke them. Letting the warm air do the job is perfect.
Step 6: Putting It All Back Together
Once the plastic was totally bone dry, I walked right back to my open hood. Sliding the clean sensor back into the round tube took two seconds. Tightening the two small screws locked it down tight. Clicking the plastic wire plug back into place felt satisfying.
Finally, I hooked my car battery cable back up securely. Closing the heavy metal hood sounded great. Starting the car engine was the final real test. It purred happily like a tiny kitten. The awful shaking was completely gone. That annoying check engine light faded away quickly. A massive wave of total relief hit me.
Mistakes I Made So You Can Avoid Them
Being completely honest with you is important to me. Messing things up sometimes is just part of learning. My very first time doing this task was definitely not perfect. Sharing my early failures is a good thing. That way you do not repeat my exact mistakes.
First off, I almost used the completely wrong spray can. Finding some strong brake parts cleaner on my garage shelf felt lucky. Thinking it would work fine was a huge error. Brake cleaner liquid is way too harsh for this delicate job. It will quickly melt the thin plastic hidden inside the housing unit.
It will permanently destroy the delicate chemical coatings on the hot wires. Stopping myself right before spraying saved the day. Always buy the specific exact spray made for this one job. Spending ten extra bucks is totally worth it.
Second, I clumsily almost dropped the tiny screws. Rushing the process made me sloppy. Fumbling the little screwdriver handle caused a slip. One screw bounced hard off a rubber hose. It landed deep down on the lower metal frame rail.
Using a long magnet on a metal stick was the only way to fish it out safely. That silly mistake cost me an extra twenty minutes of sweating. Taking your sweet time is the best advice I can give. Using modern magnetic tools helps a lot if you have them handy.
Cleaning vs Replacing: What Does It Cost?
Sometimes simple cleaning is just not enough to fix the issue. The delicate part might actually be fully broken inside the plastic shell. The tiny silver wire can snap from old age. The small internal circuit board can burn out completely.
If you clean it fully and the motor still runs bad, buying a new part is the only path forward. Doing some quick research on current prices gave me good insight. Sharing this simple cost data with you makes sense.
| Repair Option | Part Cost | Labor Cost | Total Price |
| DIY at Home | Fifty Dollars | Zero Dollars | Fifty Dollars |
| Car Dealer Shop | Hundred Dollars | Hundred Dollars | Two Hundred Dollars |
Doing the dirty work yourself truly saves a massive chunk of cash. Repair shops normally charge a very high hourly rate for their time. The actual physical job only takes ten minutes once you fully know how to do it.
Buying the new part online is usually much cheaper than visiting a local car dealer. Making sure you buy a highly rated good brand is key though. Super cheap generic sensors from unknown random brands usually fail very fast.
The Tense Test Drive After Cleaning
Slipping back behind the steering wheel felt amazing. Turning the ignition key made my heart beat slightly faster. The motor cranked over loudly. It roared to life with smooth steady power.
Watching the dash display carefully gave me hope. No yellow warning lights glared back at my face. Backing out of the concrete driveway was super smooth. Slowly pushing the gas pedal felt completely normal again. The heavy vehicle moved forward without any jerking.
Driving down my quiet street was peaceful. Stopping at the main corner sign was the ultimate test. The heavy car sat perfectly still on the road. There were zero annoying shakes or vibrations. There were absolutely no bad smells coming from the back pipe.
Pulling onto the busy main road felt safe again. Pushing the gas pedal down hard proved the fix worked. The vehicle leaped forward quickly. There was exactly zero hesitation in the motor. Shifting through the fast gears happened flawlessly. The lost engine power was fully back.
Smiling a really big goofy smile was my only reaction. Driving around town for another twenty minutes felt like a victory lap. Making sure the driveway fix was totally real mattered to me. It honestly felt like driving a brand new vehicle again. It is truly amazing how much one dirty little plastic part can ruin a nice drive.
My Final Thoughts on MAF Maintenance
Taking proper care of your daily vehicle does not have to be scary at all. Tackling this issue was a fantastic learning experience for me. Conquering my silly fear of complex engine sensors felt great. Using my simple hand tools to solve a very real problem built confidence.
My vehicle runs so much better every single day now. My gas tank mileage is finally back to completely normal levels. Those super annoying dashboard lights are gone for good.
Checking the simple things first is always the best move if your car acts sick. Assuming the whole engine block is dead is usually wrong. A tiny bit of black dirt can cause a really massive headache for any driver. Grabbing a cheap can of spray and a screwdriver can quickly save your entire weekend plans.
Checking my small sensor every single time I change my main air filter is my new rule. It is a really good cheap habit to build. It keeps the whole car breathing nothing but clean fresh air. Hoping my personal story helps you fix your own ride today. Fixing broken things yourself just feels really good. You always get a massive sense of personal pride. Keep your tools handy and always take it one slow step at a time.
Frequently Asked Questions About MAF Sensors & Tools
Can I just use normal brake cleaner on my dirty mass airflow sensor?
No, standard brake cleaner is way too harsh for this job. It will quickly melt the thin plastic and break the hot wires. You must buy the real MAF sensor spray.
Do I really need a code reader tool to fix my mass airflow sensor?
A simple code reader takes the wild guess work out of home car repair. It tells you exactly why that engine light is on. This handy tool saves you time and cash.
Is it safe to store my MAF sensor cleaner spray in a hot summer garage?
Keep your chemical sprays in a cool and very dry dark room. High garage heat can make these thin metal cans pop open. Store them safely in a strong metal box instead.
What is the best kind of screwdriver to take out the mass airflow sensor?
You need a small hand screwdriver with a good thick rubber grip. A firm handle keeps your sweaty hands from slipping fast. This keeps those tiny car screws very safe.
Can I use my garage air compressor tool to quickly dry the mass airflow sensor?
Do not ever use strong compressed air to dry this car part. The heavy blast of air will snap the thin hot wires right off. Let the wet sensor sit on a clean shop towel.