My Real Experience With Bad Oxygen Sensor Symptoms
It was a wet Tuesday morning in Alabama. Driving to the local market was on my list. My old car usually runs just fine. I turned the key in the dash slot. The motor sputtered to life with a cough. Something felt very wrong right away. The main wheel shook hard in my cold hands. I smelled a nasty gross odor. Smelling like rotten eggs and old gas is not right. This was my first loud hint of trouble. I write for Home Pick Guide normally. We test neat blenders and fast air fryers there. Fixing cars is not my main day job. Yet, I had to figure this big mess out. The check engine dash light blinked at me. It felt like a warning of a massive bill. Sighing out loud, I turned off the car key.
The Early Warning Signs I Ignored
Cars tell us when they hurt inside. We just need to listen to them closely. Missing the small clues is easy to do. I noticed small odd things weeks ago. The gas tank emptied much faster than normal. City traffic took the blame at first. My thin wallet felt the real pain at the pump. The car also felt slow on big hills. Lacking the usual pep and jump was obvious. Thinking the air filter was just dirty was my mistake. Those were classic bad oxygen sensor symptoms from the start. Knowing that now hurts my pride a bit. Paying strict attention sooner is my new rule.
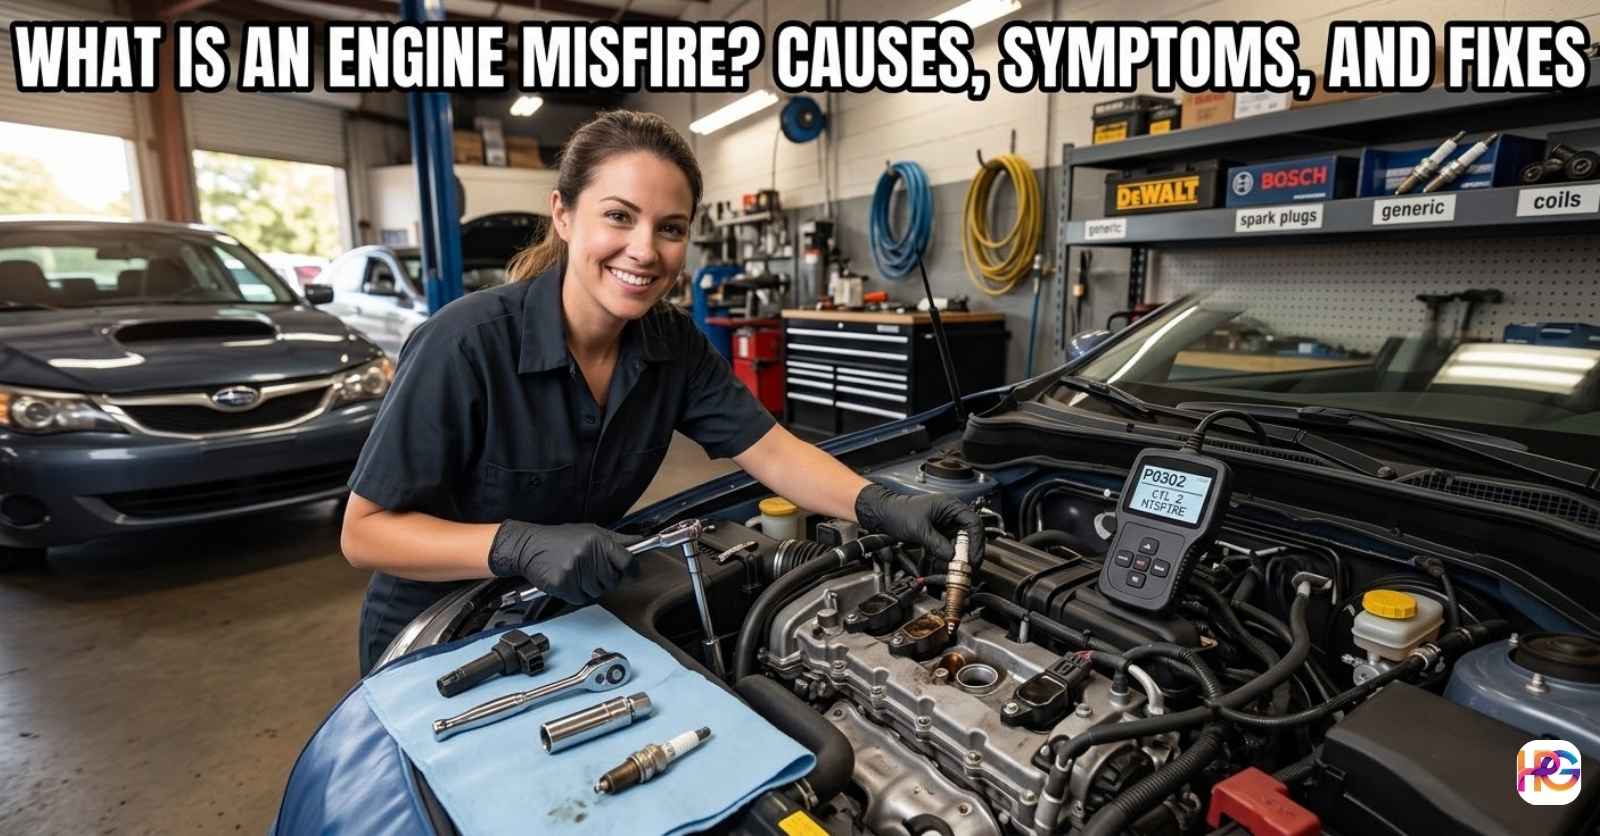
A Rough Idle at the Stop Sign
Let me paint a clear picture for you. You stop at a red street light. The car should sit still and very quiet. My car danced and shook hard. The RPM dial bounced up and down fast. It felt like the motor was gasping for air. Gripping the wheel tight was my only move. Praying it would not stall out filled my mind. Other folks looked at me in my shaking car. It was highly bad and awkward. A smooth idle needs the exact right air mix. My bad part ruined that fine balance.
The Terrible Exhaust Smell
You cannot ignore a truly bad smell. My garage stunk for five full days. It was a sharp bad sulfur odor. Raw fuel was dumping right into the tail pipe. The cat converter tried to clean it up. It could not keep up with the wet mess. The rich gas mix was choking the whole system. Opening the garage doors wide was a must. My eyes watered from the toxic fumes. This is a very clear loud sign of failure. Do not breathe that gross stuff in your lungs. It gave me a nasty dull headache.
What Really Causes This Part to Fail
I like to know why neat things break. Spending hours reading about car parts is fun. These items live in a harsh brutal place. They sit right in the hot tail pipe stream. The heat alone is truly wild. Measuring the raw air leaving the motor is their job. They send quick data to the main computer brain. The computer fixes the raw fuel mix. When they die, the brain flies totally blind.
The Problem With Old Age
Parts wear out over long spans of time. My car has over ninety thousand miles on the dash. Most mechanics say these parts last that long. They are just like basic spark plugs. You must replace them at some point. The inside items fail from pure steady heat. They get slow and very lazy. A lazy part sends late slow signals. The motor computer gets super confused. It dumps extra raw fuel just to be safe.
Carbon Buildup and Bad Fuel
Soot is a quiet killer for motors. I pulled my old part later on. It was covered in thick hard black crust. This is gross carbon buildup. It blocks the tiny holes in the tip end. The part cannot sniff the gas fumes anymore. Using cheap pump fuel can cause this faster. Buying the cheapest gas in town was my norm. That was a truly bad choice. Quality pump fuel has strong cleaners inside it. Good gas keeps the metal parts clean. Learning this lesson the hard way was not fun.
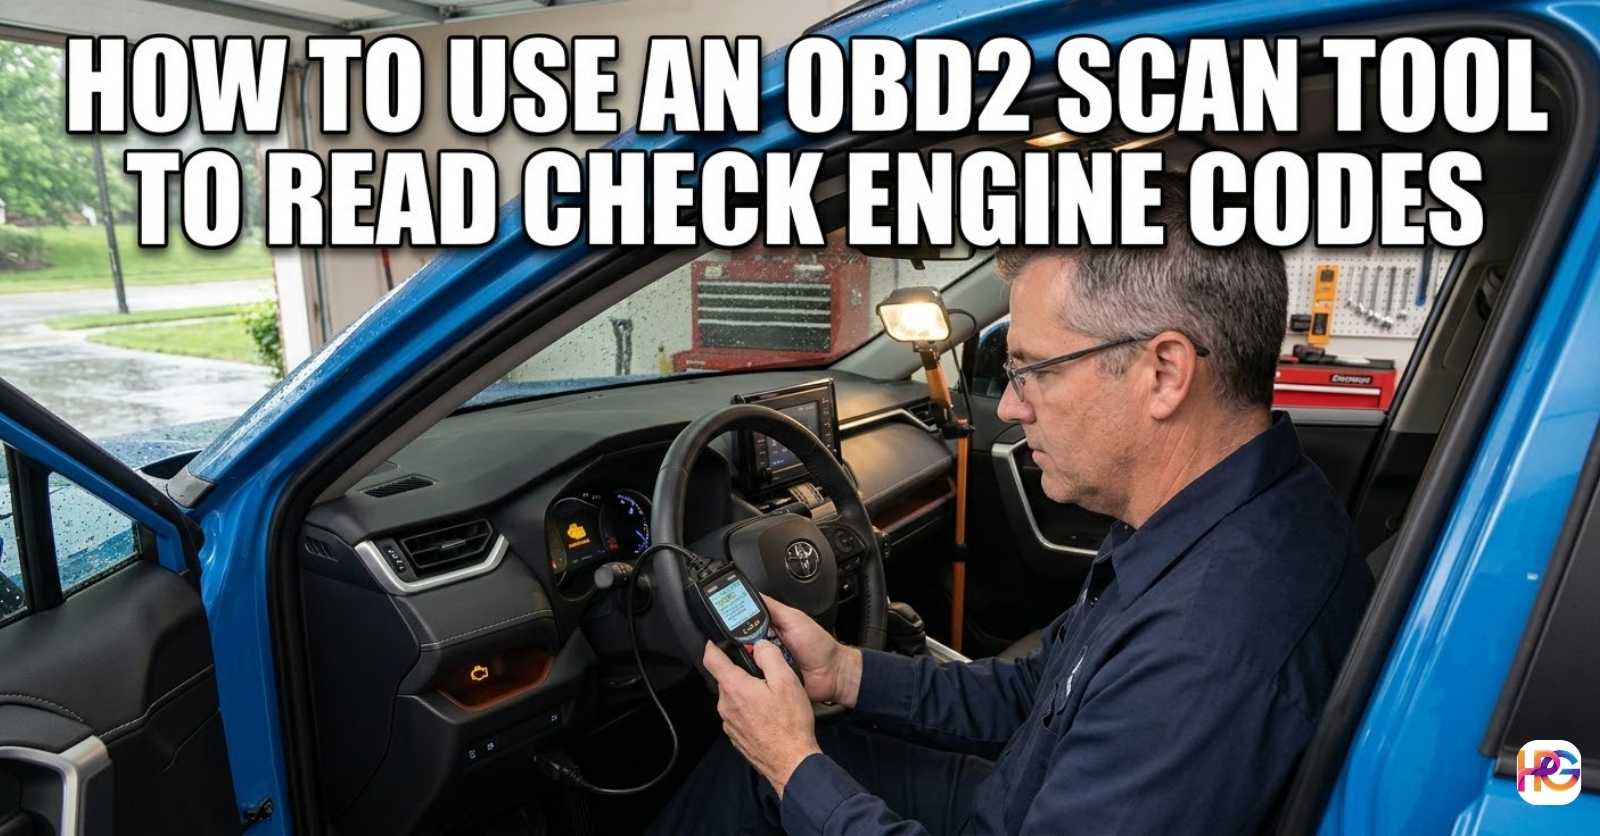
How I Tested My Car at Home
I hate going to the repair shop totally blind. Shop mechanics can charge a lot of cash. Getting data first was my top plan. I own a cheap small OBD2 scanner tool. It is a pure lifesaver for home garage guys. Plugging it under the dash is fast. It talks to the main car brain. I pressed the green read button. The screen flashed a bright code at me.
Reading the Error Codes
The screen showed the code P0133. I looked it up on my smart phone. It meant a slow read from the front part. The scanner gave me hard stone proof. Guessing was no longer needed. Tools like this build great trust. I felt like a real shop guy for a minute. The data matched my real life woes. Poor gas mileage and rough idle fit the code perfectly.
Looking at Live Data
My scanner also shows live data streams. I turned the motor on again. I watched the voltage numbers jump on the screen. A good part jumps fast between zero and one volt. My old part was stuck near a flat zero. It barely moved at all. It was dead in the dark water. Seeing the flat numbers was very cool. It proved the piece was truly bad. I love having facts before I buy things.
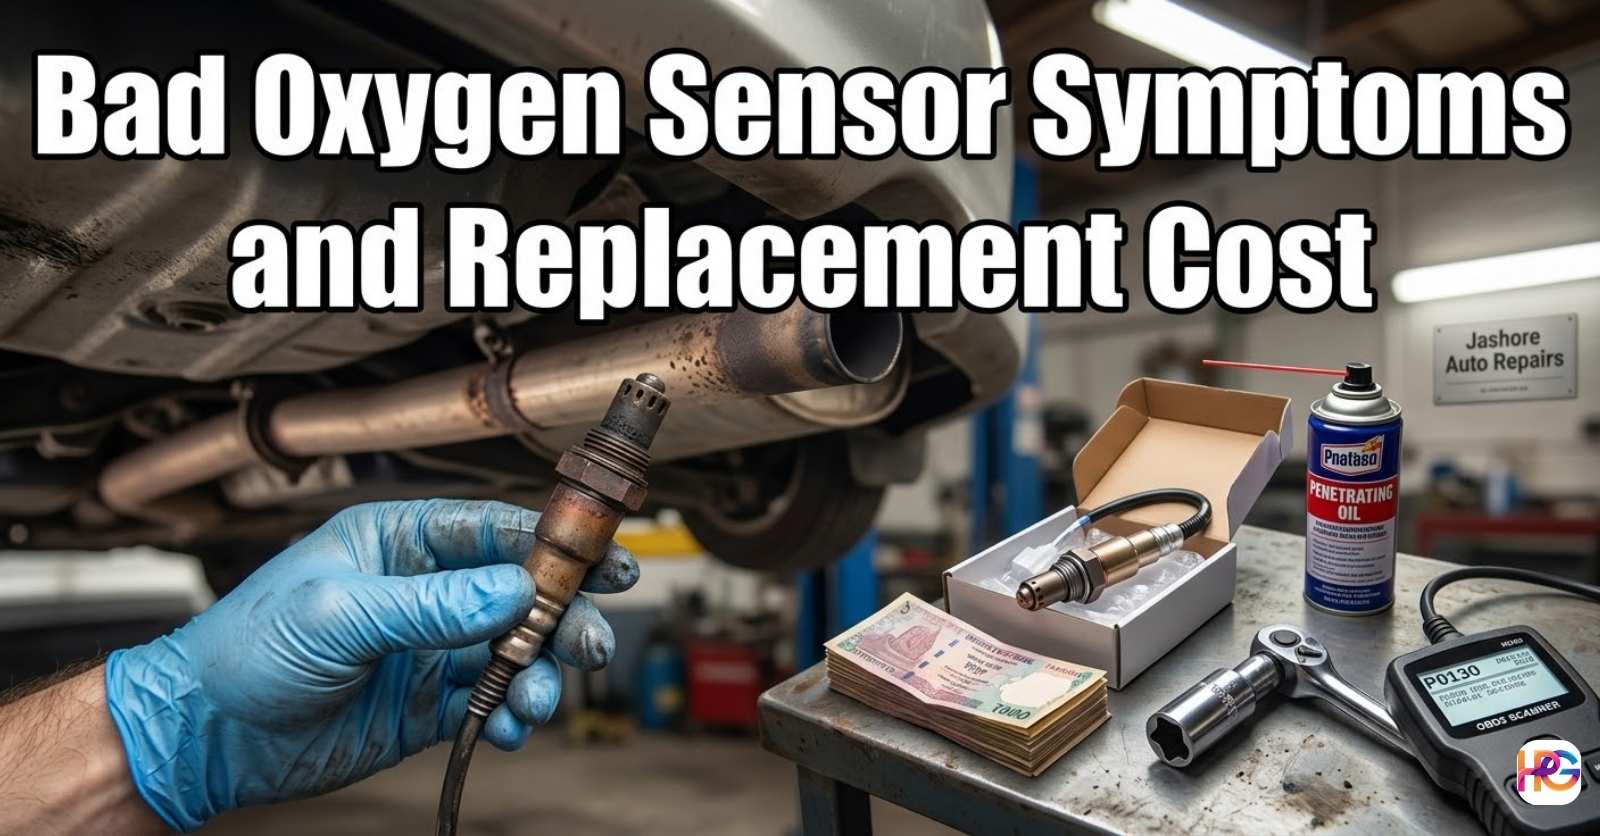
The True Replacement Cost
Now came the painful money part. I had to spend cash to fix the car. Calling the local auto parts store was my next step. They had the exact item in stock on the shelf. The price swung widely by brand name.
Buying the Right Replacement Part
You get what you pay for with car parts. Cheap no name parts cost twenty bucks. The factory brand name cost over eighty bucks. I chose the factory brand name piece. Cheap parts often fail right out of the box. They can cause more headaches weeks later. Fixing this issue once was my main goal. Eighty bucks felt fair for a calm mind.
Doing the Labor Myself
I chose to do the manual labor myself. I bought a special cut socket tool. It cost me fifteen small dollars. The old part is shaped like a spark plug. It has thick wires glued to the top end. A plain wrench will round the metal off. Spraying thin oil on the rust is smart. Letting it sit works the best. Heat cycles fuse the old metal tight. Patience and a long breaker bar are key items. Pulling hard popped it loose. My knuckles got a bit scratched up. The feeling of pure joy was totally worth it. Saving a hundred bucks felt great.
A Quick Look at the Numbers
Here is a quick look at my exact numbers. I made a table to show the costs and signs. It helps to see everything in one place clearly.
Symptoms and Cost Table
| My Car Symptoms | The OBD Code | Part Cost | Labor Cost |
| Rough Idle | P0133 | $85 | $0 |
| Bad Gas Smell | P0133 | $85 | $0 |
| Poor Mileage | P0133 | $85 | $0 |
The Actual Process of Changing the Part
Getting the old part out was a big fight. I want to share the exact steps I took. It was not as easy as the quick web videos show. Rust is a real bad enemy under a car.
Lifting the Car Safely
Safety is the most vital rule. Never get under a car held by just a jack. I used thick steel jack stands. Finding a flat cement floor was my first step. I set the hand brake hard. Wood blocks went behind the rear tires. Then I jacked up the front end. Lowering the car onto the stands came next. I gave the car a hard shake. It did not move at all. Sliding flat on my back felt safe.
Fighting the Rusted Threads
The pipe was covered in brown rust. The part looked like it was welded on. I grabbed my can of rust oil spray. Soaking the base of the part was a must. I went inside and drank a cup of tea. The spray needed time to do its magic. Coming back an hour later, I was ready. I slid the cut socket over the wires. My long metal handle clicked easily. Pulling with all my arm strength took work. It groaned and squeaked loud. The metal finally turned. I was so glad it did not snap off. A broken thread means a much bigger bill.
Installing the New Sensor
Putting the new part in was very easy. It felt great to hold the clean new piece. It was shiny metal and had fresh wires.
Prepping the New Threads
The new part came with a small foil pack. Silver paste was inside it. You must put this on the threads. Heat cannot weld the metal shut with this paste. It makes the next fix much easier. I put a small drop on the metal lines. Keeping it off the tip was a key rule. The tip must stay clean to read the gas. Turning the new part in by hand came first. This stops bad cross threads by mistake.
Tightening and Plugging It In
I used my tool to make it tight. Big force is not needed here. Just make it tight to seal the pipe. Then I ran the new wires up the wall. The plastic plug clicked right into the port. A loud snap sound echoed in the garage. I knew the wires were snug. Moving out from under the car felt good. I dropped the jack and put the tools away. My hands were black with dirt and grease. Washing up was the last step before starting the motor.
Resetting the Engine Computer
The job was almost done now. I had to tell the brain about the new part. The check engine light was still on.
Clearing the Old Error Codes
I grabbed my trusty scanner tool again. The key went to the run spot. Starting the motor was not the goal yet. I picked the erase codes button on the screen. Two beeps came from the small tool. The tiny yellow engine icon hid from the dash. The brain of the car was wiped clean. It was ready to learn from the new part data.
The Victory Test Drive
I started the engine for real this time. Smooth idle came back right away. The RPM needle sat still at seven hundred. That nasty exhaust smell was totally gone. Backing out of the driveway, I smiled. I drove the car on the highway. Pushing the gas pedal hard tested the fix. The car sped up with strong power. Driving felt like a brand new ride again. My gas mileage got better the very next day. This repair was a total win. I felt great.
Important Lessons From This Repair
This broken part taught me a few cool facts. Car care is not a big dark secret. It just takes a little bit of reading online. You can handle many small jobs at home. You save cash and learn new life skills.
Why I Keep a Scanner Tool Now
Every car owner needs a code scanner. You can buy one for twenty bucks online. It pays for itself on the first try. You never have to guess what is wrong. The check engine light is no longer a big scare. It is just a fact point to read. I keep mine right in the glove box. Helping friends check their cars is fun too. It is a great tool to own.
Better Fuel Habits Going Forward
I changed how I buy my gas. Hunting for the cheapest station is done. I look for top fuel brands now. Top tier gas keeps the motor clear of junk. It blocks that thick black crust from forming. It guards the new part I just put in. Spending a few extra cents per tank helps. It saves cash on big shop bills later. My motor runs much better today.
Final Thoughts on Car Care
Taking care of a car takes work. Parts will break as the miles pile up. That is just a sad fact of life. My bad oxygen sensor symptoms were a huge pain. The rough idle and bad smell really frustrated me. But fixing it was a great way to learn. I found out how the gas system works. Using my scan tools helped me find the truth. I bought a good part and did the hard work.
My hands got very dirty. I scraped my knuckles on the hot pipe. Yet, I felt proud when the motor ran. The test drive was smooth and fast. The gas mileage went right back to normal. If your car acts up, do not stress out. Look for the signs and check the codes. You might be able to fix it right at home. You can save cash and learn skills. Just take your time and read the facts.
Frequently Asked Questions
What is the best OBD2 scanner for finding a bad oxygen sensor?
A cheap Autel or Innova code reader works well in home garages. They pull bad engine codes fast to save you time and stress. The bright screen makes live car data clear to read.
Do I really need a special oxygen sensor socket?
Yes, a cut socket like the TEKTON brand is a must have tool. The open slit lets the thick wires pass through safely. This stops you from stripping the old rusted metal part.
Will a standard mechanics tool set work for this fix?
A great mechanics tool set with a big long bar is very good. You need that extra length to snap the rusted threads loose. It makes the tough garage job much safer to do.
How do I loosen a stuck oxygen sensor in a cold garage?
Cold air makes rusted tail pipes grip the part super tight. Spray a good rust oil on the base and let it sit for a while. This breaks the hard rust bond so your wrench can turn.
Are standard jack stands safe for a long car repair?
Yes, heavy steel jack stands keep you super safe under the car. Just make sure your garage floor is flat and hard first. A strong wide base stops the heavy car from moving at all.