Why My Keurig Needle Suddenly Ruined My Monday Morning
It was a rainy weekday morning in my kitchen, and my coffee tasted… wrong. Not cozy-wrong. More like “did I just brew sadness?” wrong. That’s when I learned the tiniest part of my Keurig—the needle—controls everything about how your coffee turns out.
I stood there in socks, staring at my mug, half awake and slightly offended. Same coffee pod. Same water. Same machine. The only suspect left was that tiny metal needle hiding inside the brewer head like it owned the place.
What the Keurig needle actually does
The needle may be small, but it’s the boss of the brewing process.
- Pierces the K-Cup lid
It punches a clean hole in the pod so hot water can get inside. No hole, no coffee. Just warm disappointment. - Delivers hot water evenly
It spreads water through the coffee grounds instead of blasting one sad corner. This is what makes coffee taste balanced instead of thin. - Controls brew pressure and flow
Too much clogging and the water struggles. Too little pressure and your cup tastes weak, like it gave up early. - Traps coffee grounds and mineral scale (the sneaky villains)
Tiny bits of coffee and hard-water minerals love to hide in the needle. You can’t see them, but your taste buds definitely can.
When I finally looked inside with my phone flashlight, it was… not pretty. Brown specks. Foil bits. A little crust from our hard tap water. Mystery solved.
Common signs your needle needs cleaning
Before that Monday, I thought my machine was just “having a mood.” Turns out, it was begging for needle maintenance.
- Coffee drips slowly like it’s tired
Instead of a smooth stream, it comes out in sad little spurts. Like the machine is yawning. - Grounds in your cup (crunchy surprise)
If you feel grit on your tongue, that’s trapped coffee escaping where it shouldn’t. - Brewer makes louder gurgling sounds
Mine sounded like it was trying to cough something up. Not comforting before caffeine. - “Add water” error when the tank is full
The machine thinks water isn’t flowing, even though it is. A clogged needle confuses the whole system.
That morning taught me something simple but important: when your coffee tastes off, don’t blame the beans first. Check the needle. It’s small, but it runs the show.
Understanding the Keurig Needle System (Upper vs Lower Needle)
I didn’t know my machine had two needles until I poked my finger trying to clean one on a sleepy Tuesday morning. Lesson learned: when it comes to how to clean Keurig needle, you need to know which needle you’re dealing with—or you’ll miss half the problem.
Once I figured this out, my whole approach to Keurig needle maintenance changed. It wasn’t just “clean the needle.” It was “clean both needles or enjoy another cup of sad coffee.”
Upper needle (inside the K-Cup holder)
This is the needle I met first. It’s right under the K-Cup holder, so it gets dirty fast.
From my experience, this one is the drama queen.
- Collects foil bits and coffee dust
Every time a pod gets punctured, tiny foil flakes and coffee grounds fall straight into this needle. I once pulled out a clump that looked like wet sand. Not appetizing. - Most common clog point
If your coffee slows down or tastes weak, this needle is usually the culprit. It’s the one that works hardest and gets blamed the most.
I now check this needle first whenever my brew feels off. It’s like checking your shoes before blaming the road.
Lower needle (inside the brewer head)
This needle is sneakier. You don’t see it unless you look closely with a flashlight.
And honestly, I ignored it for months.
- Harder to see
It hides deeper inside the brewer head. The first time I spotted it, I thought, “Oh… so that’s where the problem lives.” - Can build up mineral residue from water
Our tap water is pretty hard where I live, and this needle slowly collected white crusty scale. That buildup blocks water flow and confuses the machine.
Once I cleaned the lower needle, the gurgling sound stopped. The machine sounded calm again. Like it could finally breathe.
Special note for Keurig 2.0 needle maintenance
When I later tried this on my Keurig 2.0, I realized this model plays by stricter rules.
- Sensors are more sensitive
One wrong move and the brewer throws an error like it’s offended. - Requires gentler cleaning
I switched to a plastic toothpick instead of metal. Slow and careful wins here. - Avoid metal tools at all costs
I learned this the nervous way. Metal can scratch the needle or mess with the sensors. That’s a fast track to bigger problems.
For Keurig 2.0 needle maintenance, I treat it like cleaning glasses instead of scrubbing a frying pan. Light touch. Patience. No force.
Understanding the upper and lower needle was the moment everything clicked for me. My coffee issues weren’t random. They were mechanical. Once I respected both needles, my mornings went back to normal—hot coffee, quiet machine, and no more mystery clogs.
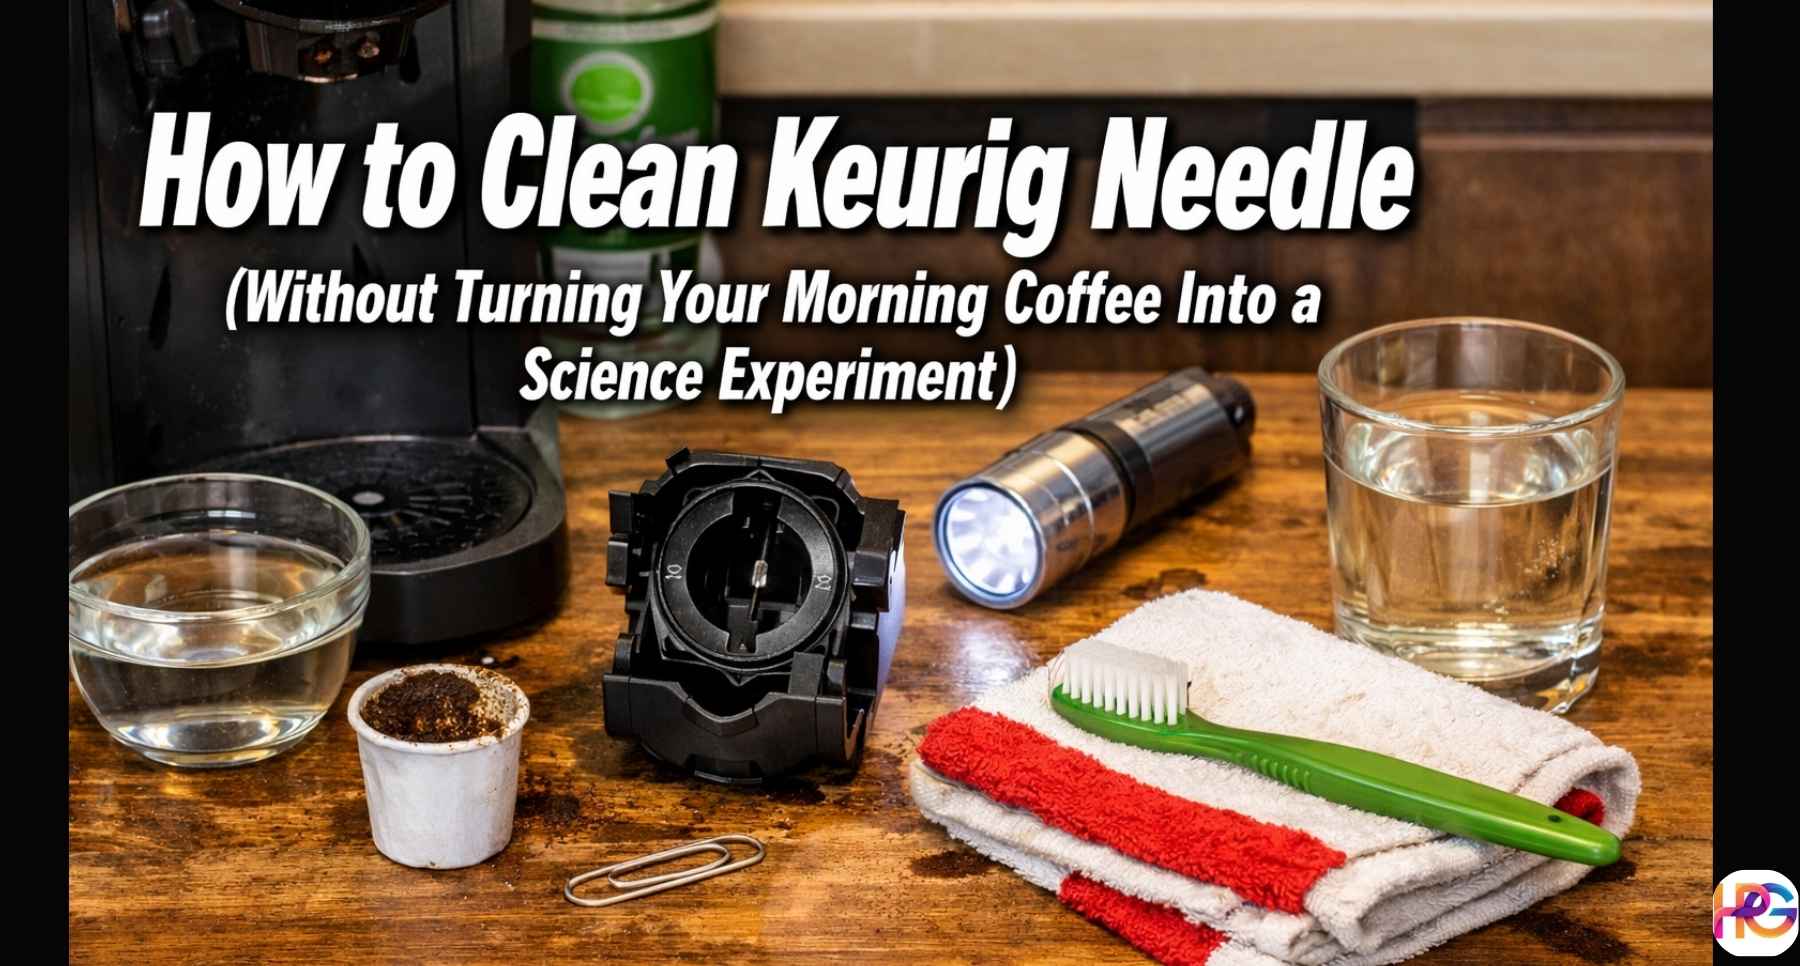
What You’ll Need Before Cleaning (Nothing Fancy)
I did this in pajamas on a quiet Saturday morning with tools from my desk drawer and kitchen sink. When I learned how to clean Keurig needle, I expected special gear. Turns out, I already had everything within arm’s reach. No trip to the store. No toolbox drama.
Basic tools
These are the things I actually used the first time I cleaned my Keurig needle. Simple. Cheap. Effective.
- Paper clip (unfolded)
This was my main tool. I straightened it and used it like a tiny detective. It pulled out coffee bits I didn’t even know were hiding in there. - Toothbrush or soft brush
I grabbed an old toothbrush from under the sink. It worked great for brushing off sticky grounds around the needle area without scratching anything. - Warm water
Not hot. Not cold. Just warm enough to rinse away coffee residue and mineral dust. It smelled faintly like yesterday’s brew. - Dish towel
I laid one on the counter because water drips everywhere. Also useful for drying parts and avoiding a slippery mess. - Flashlight or phone light
This was a game changer. Once I used my phone light, I could finally see the clog. It felt like discovering a secret tunnel inside the brewer head.
Optional but helpful
I don’t use these every time, but on deeper Keurig needle maintenance days, they really help.
- Distilled water
Our tap water is hard where I live, and it leaves white crust behind. Distilled water keeps new mineral buildup from forming so fast. - White vinegar (for deeper maintenance days)
I use this about once a month when the needle looks stubborn. The smell is sharp, but it breaks down mineral scale better than plain water.
That’s it. No special kit. No fancy cleaner. Just everyday items and a little patience. The first time I did this, I felt oddly proud—like I fixed something important with nothing but a paper clip and curiosity.
How to Clean Keurig Needle – Step-by-Step (My Real Routine)
This took me about 7 minutes on a quiet Sunday morning, and my coffee tasted normal again. That alone felt like a small victory. If you’re learning how to clean Keurig needle, this is the exact routine I use now—simple, calm, and mess-free.
Step 1 – Turn off and unplug
I always unplug first. Every time.
Not because I’m dramatic. Because hot needles are not friendly.
- Safety first
I don’t want steam, sparks, or surprise drips while my fingers are inside the brewer. - Hot needles are not friendly
I once touched the brew head too soon and learned my lesson. Let it cool. Patience saves skin.
Step 2 – Remove the K-Cup holder
This part feels easier than it looks.
- Twist and lift gently
I hold it like a fragile cookie and turn it slowly. It pops out without a fight. - Rinse under warm water
Brown water runs out at first. It smells like old coffee. That’s how I know it needed cleaning.
I set it on a dish towel and take a deep breath. Halfway done already.
Step 3 – Clean the upper needle
This is where most of the mess lives.
- Insert paper clip into needle hole
I slide it in slowly, like I’m opening a tiny locked door. - Wiggle gently (don’t jab)
No force. Just small circles. I imagine I’m brushing crumbs off a keyboard. - Dislodge coffee grounds and foil bits
Little black specks fall out. Sometimes silver foil too. It’s gross but satisfying.
This step alone fixed my slow dripping problem the first time I tried it.
Step 4 – Clean the lower needle
This one hides, so I use my phone light.
- Use flashlight to locate it
I tilt my head and squint like a detective in a crime show. - Carefully remove buildup
White mineral crust and wet coffee dust come out slowly. No rushing here. - Wipe with damp cloth
I clean around the area so nothing falls back inside.
After this, my machine stopped making that strange coughing sound.
Step 5 – Rinse and reassemble
This is the calm ending.
- Air dry for 2 minutes
I usually use that time to refill my water tank or stare at my empty mug. - Reinsert parts
Everything clicks back into place. That click feels like closure.
Once I finish, I run one brew cycle with just water. No pod. It flushes out anything left behind.
The first time I did this on my Keurig, I felt oddly proud. Like I fixed something important with nothing but a paper clip and curiosity.
Now, cleaning the needle is part of my routine. My coffee flows better. The sound is quieter. And my mornings feel normal again. No more mystery clogs. No more sad cups.
Keurig Needle Maintenance Schedule (From My Own Habit)
I clean mine when the coffee smells “off.” My nose is my reminder app. One Tuesday morning in my kitchen, the brew smelled like wet cardboard. That’s when I learned keurig needle maintenance works best on a simple schedule, not when the machine is already angry.
I don’t follow a strict calendar. I follow my senses. Sound. Smell. Flow. If something feels wrong, I know it’s time to clean the needle of my Keurig.
Weekly (light maintenance)
This is my lazy-but-smart routine. I usually do it on Sunday evening while waiting for dinner to heat up.
- Rinse K-Cup holder
I pop it out and rinse it under warm water. Brown coffee water runs out every time. That alone tells me it needed it. - Quick needle poke
I unfold a paper clip and gently poke the upper needle once or twice. Not a deep clean. Just enough to remove loose coffee bits.
It takes less than two minutes.
My machine sounds quieter after this. The brew stream looks smoother too. Small effort. Big mood improvement.
This weekly habit keeps me from dealing with major clogs later. It’s like brushing teeth instead of waiting for a root canal.
Monthly (deep needle maintenance on Keurig)
This is when I do the full routine. Usually on a calm Saturday morning when I already feel productive for no reason.
- Full needle cleaning
I clean both the upper and lower needle. I use my phone flashlight and go slow. Coffee crumbs and mineral dust always show up. - Descale cycle
Once a month, I run vinegar and water through the machine. The smell is strong, but the inside feels brand new after. - Wipe brewer head
I take a damp cloth and wipe around the brew area. Sticky coffee spots hide there like they own the place.
After this, my coffee tastes brighter.
Not fancy. Just… correct again. Like it remembered its job.
This is my real needle maintenance on Keurig routine. Nothing complicated. Just patience and warm water.
After heavy use days
Some days need extra care. I learned this after hosting family once and making ten cups in a row.
- Guests
Everyone wants coffee. Back-to-back pods mean more foil bits and grounds stuck in the needle. - Office mornings
When I worked from home and brewed cup after cup, the needle clogged faster than usual. The machine sounded tired. So was I. - Back-to-back brewing sessions
Three or four cups in one hour? That’s a needle workout. I now give it a quick cleaning the same day.
On these days, I don’t wait for weekly cleaning.
I do a fast check because I know buildup happened.
What I’ve learned from experience is simple:
If you want to know how to clean Keurig needle properly, you also need to know when to clean it.
I listen to my coffee machine now.
Slow drip? I clean.
Weird smell? I clean.
Strange noise? Definitely clean.
It’s not a strict rule. It’s a habit.
And that habit keeps my mornings calm, my coffee smooth, and my machine from throwing tiny tantrums.
Mistakes I Made (So You Don’t Have To)
I learned these the hard way. With coffee splashing. Not proud. One rushed Wednesday morning in my kitchen, I tried to clean the needle half-awake and turned a simple task into a mini disaster. That day taught me that how to clean Keurig needle is just as much about what not to do as what to do.
If you’re doing keurig needle maintenance for the first time, learn from my clumsy moments with my Keurig and save yourself a wet counter and a bad mood.
Common errors
These are the mistakes I actually made. Real life. Real regret.
- Using sewing needles (too sharp)
I thought, “A needle is a needle.” Wrong. Sewing needles are sharp and thin. I scratched the inside of the brew head and felt my soul leave my body for a second. Paper clips are safer. Always. - Pushing too hard
I once jammed the tool inside like I was digging for treasure. Big mistake. Coffee grounds came out, but so did my patience. Gentle pressure works better. Slow wins here. - Forgetting to unplug
Yes, I did this once. The machine was still warm. Steam surprised me. My heart raced. Now I unplug first every single time. No exceptions. - Skipping the lower needle
At first, I only cleaned the top needle and wondered why my coffee still dripped like a tired faucet. The lower needle was packed with mineral crust. Once I cleaned it, everything changed.
These errors taught me something important: cleaning the needle of a Keurig is not about speed. It’s about care.
What NOT to use
I experimented so you don’t have to. These tools caused more harm than help.
- Knives
I tried a butter knife once. It didn’t fit. It slipped. Coffee water splashed on the counter. End of that idea. - Toothpicks that break
One snapped inside the needle hole. I spent ten minutes fishing it out like a tiny rescue mission. Never again. - Harsh chemicals
I thought strong cleaner meant better clean. Instead, it left a sharp smell that ruined my next cup. Warm water and mild vinegar work just fine.
What I learned from all this is simple:
If you want to master needle maintenance on Keurig, don’t rush it. Don’t force it. And don’t use tools that were meant for sewing or slicing bread.
Now when I clean the needle, I slow down.
I unplug.
I use soft tools.
I clean both needles.
And my kitchen stays dry. My coffee stays drinkable. And I no longer feel like I’m performing surgery before sunrise.
How Cleaning the Needle Improves Taste and Machine Life
After cleaning, my coffee smelled richer. Like it remembered who it was. One quiet Saturday morning in my kitchen, I ran a brew after learning how to clean Keurig needle the right way. The aroma hit me first. Warm. Clean. Familiar. I didn’t change pods. I didn’t change water. I only cleaned the needle on my Keurig. That tiny step changed everything.
I used to think bad coffee meant bad beans. Now I know it often means a dirty needle.
Taste benefits
This is what I noticed right away after proper keurig needle maintenance.
- Better flow
The coffee poured in a smooth stream instead of sad drips. It looked alive again. No more waiting forever for one cup. - Even extraction
The water spread through the pod instead of hitting one spot. The flavor felt balanced. Not weak. Not harsh. Just right. - No bitterness
Before cleaning, my coffee tasted sharp, like burnt toast. After I cleaned the needle of my Keurig, that bitter edge disappeared. The cup felt softer and warmer on my tongue.
That morning, I stood by the counter and took a slow sip.
I actually smiled.
It was the same coffee pod. But a very different cup.
Machine health
Cleaning the needle helped more than taste. It helped the machine itself.
- Prevents clog damage
Coffee grounds and mineral scale stop building up inside the needle. Less blockage means fewer problems later. - Reduces pump strain
When the needle is clear, water flows easily. The machine sounds calmer. No more loud gurgling or coughing noises. - Extends brewer lifespan
Since I started regular needle maintenance on Keurig, my brewer feels stronger. It heats faster. It brews smoother. It feels like it wants to keep going.
I learned this over time, not in one day.
First, the taste got better.
Then, the noise got quieter.
Then, the errors stopped showing up.
What surprised me most was how small the fix was. A paper clip. Warm water. A few minutes. That’s it.
So now, when someone asks me why how to clean Keurig needle matters, I say this:
It saves your coffee.
And it saves your machine.
Better flavor. Longer life.
All from cleaning one tiny part that most people never think about.
When Cleaning Isn’t Enough (Real Talk)
Sometimes the needle isn’t dirty. Sometimes it’s just… tired. I learned this on a quiet Thursday morning in my kitchen after doing everything right for how to clean Keurig needle—and still getting sad coffee.
I unplugged. I cleaned both needles. I ran a water-only brew.
And yet, the cup was slow and the machine sounded confused. That’s when I realized: cleaning helps a lot, but it can’t fix everything.
This was my moment of truth with my Keurig.
Signs you may need replacement or service
These are the signs I saw after full keurig needle maintenance didn’t work anymore.
- Still slow after cleaning
I cleaned the needle twice in one day. The coffee still dripped like a tired faucet. That’s when I knew the clog was not the only problem. - Leaks inside the brewer
One morning, I noticed water pooling under the machine. Not on the counter. Inside the brewer. That is never a good sign. - Repeated error messages
The screen kept flashing warnings even though the water tank was full and the needle was clean. It felt like the machine was saying, “I tried.”
At this point, cleaning the needle of my Keurig felt like brushing a broken tooth. It helped a little. But not enough.
When to contact support
I don’t like asking for help from machines or people. But these moments changed my mind.
- Electrical issues
If the brewer won’t turn on or shuts off mid-brew, stop cleaning and start checking support options. Water and wires should not argue. - Broken needle tip
I once saw a tiny bend on the needle. It looked harmless. It wasn’t. A damaged needle can’t pierce pods correctly, no matter how clean it is. - Brew head not closing
When the top won’t shut all the way, the system can’t build pressure. No pressure means no proper coffee.
That day, I accepted something important:
Knowing how to clean Keurig needle is powerful.
Knowing when to stop cleaning is smarter.
Now, I clean first.
If that fails, I listen to the machine.
Some problems need more than a paper clip and patience.
It’s not giving up.
It’s giving your coffee maker the help it actually needs.
My Personal Keurig Needle Maintenance Habit (Short Story)
Now every Sunday night, I clean the needle while waiting for my kettle to boil. It started after I finally learned how to clean Keurig needle the right way—and realized calm mornings come from tiny habits.
I stand in my kitchen in soft light. No rush. Just me, a paper clip, and my Keurig humming quietly on the counter. This is my reset button for the week.
What it feels like
- Warm kitchen
The air is still warm from dinner. The counter feels clean. The machine is cool and quiet. It feels like the house is ready for sleep—and so is my coffee maker. - Coffee smell in the air
There’s always a faint coffee scent from earlier brews. Mixed with warm water, it smells gentle. Not sharp. Not bitter. Just familiar. - Tiny click when it’s clean
When I put the K-Cup holder back, I hear a soft click. That sound tells me the needle is clear. It’s a small moment, but it feels official. - Quiet satisfaction
No mess. No stress. Just a simple task done right. I dry my hands on a towel and feel oddly proud. Like I fixed tomorrow.
Why I keep doing it
- Faster brewing
Monday mornings move smoother. The coffee flows instead of dripping. No waiting. No guessing. The machine does its job without complaining. - Better mornings
My first cup tastes clean. No grit. No burnt edge. When I clean the needle of my Keurig regularly, the flavor stays steady all week. - No more mystery clogs
I don’t hear strange gurgles anymore. I don’t see error messages. Regular keurig needle maintenance keeps problems small before they grow.
This habit takes less than three minutes.
But it saves my mornings.
I used to clean only when something went wrong.
Now I clean so nothing goes wrong.
Knowing how to clean Keurig needle turned into something more than a fix.
It became a quiet Sunday ritual.
Warm kitchen. Clear needle. Better coffee waiting for me in the morning.
Quick Reference Checklist (For Busy Mornings)
Some mornings in my kitchen move fast. The alarm rings late. The light is still gray outside. I don’t want to “learn” how to clean Keurig needle again—I just want coffee that works.
This is the simple needle maintenance on Keurig checklist I wish I had taped to my fridge from day one.
Needle maintenance on Keurig – fast list
When my brew slows down or tastes off, this is exactly what I do:
- Unplug
I always unplug first. I learned that the hard way once. No power. No surprises. - Remove holder
I twist and lift the K-Cup holder gently. It pops out without drama. - Clean upper needle
I use a straightened paper clip. Slow wiggles. No jabbing. Coffee bits usually fall right out. - Clean lower needle
I grab my phone light and look up into the brewer head. This is where mineral scale likes to hide. I clear it gently. - Rinse
Warm water over the holder. Brown water runs out. That’s when I know it needed cleaning. - Reassemble
I press everything back in until I hear that soft click. That sound means it’s seated right. - Brew water only once
No pod. Just water. This flushes out anything left behind and resets the flow.
That’s it. Seven small steps.
When I follow this quick routine for how to clean Keurig needle, my coffee flows smooth again. No grit. No gurgling. No mystery errors. Just a normal cup on a normal morning. And honestly, that’s all I want before 8 a.m.
FAQs About How to Clean Keurig Needle
1. How often should I clean my Keurig needle?
I do light Keurig needle maintenance once a week. A deep clean once a month keeps flow smooth and taste fresh. If coffee slows or tastes odd, clean it sooner.
2. What happens if I don’t clean the needle of my Keurig?
Clogs build up fast. You may see slow drips, grounds in your cup, or error messages. Regular cleaning protects taste and helps your machine last longer.
3. Can I use a sewing needle to clean a Keurig needle?
No. Sewing needles are too sharp. They can damage the brewer head. Use a paper clip or plastic pick instead for safe needle maintenance on Keurig.
4. Why is my Keurig still slow after I clean the needle?
If flow stays weak, mineral scale may block deeper parts. Try a descale cycle. If errors repeat, the needle or pump may need service.
5. Do I need to run water after cleaning the Keurig needle?
Yes. I always brew one water-only cycle. It flushes loose grounds and resets pressure. This step helps your next cup taste clean and smooth.