Microwave Won’t Turn On? How to Test and Replace a Blown Main Fuse
The Day My Microwave Died
It was a rainy Tuesday afternoon here in Birmingham. I just wanted to warm up a slice of leftover sourdough bread. Baking bread takes a lot of time. Eating it warm makes the effort worth it. I put my plate inside and shut the door. Then I pressed the start button. I expected the usual loud hum. Instead I heard a tiny click. After that the kitchen went totally silent. The digital clock went dark. My microwave was completely dead.
I stood there for a minute. Annoyance washed over me. I really wanted that warm bread. But then the DIY side of me kicked in. I love fixing things around the house. Our goal at Home Pick Guide is helping you pick better and live smarter. So I decided to figure out what went wrong. Grabbing my tools felt like a good first step. I wanted to see if I could save my appliance from the trash bin.
Signs It Is Just a Fuse and Not a Dead Microwave
It is easy to panic when appliances break. Panic definitely hit me at first. I use my kitchen tools constantly. Living here means dealing with very hard water. Descaling my coffee machines happens every two months. My electric kettle gets crusty fast. Water scaling ruins those heating elements slowly. You notice them getting worse over weeks.
Microwaves do not break like that. A blown main fuse happens in one single second. The machine works perfectly one moment. Then it becomes a completely dark box the next. It does not get weak slowly.
If your keypad still lights up the fuse is fine. Finding the glass tray spinning while food stays cold means a different issue. That usually points to a bad magnetron tube. The main fuse controls all the power entering the cabinet. When it dies the whole machine loses power. Not a single light or beep will happen.
What Causes a Microwave Main Fuse to Blow?
A totally dark appliance feels scary. It makes you think the motor is ruined. But often the problem is very small. A tiny little tube is usually to blame. We call this the main fuse. It acts like a security guard for your home.
This fuse stops too much electricity from getting inside. It sacrifices itself to save the expensive computer boards. When a power surge happens the fuse burns out quickly. This stops the dangerous power flow instantly.
Sometimes opening the door too fast causes an issue. Microwaves have safety door switches built into the frame. If these switches get stuck they create a short circuit. The machine blows the fuse to keep you safe. Aging parts can also draw too much power. This makes the fuse fail eventually over time.
Common Culprits Behind a Blown Fuse
Understanding why a component fails helps prevent future problems. You do not want to keep replacing parts every week. Here is a breakdown of the most common reasons. I put together some data based on standard appliance repairs.
| Cause of Failure | Probability | How to Prevent It |
| Power Surges | 40 percent | Use a quality wall surge protector |
| Broken Door Switches | 35 percent | Do not slam the machine door |
| Aging Capacitor | 15 percent | Replace parts when they get old |
| Internal Short Circuit | 10 percent | Keep the inside clean and dry |
Safety First: Read This Before Opening Your Microwave
I must be very honest with you right now. Microwaves are not like standard kitchen mixers. They are actually very dangerous to open. Even when unplugged they hold a hidden danger.
Inside the metal box sits a high-voltage capacitor. This part stores huge amounts of electricity. It powers the cooking elements inside the box. The capacitor can hold a lethal electrical charge for days. You cannot just open the case and start touching wires.
You must respect the machine. Taking a deep breath helps me focus. I double check that the power cord sits on the floor. Safety steps are never optional here. If you feel scared it is perfectly okay to stop. Calling a professional repair person is always a smart choice. But if you want to try let us gather our gear.
The Tools You Need to Stay Safe
Having the right tools makes the job easy. It also keeps you alive and safe. Do not use cheap or broken tools for this task. I keep a specific set just for electrical repair.
| Tool Name | Why You Need It | Safety Rating Needed |
| Digital Multimeter | To test for a clear electrical path | Basic home use rating is fine |
| Insulated Screwdriver | To discharge the heavy capacitor | Must have a thick rubber handle |
| Needle Nose Pliers | To gently pull the small tube out | Rubber coated grips are best |
| Heavy Work Gloves | To protect hands from sharp metal | Thick leather or heavy rubber |
Step 1: Unplug and Open the Cabinet
The very first step is pulling the plug out. Do not just turn off the wall power strip. Actually remove the plug from the outlet. Put the cord somewhere you can easily see it.
Now you need to remove the outer metal shell. Look at the back of your unit. You will see a row of small screws along the edges. Some models also have screws on the sides. You will need a standard Phillips head screwdriver. Sometimes manufacturers use special star security screws. Having a security bit set fixes that problem quickly.
Take out all the screws very carefully. Put them in a small bowl so they stay safe. Grab the bottom edges of the metal cover. Pull it back and then lift it straight up. The cover might stick a little bit at first. Wiggle it gently until the metal comes free. Now you can see the inside parts. It looks like a complex maze of wires.
Step 2: Safely Discharge the Capacitor
This is the most critical part of the entire process. Do not touch anything else inside the box yet. You need to find the high-voltage capacitor. It looks like a shiny oval metal can. You will see two metal tabs sticking out of the top. Wires connect directly to these silver tabs.
Put your heavy gloves on right now. Grab your insulated screwdriver firmly. Make sure your hand only touches the thick rubber handle. Never let your bare fingers slip down to the metal shaft.
Slide the metal shaft across the two terminals. You want to touch both metal tabs at the exact same time. A loud pop sound might happen suddenly. You could even see a bright blue spark flash. This is completely normal and expected. It means the stored electricity drained safely into your tool. I always tap the terminals twice just to be totally sure.
Finding the Noise Filter Board
Now the machine is safe to touch. We need to locate the actual blown fuse. Follow the thick power cord into the back wall. The cord usually connects to a small green circuit board. Repair experts call this the noise filter board.
The main fuse sits right on this green board. It looks like a small glass or ceramic tube. You will see shiny metal caps on both ends. Two small metal clips hold it firmly in place.
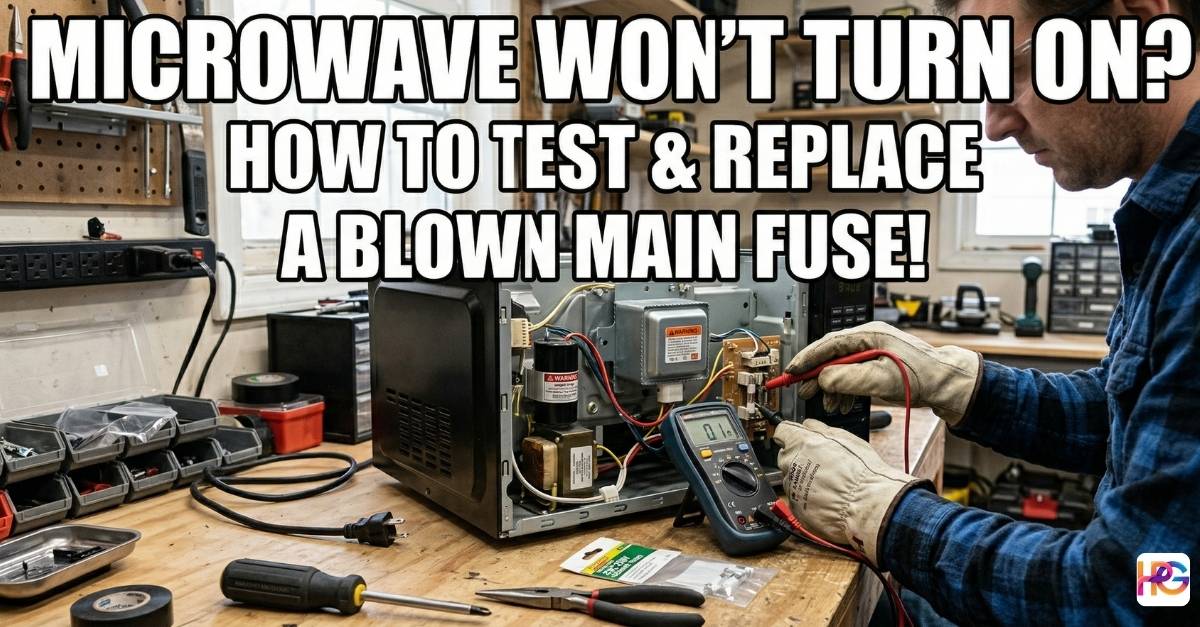
Step 3: Test the Fuse for Continuity
You cannot always tell a fuse is bad by looking. Sometimes a glass tube gets black and cloudy inside. That gives a clear sign it burned up. But many times a bad unit looks perfectly fine. Ceramic models hide the broken wire inside completely.
This is why you need a digital multimeter. A multimeter sends a tiny bit of power through the metal. It checks if the power makes it all the way across. We call this checking for continuity.
Take your needle nose pliers. Gently grab the middle of the small tube. Pull it straight up and out of the metal clips. Be careful not to crush the delicate sides. Lay the part down on a dry wooden table.
Using a Multimeter for Testing
Turn your multimeter dial to the continuity setting. The screen symbol usually looks like little sound waves. Grab the red probe in your right hand. Hold the black probe in your left hand. Touch the metal tips of the probes together. Your meter should make a loud beep sound. Hearing that means the testing meter works perfectly.
Now touch the red probe to one end cap. Touch the black probe to the other end cap. Listen very closely to the machine.
If the meter beeps your fuse is good. Electricity flows completely through it. Finding this means your fuse is not the actual problem. Your appliance might have a bad main control board instead. If the meter stays silent the fuse is dead. The tiny wire inside broke apart. You found the exact reason your appliance will not start.
Step 4: Finding the Right Replacement Part
Finding a broken fuse feels like a big victory. A smile crossed my face when my meter stayed silent. I knew I found the main culprit. But you cannot just shove any new piece in there.
Fuses come in very specific sizes and ratings. They handle precise amounts of electrical power. You need to read the tiny writing stamped on the metal. My broken piece said 20A 250V on the side. This means it handles twenty amps and two hundred fifty volts.
Putting a fifteen amp model inside makes it blow instantly. Installing a thirty amp version creates a huge danger. The bigger size lets too much raw power through. Doing that could start a terrible fire inside your kitchen.
Always buy the exact same electrical rating. You can order them online for just a few dollars. I went to a local hardware shop here in town. They had a little bin full of ceramic appliance parts. I bought three just in case it happened again later. Ceramic types handle high heat better than glass ones do. Choosing them is always a smart move for kitchen gadgets.
Step 5: Install and Test Your Appliance
Installing the new part takes only a few seconds. Pick up your brand new ceramic fuse. Line it up with the empty clips on the green board. Push down firmly with your thumb. It should snap right into place easily. It does not matter which direction the ends face.
Now it is time to close up the machine. Grab the large metal outer shell. Slide it carefully back over the internal frame. Make sure the front edges line up with the digital panel. Put all the small screws back into the holes. Tighten them down nice and snug.
Clear your heavy tools away from the area. Pick up the main power cord again. Plug it back into the wall outlet safely. This brings the real moment of truth.
I plugged mine in and held my breath. A second later the digital display beeped loudly. The green clock numbers lit up the dark room. I set the timer for thirty seconds. I put my cold bread back inside the box. The machine hummed to life perfectly. The turntable spun around just like a new unit.
Fixing it myself felt really amazing. Doing the work saved me a lot of money. It also kept a heavy machine out of the local landfill. The entire repair took less than twenty minutes total. Just remember to respect the hidden electricity inside. Always discharge that large capacitor first. Take your time and you can make smart choices too.
Common Questions About Fixing Microwave Fuses
Can I use a basic digital multimeter from a local store to test my microwave fuse?
Yes, even a simple digital multimeter works for checking continuity. Just make sure the battery is fresh so you get an honest reading on the display.
Why do I need a specific insulated screwdriver to discharge the high-voltage capacitor?
A thick rubber handle blocks the electricity from reaching your hand. Using plain metal tools is very risky since they can conduct a lethal shock.
Is it safe to store my repair tools and multimeters in a hot garage during summer?
Extreme heat can ruin the LCD screen and leak the batteries inside your meter. Keep your delicate electronic tools in a cool, dry spot instead.
Should I buy a ceramic microwave fuse or a glass one for my repair?
Ceramic fuses are stronger and handle high heat better than glass versions. They are safer for high-draw appliances like a large microwave oven.
Do standard gardening gloves provide enough protection when working on a microwave?
No, you need thick rubber or heavy leather work gloves to stay safe. Thin cloth gloves will not stop a spark if the capacitor discharges near you.