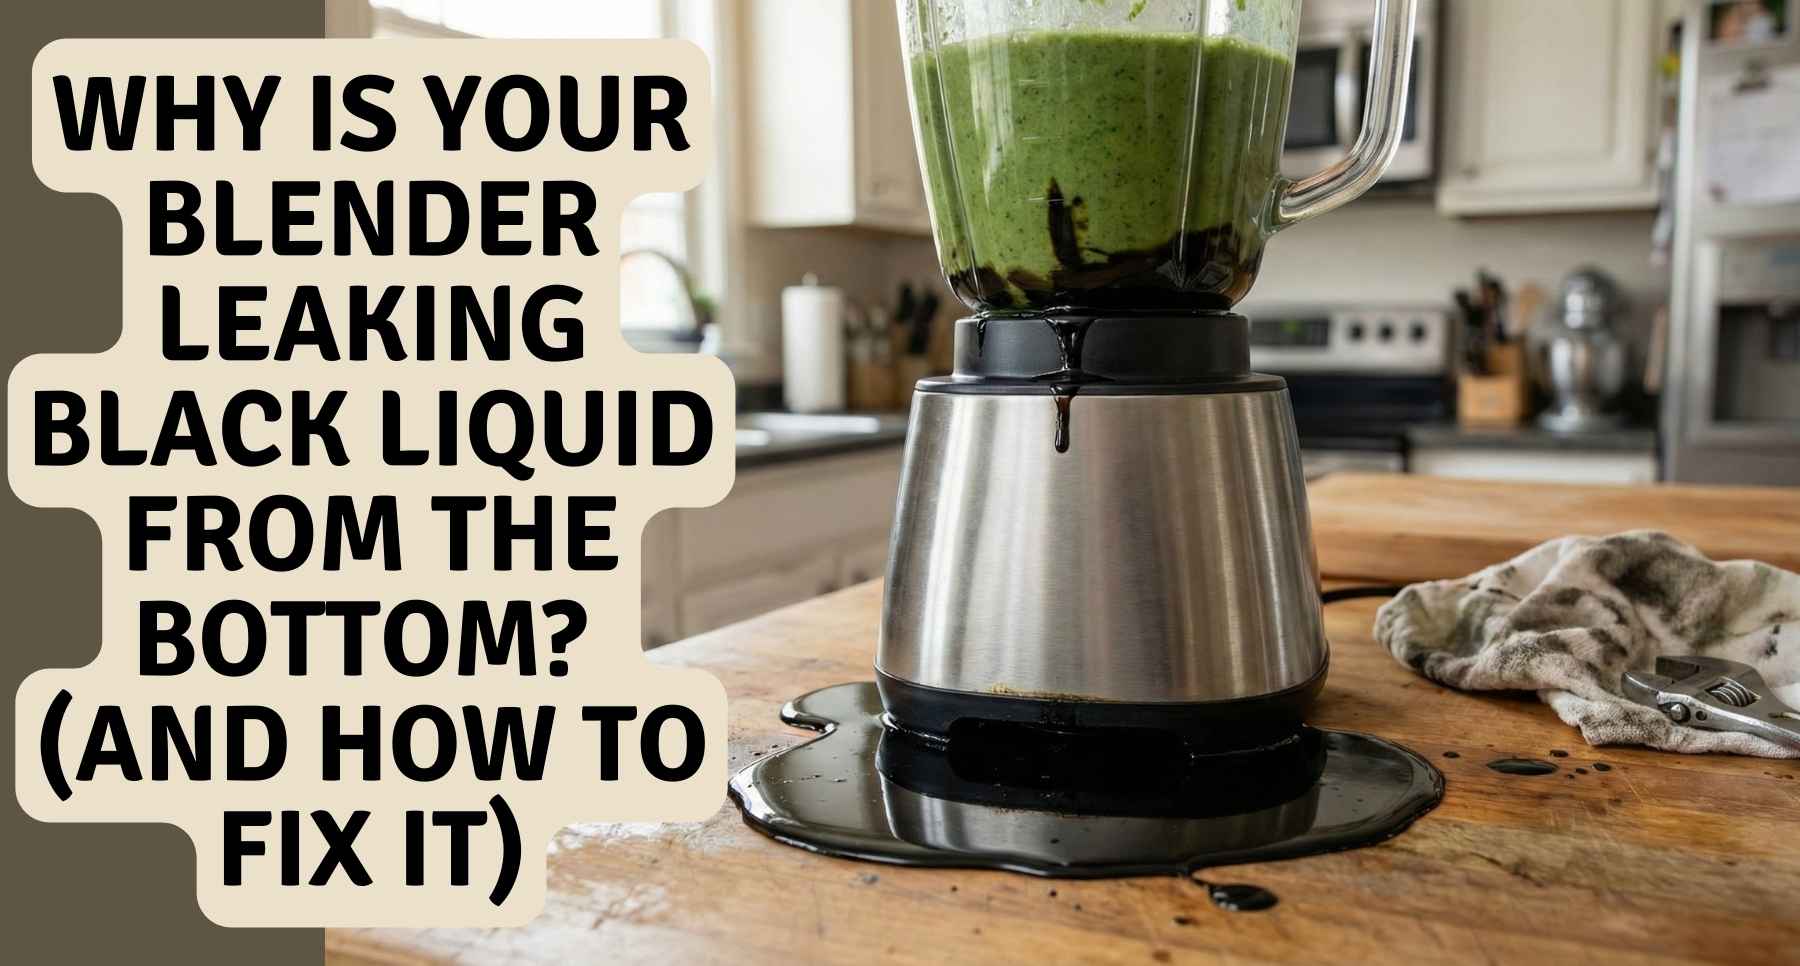
It is a hot day in Texas. You want a cold drink. You press start on your Ninja. Then, juice leaks on the wood. I hate when that happens. The rubber seal is dead. Do not buy a new motor. You just need my blender gasket replacement instructions. I fix these parts a lot in my own house. Let us stop the leak fast.
What is the Most Common Blender Problem?
Spoiler alert. It is the dreaded base leak. One tiny part causes all the mess.
The Big Issue I hear about this problem every single week. People tell me their kitchen looks like a crime scene. Red berry smoothie is everywhere. Leaking from the bottom is the top complaint I see from home users. It happened to me last Sunday. I was making fresh salsa for a party. Suddenly, cold tomato juice dripped right onto my bare feet. It was slimy and gross. I sighed loud and grabbed a wet rag.
The Real Culprit Do not blame the strong motor. Do not blame the heavy pitcher. The true villain is the rubber seal. It goes through a lot of stress in your kitchen. Boiling hot soups cook it. Hard ice cubes freeze it. Over time, the rubber just gets old. It gets stiff. It cracks. Sometimes, it even shrinks.
What is a blender gasket? You might ask what this piece actually is. Let me explain it simply.
- It is an O-ring: It is just a small, flexible circle of rubber.
- Where it sits: You will find it sandwiched right between the sharp blade assembly and your glass or plastic jar.
- What it does: It acts like a tiny, waterproof wall. It stops your liquid food from spilling down onto the electric motor base.
")
Getting Ready: Finding a Replacement Gasket for Blender
You cannot just shove any random rubber ring in there. We need the exact fit so your kitchen stays clean and dry.
Step-by-step repair guide: Universal vs. Brand Specific Let us talk about picking the right seal first. It matters a lot.
- Universal gaskets: I once bought a cheap multipack online. It was a cold Friday night. I wanted to save five dollars. Big mistake. The rubber felt stiff and rough in my hands. Universal parts are often too thick or too thin. They stretch out super fast. My cheap ring snapped in half on day two. I heard a loud snap. Then, sticky green juice ran down the shiny plastic base. I groaned and wiped it up.
- Brand-specific gaskets: Do yourself a huge favor. Buy the exact brand name part. It fits very snug. It feels soft. It grips tight. Yes, it costs a few dollars more. But it saves you from cleaning sticky puddles off your floor.
- Where to look: Do not guess the size. Pick up your heavy machine. Flip the base over. Look at the bottom. You will see a small silver sticker to find the blender model number. Find the exact model number printed right there. Write it down before you shop. Getting the exact part makes my blender gasket replacement instructions work perfectly later.
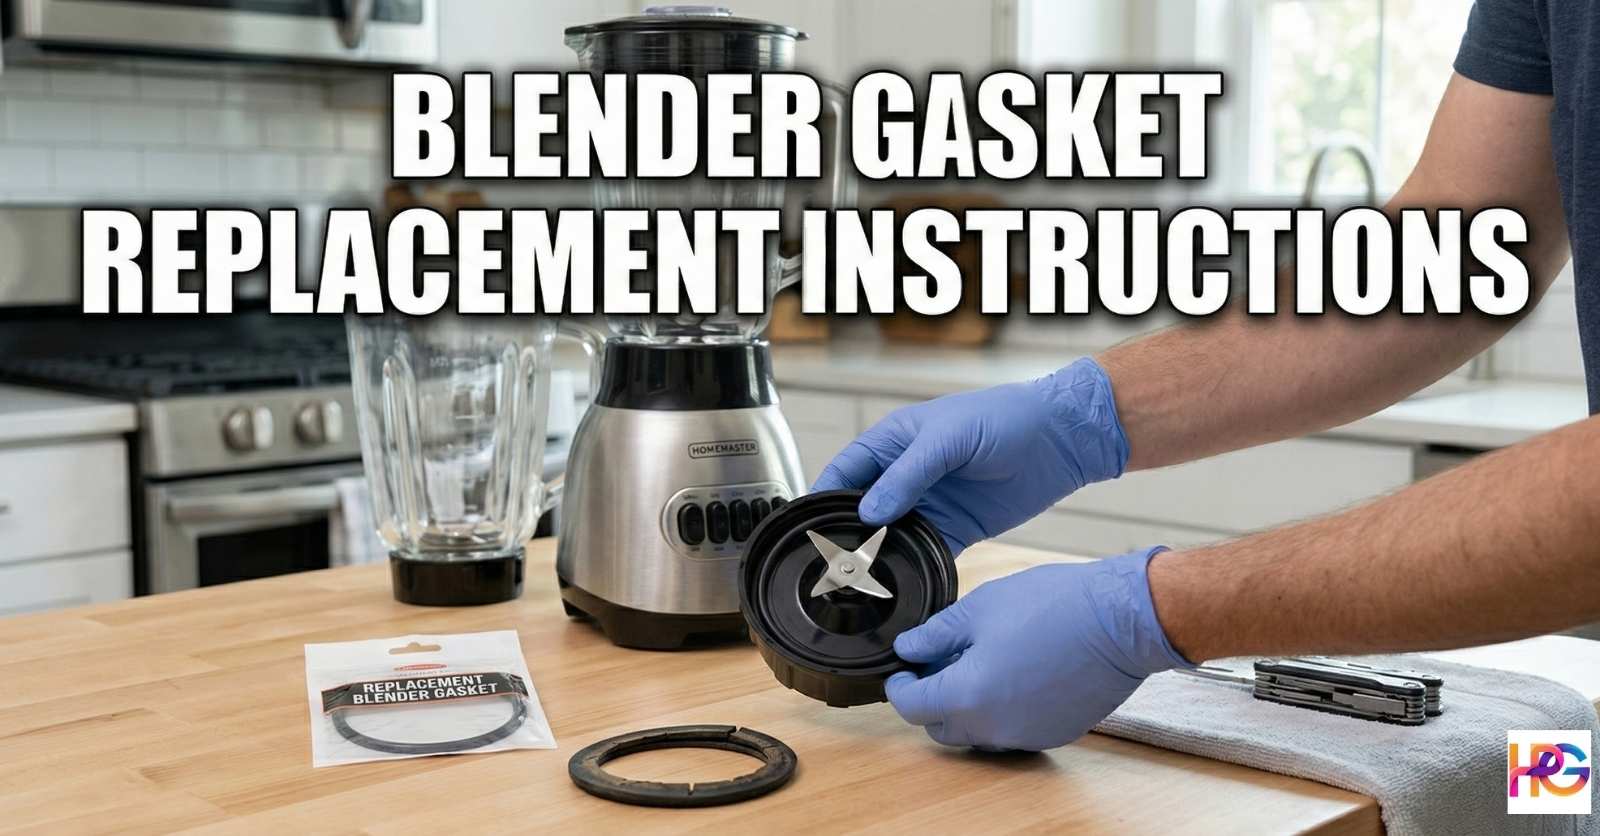
The Main Event: Blender Gasket Replacement Instructions
Roll up your sleeves. Grab an old towel. It is time to get your hands slightly dirty. I always do this right on my kitchen island. These blender gasket replacement instructions are very simple.
How to change a gasket (The Removal)
- Unplug the machine: Safety comes first. Always. I never skip this step.
- Unscrew the base: Twist it right off the heavy pitcher.
- Pull out the blade unit: Watch your bare fingers. Those metal blades are very sharp.
- Find the old rubber ring: It sits flat on the base.
- Pry it off: It is usually stuck tight. I use a dull butter knife. Gently wedge the round tip under the hard rubber. Pop it up.
- Check the smell: Notice that gross odor? That is old, rotten food trapped under there. Yuck. Throw that old ring in the trash.
How to replace blender gasket (The Install)
- Wash the base: Scrub the empty blade base first. Get rid of that sticky, sour gunk with hot water.
- Prep the seal: Take your brand new ring. Stretch it just a tiny bit with your two thumbs. Do not pull too hard.
- Push it in: Press it flat into the deep groove. It goes right around the blade assembly.
- Check the fit: Push down hard. Make sure it sits perfectly flat. If the rubber twists even a little, it will leak again. Nobody wants that.
Wait, How to apply gasket cement?
You might see messy glue tubes online. Skip them. I always clarify that 99 percent of home kitchen models do not need cement. They just use tight friction.
- When to use it: You only need glue for huge, heavy-duty commercial machines. Very old vintage models use it too.
- How to do it: If your rare machine actually needs it, clean the empty groove with strong rubbing alcohol. Put one tiny drop of food-safe silicone sealant right in the track. Press the ring down hard. Let it dry on your counter for 24 hours before making a drink.
Maintenance: How to Clean a Rubber Gasket on a Blender
Let us keep that new ring fresh. We do not want to use those blender gasket replacement instructions again next month. I want to relax on my weekends, not fix leaks.
- Take it apart: I used to just run soapy water inside the glass jug. I thought it was clean. I was very wrong. You have to take the base completely apart every few uses.
- The Wash: Drop the rubber ring in your kitchen sink. Hand wash it gently. I use warm tap water and a few drops of mild dish soap. Rub it with your bare fingers until it feels squeaky clean.
- The Vinegar Trick: Does it smell like old garlic? Here’s how to clean a rubber gasket properly. That happens to me when I blend fresh salsa. If it smells bad, grab a small glass bowl. Fill it with plain white vinegar. Drop the ring inside. Let it soak for ten minutes. It works like pure magic. The bad smell vanishes fast.
- Air Dry: Never put this rubber piece in your hot dishwasher because dishwasher heat damages rubber. I did that once. The high heat melted it into a sad, wavy noodle. It was totally ruined. Now, I just lay it flat on a soft, dry cotton towel. Let the air dry it completely before you put your machine back together.
FAQ: Blender Gasket Replacement Instructions
What are the best blender gasket replacement instructions?
Unplug the base first and take out the sharp blade. Pull off the old piece and wash the empty spot. Put the new blender gasket flat in the deep groove to stop leaks.
Why does my glass blender leak from the bottom base?
It leaks when the small rubber seal gets too old. The soft ring cracks from hard use over time. Read our simple guide to swap the part and stop the sticky mess today.
How often should I buy a new rubber blender gasket?
You should buy a fresh replacement O-ring once a year. Hard ice and hot soup wear the soft rubber out quickly. A new part keeps your kitchen clean and stops bad base leaks for good.
Can I wash the rubber ring in my dishwasher?
Do not put the rubber ring in a hot dishwasher. The high heat melts the soft seal and ruins it. You must hand wash it in your sink with mild dish soap to keep it safe.
Are cheap universal parts good for my machine?
Cheap parts fit poorly and stretch out fast. They are often too thick or too thin to work well. Always buy the exact brand name part for a tight and safe leak-free fit.