How I Fixed My Samsung Microwave Coupler in 5 Minutes
The Day My Microwave Just Stopped Spinning
Hello. My name is Erick. I want to share a recent kitchen disaster with you today. It happened on a quiet Tuesday evening right here in Birmingham. I was extremely hungry after a long day of writing for Home Pick Guide. I wanted food fast. So, I put a cold bowl of leftover chicken and rice into my Samsung microwave. I pressed the start button and waited for that familiar warm hum.
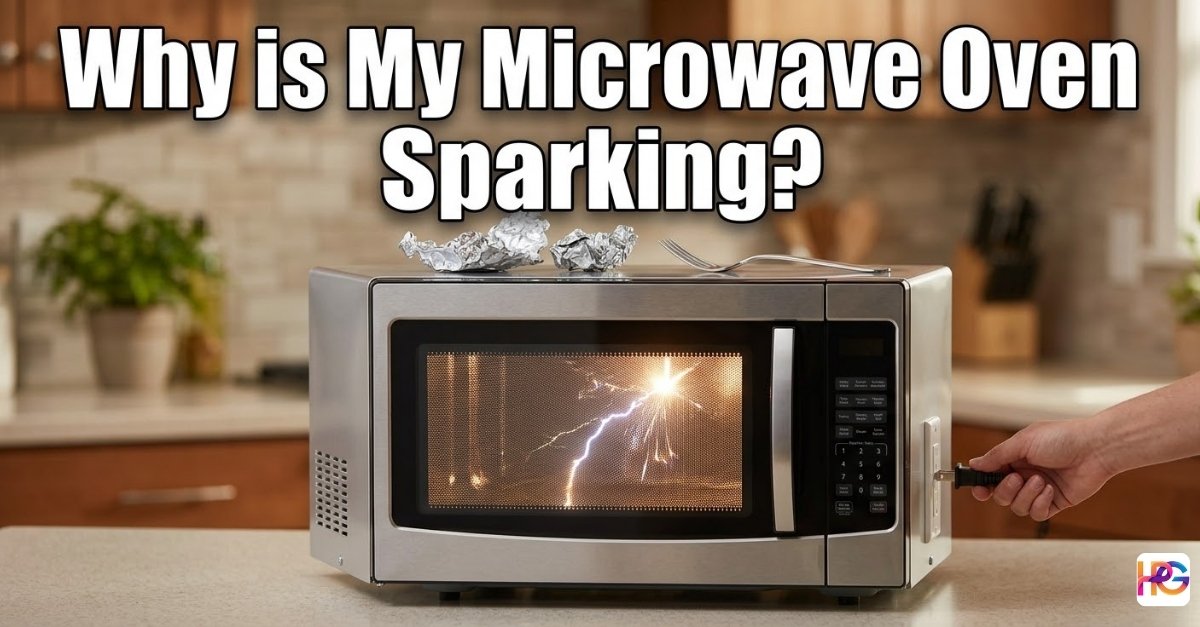
But something looked very wrong through the front glass. The yellow internal light turned on perfectly fine. The machine made its usual low buzzing sound. However, the heavy glass plate inside was not moving at all. I stood there staring at it through the dark mesh door. My food was getting boiling hot on one single side. The other side was still completely frozen cold. This was incredibly frustrating to watch.
I really hate it when simple home appliances suddenly break down. It ruins your daily routine instantly. But I knew I could probably figure this out myself. I like taking things apart to see how they tick. I want to show you exactly how I solved this. You can definitely do this easy repair too.
Diagnosing the Problem Without a Pro
I stopped the cooking cycle right away. I pulled out my half cold bowl of food. Then I took a much closer look inside the white metal box. I carefully lifted the thick glass turntable up and out. I saw a small plastic piece sitting in the very center of the floor. This tiny little part is called the microwave turntable coupler. It acts like a very simple bridge. It connects the hidden electric drive motor to your heavy glass tray.
Why Do These Plastic Parts Fail?
I noticed my old coupler looked burnt and badly warped. Heavy ceramic bowls put a whole lot of extra stress on this thin plastic. High heat from long cooking times also makes it very brittle. Over many years of daily use, the hard plastic just gives up. It either cracks straight down the middle or completely melts.
Mine was actually split right into two jagged pieces. The metal motor underneath was still turning just fine. It just could not grip the heavy tray to spin it anymore. Finding out the main motor was still good made me smile big. Replacing a tiny piece of plastic is a very cheap job. Calling a real repair guy would cost way too much money.
The True Cost of Calling a Repair Technician
Before I bought the replacement part, I looked up local repair costs. Repair shops in my city charge a high fee just to visit your house. They usually call it a basic diagnostic charge. That fee alone is often fifty dollars or even more. Then they charge you extra for the markup on parts. They also add a heavy fee for their manual labor.
A professional repairman might charge over one hundred dollars for this tiny fix. That is just excessive for a simple plastic bridge. My brand new part cost me less than ten dollars total online. I saved a whole lot of hard earned money by taking ten minutes to look inside. Doing your own basic research pays off very well. It fits my life motto perfectly. Pick better. Live smarter.
Getting the Right Tools and Parts Together
I quickly ordered a new part on the internet. You absolutely must make sure you buy the exact right one. I looked closely at the shiny silver sticker inside my open microwave door. It clearly showed my exact factory model number. This specific detail is very important for buying correct replacement parts. Do not skip this step.
Here is a quick look at the simple tools I used for this fast DIY repair.
| Item Needed | Purpose for Repair | My Personal Note |
| OEM Samsung Coupler | Replaces the broken piece | Do not buy a cheap copy |
| Needle-Nose Pliers | Pulls out stuck plastic | Only needed if it melted |
| Damp Cotton Cloth | Cleans old cooking grease | Warm water works the best |
| Small Flashlight | Seeing the dark corners | Your cell phone light is fine |
Waiting for the small package to arrive took two full days. My family had to heat our meals on the gas stove during that waiting time. It really made me miss the fast convenience of a working microwave oven.
My Step-by-Step Replacement Process
The small brown box finally arrived at my front door. I cleared off my kitchen counter and got right to work. This entire fix took me less than five total minutes. You do not need any special mechanical skills at all to do this.
Step One: Unplugging for Safety First
I always talk about safety first on my home blog. You must unplug the thick black power cord from the wall outlet. Never work on any kitchen appliance while it has live electric power. A nasty electric shock is the very last thing you want today. I pulled the tight plug out and tucked it safely to the side.
Step Two: Clearing the Glass and Ring
The main front door opened wide, and the heavy glass turntable tray was carefully lifted out. After a thorough wash in the sink, it was placed safely on a dry towel.
Next, I pulled out the round plastic roller ring. This wide ring sits under the glass and helps it glide smoothly. I washed that dirty ring with warm soapy water too. Now the entire flat floor of the microwave was completely empty and ready.
Step Three: Pulling Out the Broken Plastic
I shined my bright flashlight right into the bottom center hole. A shiny metal motor shaft pokes up right through the floor here. The broken remnants of my old coupler were still stuck hard on it. I tried pulling the plastic with my bare fingers first. It was jammed on there pretty tight.
So I grabbed my trusty needle-nose pliers from my tool box. I gently pinched the broken white plastic. Then I pulled straight up with a very firm tug. It popped off with a loud snapping sound. I was very careful not to scratch the white interior paint. Damaging the paint inside can cause dangerous electric sparks later.
Step Four: Cleaning the Greasy Floor
Microwave floors collect a huge ton of hidden food mess. A lot of greasy crumbs get trapped right under the spinning tray. I took my damp cotton cloth and wiped the whole bottom area clean. I paid special attention to the bare metal motor shaft.
A perfectly clean surface helps the new plastic part slide on smoothly. It also removes any weird burning smells from old food bits. Taking a minute to clean makes the whole job feel much better.
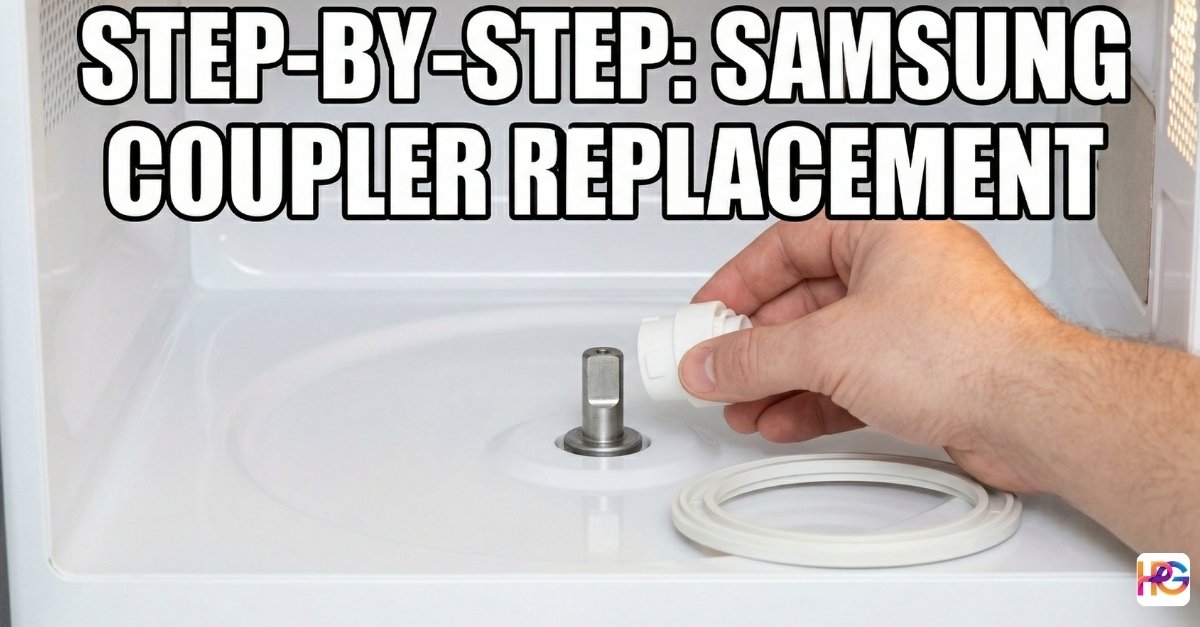
Step Five: Snapping in the New OEM Part
I picked up my brand new Samsung microwave coupler. I looked closely at the metal motor shaft sticking up from the floor. You will quickly notice it is not a perfect round circle. One side of the metal shaft is totally flat. It looks exactly like the capital letter D.
Now I looked at the bottom hole of my new plastic piece. It also had a matching D shape molded deep inside. I slowly lined up the flat plastic side with the flat metal side. I pushed the tiny part straight down with my thumb. It slid firmly into place with a satisfying little snap. I gave it a gentle wiggle with my fingers. It felt very tight and highly secure.
Testing the Repair and Final Thoughts
The hard physical work was officially over now. The clean plastic roller ring went back into its floor groove, followed by placing the heavy glass turntable on top. The center grooves were aligned carefully to lock onto the new coupler arms.
With everything set, the thick black cord went back into the wall socket, and a clear glass mug of tap water was placed inside for a quick test. You should never run a microwave totally empty. I punched in thirty seconds and hit the green start button. The yellow light clicked on brightly. The low humming noise started up right away. I watched happily as the water mug spun in perfect slow circles. The simple home repair was a total success. My family could eat hot meals easily again.
Why I Always Choose OEM Samsung Parts
You might see very cheap generic parts for sale online. I strongly suggest avoiding those cheap plastic copies. I want to show you exactly why spending a few extra dollars really matters.
| Part Type | Fit on Shaft | Material Quality | Expected Lifespan |
| Genuine OEM Samsung | Perfect tight fit | High heat resistant | Lasts for many long years |
| Cheap Generic Copy | Often loose or wobbly | Melts very easily | Breaks down in a few months |
Using a loose generic part can actually ruin your appliance. The loose plastic can strip your metal motor shaft completely bare. That turns a cheap five dollar fix into a massive problem. Replacing the whole drive motor underneath is very hard and expensive. Always pick the better factory part. You will live smarter and save yourself future headaches.
How to Make Your New Coupler Last Longer
I do not want to fix this exact same thing again next year. So I changed how I use my favorite kitchen appliance entirely. Heavy dishes are the absolute biggest enemy of your spinning tray. I stopped putting giant, heavy ceramic casserole dishes inside my microwave. The extreme weight grinds the plastic parts down over time.
Keep the Roller Ring Very Clean
The plastic ring under the glass is also very important. If the small rolling wheels get jammed with sticky food, they stop moving. This forces the small center motor to push much harder. The extra heavy strain will snap your new coupler very fast. I now wipe down those tiny wheels every single week.
Avoid Running Very Long Cycles
High heat is another big problem for thin plastic parts. Boiling large pots of soup inside creates massive hot steam. It softens the parts located under the tray. I try to heat things up in short little bursts now. It keeps the temperature lower near the bottom base. These small daily habits make a very big difference.
Wrapping Up My Repair Story
Fixing broken things around the house feels really good. I hope my little story helps you fix your own kitchen tools today. You do not always need to call an expensive professional repair service. Sometimes the big problem is just a tiny piece of cracked plastic.
Thank you for reading my personal repair guide. Check your model number carefully and order that new exact part. Grab your pliers and wipe down that dirty microwave floor. You will have your food spinning hot again in no time at all. Let me know if you have ever fixed an appliance yourself. Have a great day.
Common Questions About Microwave and Tool Repairs
What type of pliers work best for replacing a Samsung microwave coupler?
Good needle-nose pliers grab the broken plastic tight. A solid pair from Makita will not slip at all. This keeps the metal drive shaft safe from deep scratches.
How do I stay safe using metal tools on kitchen appliances?
Unplug the wall cord first for safety. Do not use metal pliers near live power. Store your tools in a dry garage so they stay clean and rust free for DIY fixes.
Will a cheap Samsung microwave coupler last as long as a factory part?
No, cheap parts melt fast under high heat. True OEM parts handle heavy glass plates and daily use much better. Good parts give your kitchen tools a longer life.
How much force do I need to pull off a stuck plastic part?
Just use a firm grip with your hand tools. Do not yank hard or you might bend the bottom metal shaft. A smooth, straight pull pops the bad plastic free fast.
Do I need a heavy duty work light to see inside the machine?
A small LED flashlight works great for this dark space. A tough DeWalt light is nice, but a cell phone light does the job too. Just make sure you can see well.