My Guide to the Soapy Water Test: How to Check for Gas Leak on Grill
A Scary Day in Texas.
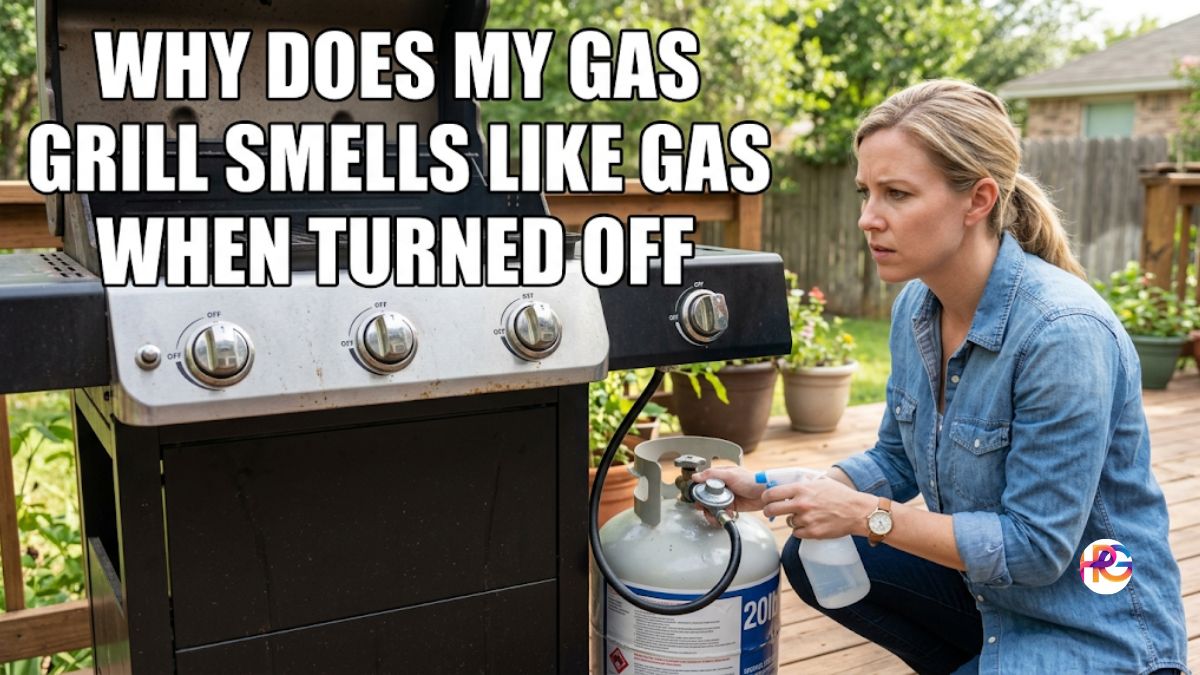
It was a hot day in Austin, Texas. I was making a big meal for my friends. We wanted to celebrate the Fourth of July in style. My yard was ready for a fun summer cookout. I hooked up a fresh fuel tank to my grill.
Then, a very bad smell hit my nose. It smelled just like old, rotten eggs. I knew this meant big trouble for us. Propane is a dangerous gas that catches fire quickly.
I knew I had to deal with the problem immediately. After rushing to the kitchen, I grabbed some plain dish soap and a bowl of clean tap water. Since this quick fix worked so well for me, I want to share it with you. Let us talk about the soapy water test: how to check for gas leak on grill.
Why You Must Check for Leaks
Grill safety is a very serious thing. Many people skip this vital safety step. They just hook up the tank and cook meat. That is a very bad and risky habit. A hidden leak can ruin your fun day fast.
Rubber hoses get dry and crack in the sun. Metal parts go bad as time passes by. Sometimes, a joint is just a little bit loose. A tiny leak wastes your money every single hour. The fuel goes up into the open air.
More than that, escaping fuel is a fire risk. The gas sits in the dark cart box. A spark can cause a huge flash of fire. That can burn your face or ruin your home. You must stay safe and check your gear.
Bad Signs to Look For
You might notice a leak before you test it. Pay close attention to what you sense around you. The top sign is that awful, foul smell. Fuel brands put a special scent inside the tank. It smells like a skunk or bad trash.
You might also hear a soft hissing sound. Listen close when you open the main top valve. Another clear sign is a very weak fire. If the flames stay low, you have a problem. The fuel is escaping before it hits the burners.
What is This Simple Test?
This is an old trick used by smart plumbers. It is the cheapest way to find lost air. You do not need costly tools to do it. You just need basic stuff from your clean kitchen. Anyone can learn to do this fast trick.
The main idea is very easy to grasp. You put wet soap on the metal gas tubes. Then, you turn on the high fuel pressure. The gas pushes hard through the wet liquid film. This makes new bubbles that you can easily see.
Soap makes normal water very stretchy and weak. When gas escapes, it gets fully trapped inside. The wet film stretches around the pushing air mass. The bigger the leak, the faster the bubbles grow. It gives you a clear visual warning sign.
Items You Need for the Job
You likely have all these items right now. Look inside the cabinet under your home sink. I use a very basic setup for my checks. Let us look at your testing tool kit. Here is a simple table of what you need.
| Needed Item | Why You Need It |
| Dish soap | Makes the wet film to trap the gas. |
| Tap water | Thins the soap so it flows very well. |
| Small cup | Holds your mixed soapy test liquid safely. |
| Soft brush | Puts the wet mix onto the metal parts. |
I like using a small paint brush the best. It lets me put liquid deep on tight joints. A soft sponge works very well for this too. Just make sure your sponge has no dirty spots. You want to see the clear bubbles right away.
Steps for the Soapy Water Test
Now we get to the actual work part. Let us walk through the quick steps as a team. It takes less than five minutes to do this. Do not rush through the fast process at all. Be careful and take your sweet time.
Prep Your Gear First
First, make sure the whole grill is off. Look at every single plastic dial on the front. They must all point to the off mark. You do not want fuel inside the cooking zone. This keeps you safe while you work.
Next, mix up your wet testing liquid. I put equal parts soap and pure water. Swirl the cup around with a gentle hand. Do not shake it up into thick foam. You just want a slick and wet base.
Put the Liquid On
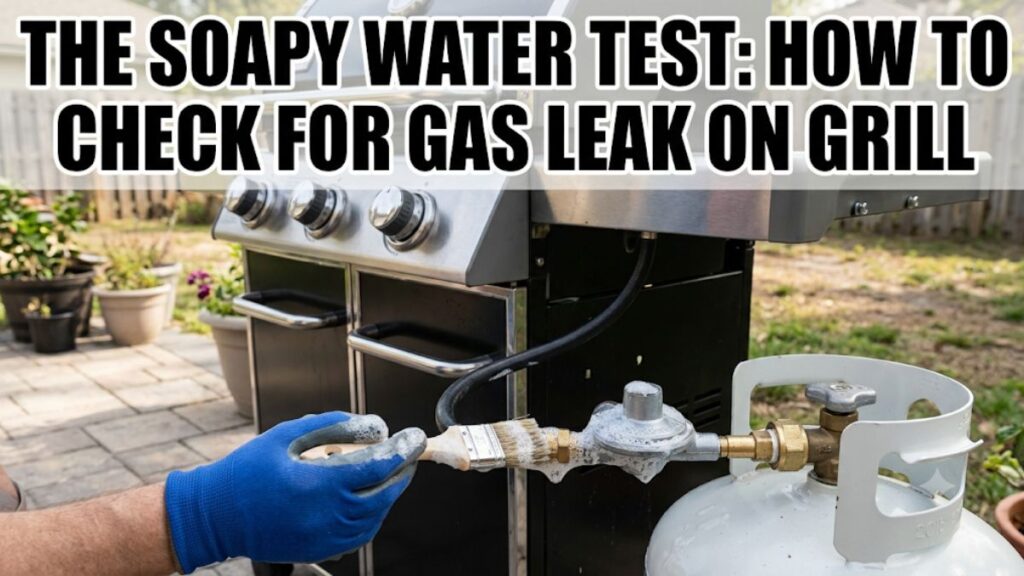
Take your brush or your soft wet sponge. Dip it deep into the mixed soapy water. Wipe the main valve on top of the tank. Put the liquid on in a nice thick coat. Make sure you cover the whole metal top.
Move your hands down to the flat disc. This flat part is called the gas regulator. Coat the tight joint where the parts meet. Then, wipe soap along the long black rubber hose. Finish up at the spot where the hose ends.
Read the Final Results
Slowly open the valve on your white fuel tank. Turn the round handle just a small bit. This puts pressure back into the closed line. Watch all the wet spots very closely now. Get your eyes down close to the hose.
| What You See | What This Means |
| The wet soap lays completely flat. | Your setup is safe and fully sealed. |
| Tiny bubbles slowly form and grow. | You have a very small, slow leak. |
| Huge bubbles grow up very fast. | You have a major and bad gas leak. |
In my hot Texas yard, I saw big bubbles. They grew fast near the flat metal disc. It looked like a child blowing soap wands. I had found my bad spot with ease. The soapy water test saved my cookout.
How to Fix a Bad Leak
Do not panic if you see big bubbles. Act fast and stay calm in your mind. The first step is to stop the fuel flow. Reach for the top tank valve and close it. The fire risk goes away when you do this.
Next, you must look at the leaky spot. Was it sitting at a tight metal joint? Sometimes, the fitting is just a bit loose. You can try to tighten the part by hand. Take the black hose off and put it back.
Turn the fitting tight, but do not use tools. Now, you must test the spot one more time. Put fresh wet soap over the fixed joint. Turn the gas back on with a slow hand. If no new bubbles form, you fixed it!
Parts That Break Down
Sometimes a tight turn does not work. This means a part is truly broken for good. Black hoses break down in the hot summer sun. They dry out and crack after a long year. Yard pests like rats can chew them too.
Flat metal parts fail inside their cases too. If the air comes from the disc center, stop. You cannot fix a fully busted control disc safely. You must buy a brand new hose and kit. They are cheap to buy at the hardware store.
When to Run This Safety Check
You should make this test a normal home habit. I do it a few times every single year. Always test your gear when summer finally starts. The parts sat idle in the cold winter snow. Spiders might have built webs inside the tubes.
You must also test when you change tanks. Lifting a heavy new tank moves the tight joints. Things get knocked loose when you swap them out. A quick check gives you total peace of mind. Safety is always worth five minutes of time.
The Story Behind the Smell
Natural gas has no actual smell of its own. It is an unseen gas in the pure air. This made it very risky in the old days. People could not tell if a room was full. They would light a match and cause a fire.
Safety laws changed to help fix this big issue. Smart people added a new harmless chemical to it. This new mix is very safe to burn daily. But it smells awful to the human nose. It reeks like wet trash or boiled eggs.
Now, our noses act as a great defense line. We smell the bad odor and step away fast. This awful smell is truly an amazing life saver. It keeps us safe in our homes and yards. Always trust your nose if things smell wrong.
Final Thoughts on Staying Safe
That hard day in Texas taught me well. I had to delay my meal by an hour. Driving to the local store was a small pain. My hungry pals had to wait for their food. But we all stayed safe from any real harm.
We ate a great meal with no scary fires. Finding bad leaks is a very easy job. Anyone can do it fast in their own yard. You do not need special skills or big tools. You just need soap, clean water, and patience.
I hope my personal story helps you out today. Keep your cooking gear in very good shape always. Take time to run the soapy water test: how to check for gas leak on grill. Have a safe and fun summer with your friends. Happy grilling to all of you out there!
Frequently Asked Questions
Q: Can I use any dish soap for the soapy water test: how to check for gas leak on grill?
A: Yes, any standard liquid dish soap works great for this test. Brands like Dawn or Palmolive mix easily with water to create highly elastic bubbles that instantly reveal escaping gas.
Q: Why does my Weber grill regulator hiss when I first turn on the propane tank valve?
A: A faint, brief hiss can be normal as gas pressurizes the line. However, if the hissing continues, use the soapy water test to check for a dangerous leak around the brass fitting.
Q: Will storing my grill tools and propane tank in a freezing cold shed cause leaks?
A: Extreme cold makes rubber hoses stiff and prone to hairline cracks. Always check your hose with soapy water at the start of spring to ensure winter weather did not break the seal.
Q: How often should I replace the gas hose and regulator on my Char-Broil grill?
A: Most manufacturers recommend replacing the hose assembly every five years. If your soapy test shows bubbles that tightening cannot fix, swap the parts immediately to keep your yard safe.
Q: Can I use a leak detector spray instead of making my own soapy water mix?
A: Commercial leak sprays work well, but homemade soapy water is just as accurate and costs pennies. It gives tool users a fast, reliable safety check using items already in the kitchen.