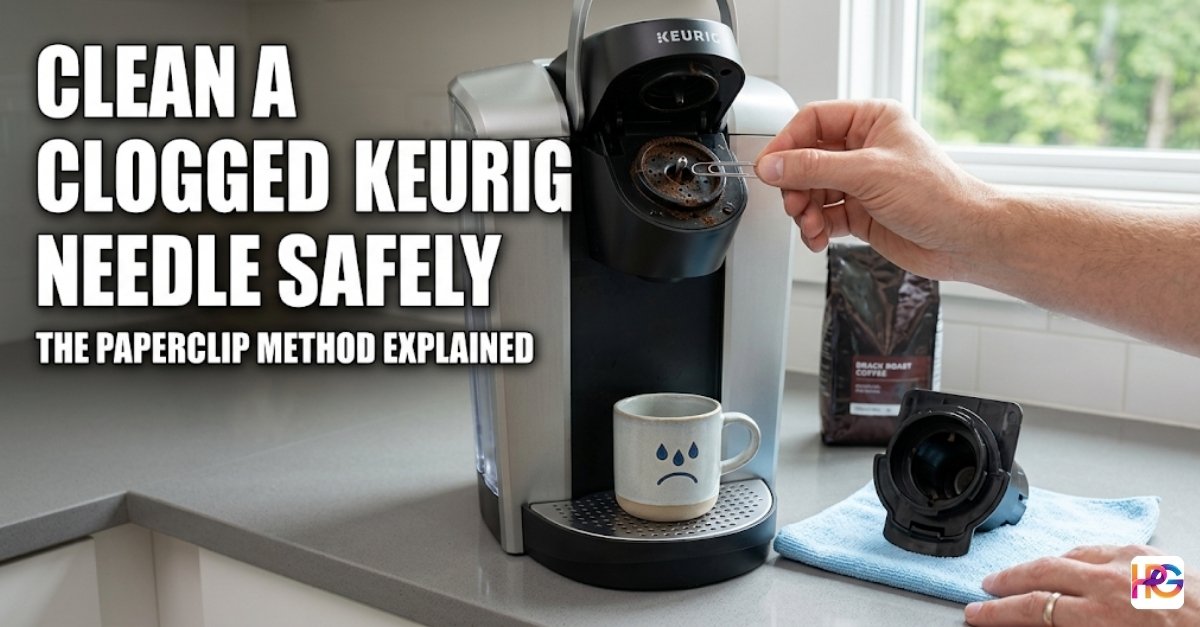
How to Clean a Clogged Keurig Needle Safely
It was a rainy Tuesday morning. I woke up craving a dark roast. I walked into the kitchen with sleepy eyes. The coffee mug went on the drip tray. I pushed the brew button with deep hope. My machine had a different idea today. It let out a loud sputtering groan. Only three sad drops of water fell down. I stared at the mug in total shock. Caffeine withdrawal was about to hit me hard. This sudden failure reminded me of a cold day in Chicago. I lived in a freezing apartment back then. My cheap coffee pot died right in the middle of winter. That day was a total nightmare.
But this morning was slightly different. I knew my single serve brewer was not dead. Its motor still hummed quite loudly. A full tank of water sat on the side. The problem was hiding inside the brew head. That tiny metal puncture needle was totally choked up. Coffee grounds block these tiny tubes easily. I needed to fix this issue fast. Buying a new machine was not an option. I rolled up my sleeves to get to work.
Why Do Keurig Needles Clog Anyway?
You might wonder how a coffee maker gets stopped up. The answer involves basic daily use. Your machine relies on two sharp needles. One needle pokes a hole in the top lid. The second needle pierces the bottom cup. Hot water blasts through these narrow metal tubes. Ground coffee is very fine and sticky. Dark roasts carry a lot of heavy natural oils. These coffee oils act like a wet glue. Old grounds stick to the metal walls inside.
Time makes this problem much worse. Daily brewing adds layer after layer of dirt. A solid block forms inside the narrow tube. Water cannot push past this heavy dirt wall. Hard water causes a lot of trouble too. Tap water contains calcium and white minerals. These minerals turn into a hard white crust. The crust builds up around the needle holes. The exit flow gets smaller and smaller. Eventually the machine just stops pouring altogether.
My Experience with Coffee Machine Failures
Over the years, I have tested many coffee makers and regularly share my findings on our website. At home, I personally use a shiny Technivorm machine. A classic Bunn sits on my back counter. I also use a stainless steel French press on lazy weekends. Those traditional machines are very simple to wash out. You just rinse the glass pot in the sink. Single serve brewers hide their moving parts entirely. The internal needles trap dirt out of plain sight. You cannot see a thick clog forming slowly.
You only notice a problem when your morning cup fails. Pouring a half empty cup feels very sad. It feels like throwing money into the trash bin. But you do not need to buy a brand new brewer. You certainly do not need to call a repair guy. You just need a tiny bit of patience. We can solve this together right now.
The Best Tool for the Job
You might think you need a fancy repair kit. Some stores sell expensive orange cleaning tools. I have tried them all in my kitchen. My favorite tool costs absolutely nothing at all. It is a standard metal office paperclip. You probably have one sitting on your desk. The metal wire is incredibly thin and strong. It fits perfectly inside the tiny needle hole. The metal can push out dry grounds with ease.
Comparing Your Cleaning Options
Here is a quick look at different fixing methods. I put this handy table together from my own tests.
| Cleaning Method | Best Used For | Cost Level | Time Needed |
| Metal Paperclip | Deep clogs and packed grounds | Free | Five minutes |
| Rinse Pods | Flushing oily residue and smells | Low | Two minutes |
| Vinegar Soak | Hard water mineral scale | Low | One hour |
Step by Step: Unclogging the Exit Needle
Let us get down to real business now. Safety must be the first thing on your list. Unplug your coffee machine from the wall socket immediately. Do not skip this very important step. The internal metal needles are extremely sharp. You do not want the machine turning on by accident. A sudden spray of hot water would hurt a lot.
Removing the Plastic Pod Holder
Open the top lid of your coffee brewer. Look for the black plastic pod holder piece. Place your fingers under the plastic rim gently. Push straight up from the bottom edge. It should pop right out into your hand. Be very careful with the side plastic clips. You do not want to snap them off today. Once the piece is out, look at it closely. Pull the bottom funnel piece away from the cup. They separate quite easily with a soft tug.
Clearing the Bottom Tube Flow
Now look at the bottom of the main holder. You will clearly see a small exit tube. Take your completely straightened metal paperclip. Insert the wire tip into the tube from the bottom. Push it up slowly until you feel resistance. Give the wire a gentle wiggle around the edges. Move it in small circles to break the dirt.
Never push the wire from the top down. The sharp bottom needle sits at the top end. Pushing from the top can bend the metal badly. It can also poke your finger deeply. Just stick to pushing from the bottom side up.
Tackling the Entrance Needle Safely
The bottom exit tube is now perfectly clean. We must fix the top puncture needle next. Lean over and look up under the main lid. You will spot the sharp entrance needle hanging down. It has two tiny holes on its metal sides. Hot water shoots out from these tiny side holes.
Wiggling the Old Debris Free
Slide your paperclip tip into one side hole. Move the wire around very gently inside. Do not force the wire if it feels stuck. You just want to break up the dry dust. Switch over to the second hole and do the same.
I once found a huge chunk of dry stuff hiding up there. It was a lump of old peppermint tea leaves. They fell out onto my counter in a dusty pile. Wash your hands thoroughly after doing this part.
Running a Cleansing Brew Cycle
We are almost done with the messy kitchen work. Snap the bottom funnel back onto the plastic holder. Drop the whole cup assembly back into the machine base. Push down firmly until it clicks loudly into place. Plug the black power cord back into the wall socket. Turn the main power button back on again.
Flushing with Hot Clean Water
Place a large ceramic mug on the bottom drip tray. Do not put a fresh coffee pod in the holder. Close the top lid down completely empty. Select the largest cup size setting on your front display. Press the blinking brew button to start the flow.
Hot water will rush loudly through the clean needles. You might see dark specks floating in your clear mug. That is the old leftover dirt flushing right out. Dump this dirty brown water into your kitchen sink. Run one more clear water cycle just to be totally safe.
Using Keurig Maintenance Pods
Paperclips are truly great for fixing hard physical clogs. But I prefer to avoid terrible clogs entirely. This is where simple maintenance pods come in very handy. They look exactly like your regular morning coffee pods. But they hold a safe foaming soap powder inside.
My Hot Cocoa Disaster Story
I learned about these soapy pods the hard way. My young nephew visited my house last winter. He made three huge cups of sticky hot chocolate. He forgot and left the empty pod in the machine overnight. The liquid sugar dried up into a rock hard crust.
My morning cup of coffee tasted like old burnt chocolate. It was a nasty surprise for my taste buds. I had to scrub the machine for an hour straight. Now I just use a quick rinse pod every month.
How Often to Wash Things
Routine care keeps your drinks tasting totally pure. Here is my personal schedule for keeping things fresh.
| Maintenance Task | How Often to Do It | Why It Matters |
| Water Only Flush | After sweet sticky drinks | Stops hard sugar blocks |
| Wash Pod Holder | Once a full week | Removes stale coffee oils |
| Descale Machine | Every three short months | Clears internal water lines |
How I Prevent Future Clogs Now
Nobody wants to fix a broken machine before going to work. A little tiny bit of daily care goes a long way. I changed a few simple habits in my own kitchen. My loud brewer runs perfectly fine now. It never sputters or drips slowly anymore.
Eject Empty Pods Immediately
This is my absolute number one rule for everyone. Never leave a wet used pod sitting inside the chamber. The hot wet grounds dry out very fast in the air. They cement themselves right onto the delicate metal needle. Open the big lid and toss the pod instantly. Throw it away as soon as your hot drink is ready. It takes only two short seconds. It saves you from a massive headache later on.
The Filtered Water Secret Trick
Tap water is completely full of heavy hidden minerals. I used to fill my plastic tank straight from the sink. The hard sink water ruined my machine lines in a few months. Thick calcium built up absolutely everywhere inside.
Now I only pour filtered water into the clear tank. Bottled spring water works great for this routine too. The hidden internal lines stay completely clear all year. Hot water flows fast and freely every single morning.
Final Thoughts on Keeping Your Brewer Happy
Dealing with a totally clogged needle is super annoying. But it is a very easy problem to solve quickly. A simple metal paperclip can save your entire morning routine. Regular gentle cleaning keeps your daily drinks tasting pure.
You do not need a smart repair tech for this. You can do this yourself in five short minutes. Pick better daily habits for your small kitchen appliances. You will live smarter and enjoy far better coffee. Let me know if you have tried this fun paperclip trick.
Common Questions About Fixing Your Coffee Tools
Can I use a sewing needle to fix my clogged Keurig needle?
A sewing needle is too thin and might snap off inside. A thick metal paperclip is much stronger and safer for clearing out old coffee grounds and dirt.
Should I use a small drill bit to clear a stubborn needle clog?
Never use a power tool or drill bit on your coffee machine. The metal is very thin and a drill will ruin the puncture needle and the plastic holder for good.
Does storing my Keurig in a cold garage damage the internal parts?
Cold air can crack plastic lines and ruin the heater. Drain the water and store your unit in a dry, warm room to keep it safe and strong for many years.
Can a wire brush from my workshop clean the K-Cup holder?
Do not use wire brushes. They can scratch the plastic and dull the needle. A soft brush and warm water are much better for removing old oily coffee residue.
Will using a metal tool like a paperclip damage my Keurig?
A paperclip is safe if you are gentle and move it slowly. Just avoid pushing too hard, as you do not want to bend the small needle or poke your finger.