How to Deep Clean Coffee Maker: My Personal Guide
The Morning My Coffee Tasted Like Mud
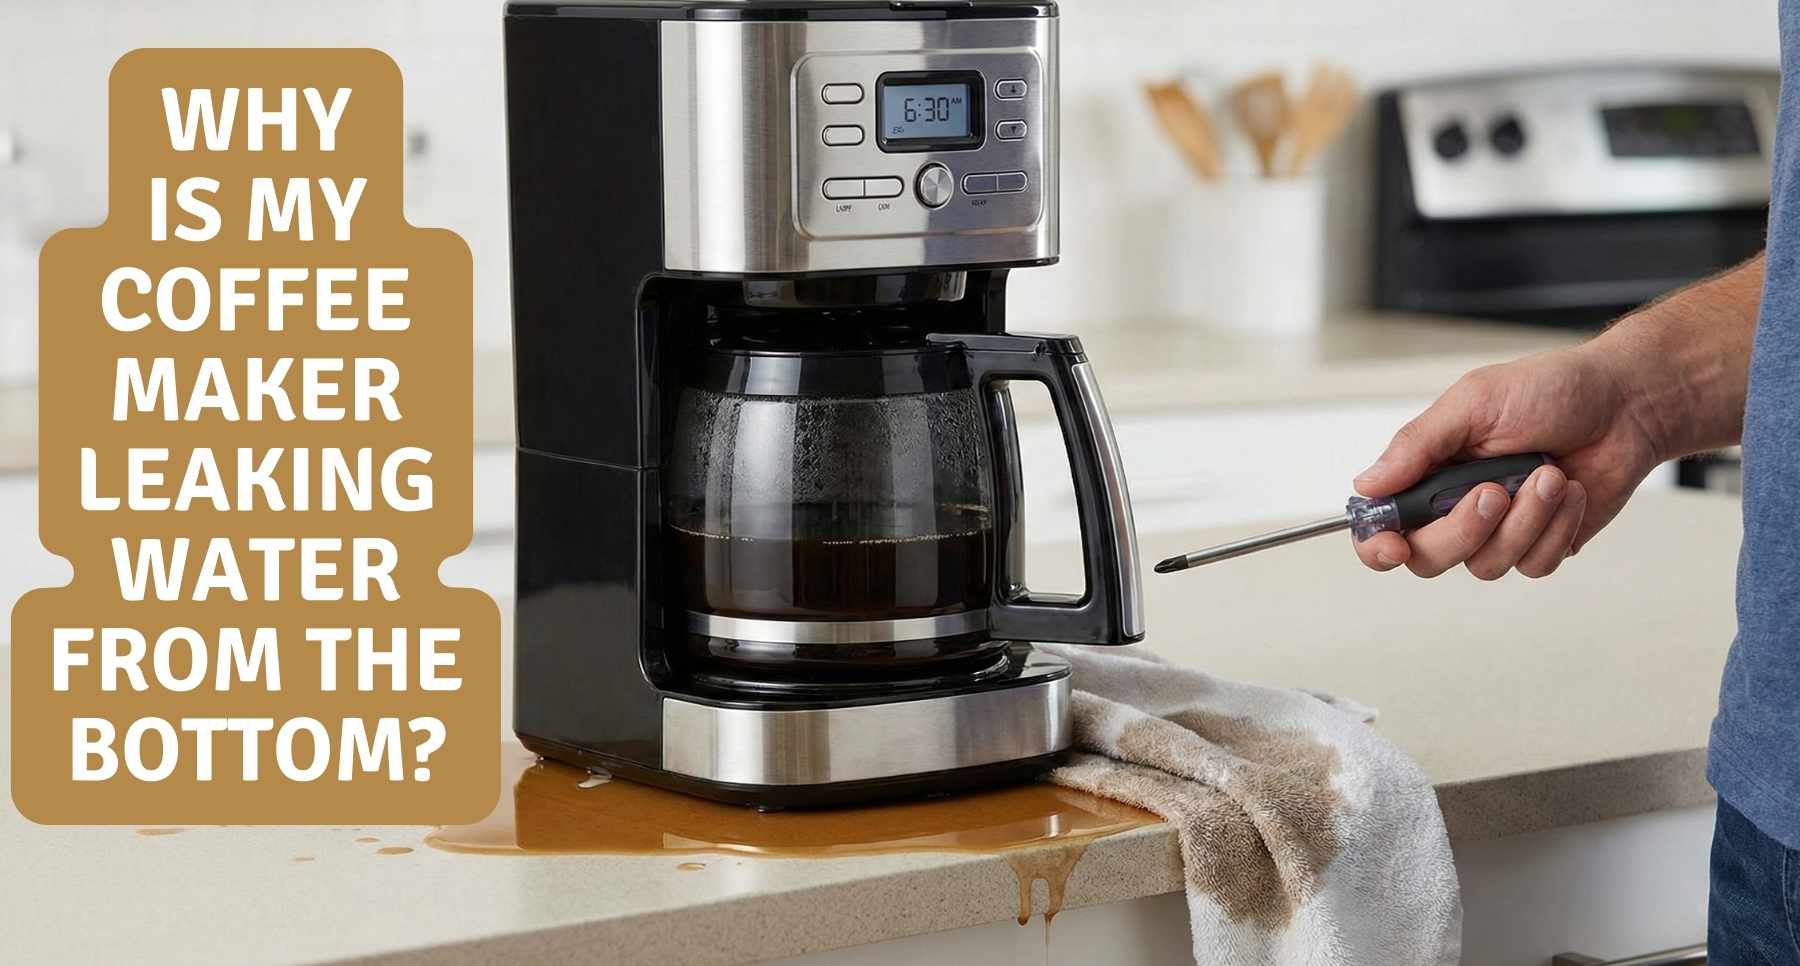
I remember the moment clearly. It was a rainy Tuesday morning. I live in Texas, but my mind was wandering far away. My thoughts were stuck on a trip to Portland, Oregon. The desire for that same rich cafe taste was strong. Fresh water went into my machine. I added some expensive ground coffee. I hit the start button.
The machine sputtered loud. It coughed like an old truck engine. Then, the smell hit the room. It was not a fresh roast aroma. It smelled terrible and burnt. I took a tiny sip. The drink was bitter and flat. My trusty coffee maker was clearly filthy. I knew action was needed quickly. Here at Home Pick Guide, we talk about living smarter. Drinking dirty coffee is definitely not smart. Today, I will walk you through exactly how I deep clean a coffee maker, including the methods that work best and a few personal mistakes I learned from along the way.
Why Your Brewer Needs Constant Help
Tap water is not just simple liquid. It holds tiny invisible things. Most city water has hidden minerals. Calcium is a very big problem here. Over time, this calcium builds up slowly. It coats the thin tubes inside your brewer. Experts call this hard mineral crust scale. Scale blocks the internal water flow. It also lowers the final brew temperature. Cold water always makes weak and sad coffee.
Beans also create big messes. Dark roasted beans have natural oils. These oils are incredibly sticky. They cling to the plastic baskets. They coat the glass carafe walls tightly. Old oil goes rancid very quickly. Rancid oil tastes like sour wet plastic. You must remove both hard scale and sticky oil.
Signs Your Machine is Crying for Help
Your appliance will actually tell you when trouble starts. You just need to listen closely. Does the unit make loud popping noises? That means the inner tubes are badly clogged. Does the full brew cycle take twice as long now? That is another huge warning sign.
Look closely at your glass pot under bright light. Is there a cloudy white ring at the very bottom? That ring is pure mineral scale. Do you see a brown sticky film up top? That is old rancid bean oil. If you notice these things, it is time to work.
Vinegar Versus Commercial Descaling Fluids
I used to wonder what special liquid to buy. Many older folks swear by cheap plain white vinegar. Modern tech forums say you must buy a special descaling solution. I have tested both options many times. I ruined an entire pot of morning coffee once. My mistake was not rinsing the acid out enough. Let us look at the simple facts.
Comparison of Coffee Cleaning Liquids
| Liquid Type | The Good Points | The Bad Points | Best Time to Use |
| White Vinegar | Very cheap. Easy to find anywhere. | Smells terrible. Requires many fresh rinses. | Regular monthly washes on a strict budget. |
| Descaling Solution | Works very fast. Leaves zero bad odors. | Costs a lot more money per bottle. | Hard water areas. Very neglected dirty machines. |
I usually grab a jug of vinegar for a routine wash. I keep a huge bottle under my kitchen sink. If I wait too many months between washes, things change. I will buy the strong commercial stuff for heavy crust.
My Simple Step-By-Step Cleaning Routine
You do not need fancy skills for this chore. You just need some free time and patience. Do not ever rush this delicate process. I rushed it once last year. I ended up drinking hot sour vinegar. It was a terrible morning shock. Follow these exact steps closely for safety.
Step 1: Empty Every Single Part Out
First, unplug the black power cord from the wall. Safety is the most important rule in my kitchen. Next, open the top plastic lid completely. Take out the removable filter basket. Throw your old wet paper filter into the trash bin. Dump out all the heavy wet grounds.
Wash the empty basket in your kitchen sink. Use very warm tap water. Add a single drop of mild dish soap. Scrub the plastic with a gentle soft sponge. Set the clean basket on a towel to air dry. Now, look at the back water tank. Dump any old leftover water into the drain. Rinse the main glass pot with fresh clean water. Your machine is now totally ready for deep action.
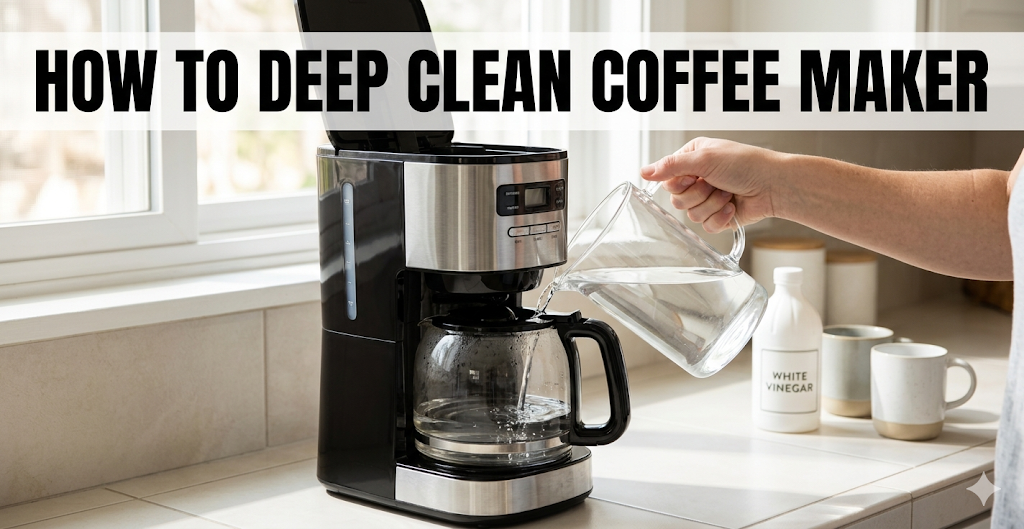
Step 2: Mix Your Magic Cleaning Potion
Now, you must make your cleaning fluid. I will use the cheap vinegar method for this guide. Get a fresh bottle of clear white vinegar. Do not ever use brown apple cider vinegar. Fill the main water tank halfway up with the acid.
Fill the remaining empty space with cold water. You want a perfect half and half mixture. Put the empty glass pot back down onto the metal hot plate. Check that the basket is seated correctly.
Step 3: The Secret Half-Brew Pause trick
This is my absolute favorite secret trick. Plug the machine power cord back into the wall outlet. Turn the main power switch on. Watch the clear liquid drip down into the glass pot. Wait patiently until half of the vinegar mix is gone. Turn the machine power switch off immediately.
Let the unit sit there quietly. Do not touch any buttons for one full hour. This long pause is incredibly crucial. The strong acid needs time to eat the hard white crust. The crust hides inside the tiny copper heating tubes.
Step 4: Finish the Heated Wash Cycle
The long waiting hour is finally up. Turn the machine power switch back on again. Let it finish the entire brew cycle loudly. It will spit out the rest of the dirty hot liquid. The liquid inside the pot might look very cloudy. It might even have tiny white solid flakes floating inside.
Seeing flakes means the deep cleaning is really working. Pour this hot dirty liquid straight down your sink drain. Be careful not to splash your hands.
Step 5: The Crucial Fresh Water Flushes
This step is where I failed miserably in the past. You absolutely must rinse the machine out completely. Skipping this means your next drink will taste like sour salad dressing. Fill the empty tank to the top with pure cold water. Run a full normal brew cycle.
Dump the hot rinse water away. Fill the tank up again with cold water. Run a second full hot cycle. Dump that water out too. Sniff the empty glass pot closely. Do you still smell strong vinegar fumes? If yes, run a third water cycle. I always run three cycles just to be totally safe.
How to Scrub a Stained Glass Carafe
Running hot vinegar cleans the inside hidden tubes well. It does not clean the glass pot walls very well. Baked-on coffee oil is very tough stuff. Normal soap and water are rarely enough to lift it. My main carafe used to look constantly brown and dull. Now it sparkles brightly like brand new glass. I use cheap items from my baking cupboard to fix it.
The Baking Soda Scrub Trick
Put two large spoonfuls of baking soda into the empty pot. Add just enough warm water to make a thick wet paste. Grab a soft clean sponge. Scrub the inside glass walls gently with the white paste.
Baking soda has a tiny bit of natural grit. It rubs away the sticky brown oil stains easily. It is soft enough that it will not scratch the fragile glass. Rinse the entire pot out with extremely hot water. The glass will look absolutely perfect again.
Cleaning the Outside Plastic and Metal
The outside plastic shell matters a lot too. Daily dust and messy liquid spills happen often. Unplug the unit from the wall outlet again. Take a soft microfiber cloth. Get it slightly damp with plain warm water. Wipe down the dark plastic sides firmly. Wipe the top lid carefully.
The flat metal hot plate at the bottom gets very messy. Coffee drips down and burns onto the hot metal instantly. This leaves ugly dark black rings.
Fixing a Burnt Metal Hot Plate
If your hot plate has a thick black crust, stop right there. Do not try to use a sharp metal knife. You will scratch the protective paint right off. Let the metal plate cool down completely first. Put a soaking wet paper towel directly over the burnt spot.
Leave the wet towel there for twenty full minutes. The sitting water will slowly soften the hard burnt crust. Wipe the mess away gently with a sponge. If the crust is truly stubborn, use one tiny drop of dish soap.
Why Good Brewing Water Matters So Much
Water makes up almost the entire volume of your drink. Bad water means your final cup will taste bad. I learned this harsh lesson while visiting a hotel in Chicago. The hotel room tap water tasted like pure rust and metal. My expensive travel coffee kit could not fix the bad flavor.
Back home, I started using a filtered water pitcher. The change in flavor was massive and instant. Good filters remove harsh chlorine taste completely. They also trap heavy metals before they hit your cup. Your machine stays much cleaner for a longer time. You will not have to descale it as often. If you buy bottled spring water, read the back label first. Some spring water actually has extremely high mineral levels. High minerals will clog your thin tubes super fast. Stick to simple filtered pitcher water for the best results.
Checking Your Machine Parts for Damage
Cleaning is not the only important maintenance task. Sometimes small physical parts break down over time. You must inspect them closely every single month. Look at the tiny black rubber water seals. Are they feeling hard or looking completely cracked? Feel the thick black power cord with your hand. Is the cord feeling hot when plugged into the wall? That is a very dangerous fire sign.
The glass pot can easily get tiny chips on the rim. A chipped glass pot can shatter quickly from sudden heat. Check the top rim very carefully while washing it. If you see a sharp crack, buy a new pot immediately. Do not risk a huge glass explosion in your kitchen sink. Replacing small broken parts is much cheaper than buying a whole new unit.
Things I Learned the Hard Way
I have made many foolish mistakes with my kitchen tools. I want to share them out loud so you can avoid them. Once, I poured boiling hot water directly into the cold plastic tank. The thin plastic walls warped and bent instantly. Always use plain cold or room temperature water to fill the tank.
Another time, I thought about using strong laundry bleach. Never ever put chemical bleach inside a coffee maker. Bleach is highly toxic to human bodies. It will completely melt the inner plastic safety seals. It is never safe to drink from a bleached machine. Stick strictly to natural food acids or safe commercial products.
Setting a Good Maintenance Schedule
You really need a solid cleaning routine. Waiting until the coffee tastes bad means you waited way too long. I deep clean my main home brewer exactly once a month. I set a repeating reminder alert on my cell phone.
If your town has very hard tap water, do it every three weeks. If you only brew one pot on lazy Sunday weekends, you can wait two full months. Taking good care of your kitchen tools saves you real money. A clean maintained machine works perfectly for many years. A dirty neglected one usually breaks down quickly.
Daily Habits for Better Tasting Brews
Do not leave old wet grounds sitting in the basket all day. Throw them straight into the trash after you pour your first cup. Rinse the empty glass pot out with water every single day. Leave the top plastic lid flipped wide open after brewing finishes. This simple trick lets the damp inside parts air out completely. Dry plastic parts do not grow green fuzzy mold.
My Final Thoughts on Fresh Coffee
Doing deep kitchen chores is definitely boring work. I know that feeling very well. However, the final tasty reward is incredibly huge. The very next morning, things will be completely different. You will notice a quiet, smooth brewing sound as the aroma of rich, roasted beans fills the air, leading to a perfectly clean and hot cup of coffee.
That first sip makes the boring cleaning effort totally worth it. Try my simple method this coming weekend. See the massive flavor difference for yourself. Happy smooth brewing to you from all of us at Home Pick Guide.
Coffee Maker Maintenance FAQs
How often should I deep clean my coffee maker for the best performance?
Try to deep clean your unit once every month. This easy task stops scale from hurting the heater. It keeps your tool running like new for a very long time in your home.
Can hard water in the USA damage my coffee maker’s internal parts?
Yes, hard water minerals can clog the small tubes. This makes the pump work too hard and fail. Cleaning often protects these parts from wear and big repair costs later.
Is it safe to store a coffee maker in a cold garage during winter?
No, cold air can freeze the water left inside the tubes. This will crack the plastic seals and cause leaks. Store your brewing tools in a warm, dry spot to keep them safe.
Should I use white vinegar or a commercial descaling solution for my Keurig?
Vinegar is cheap but smells bad for a long time. A pro solution works fast on thick crust. It rinses out much faster and leaves no sour taste in your next fresh morning cup.
Do I need to unplug my brewer before I start the deep cleaning process?
Always pull the plug when you clean the outer shell or move parts. This easy step keeps you safe from shocks while you work on your small tools in the kitchen workshop.