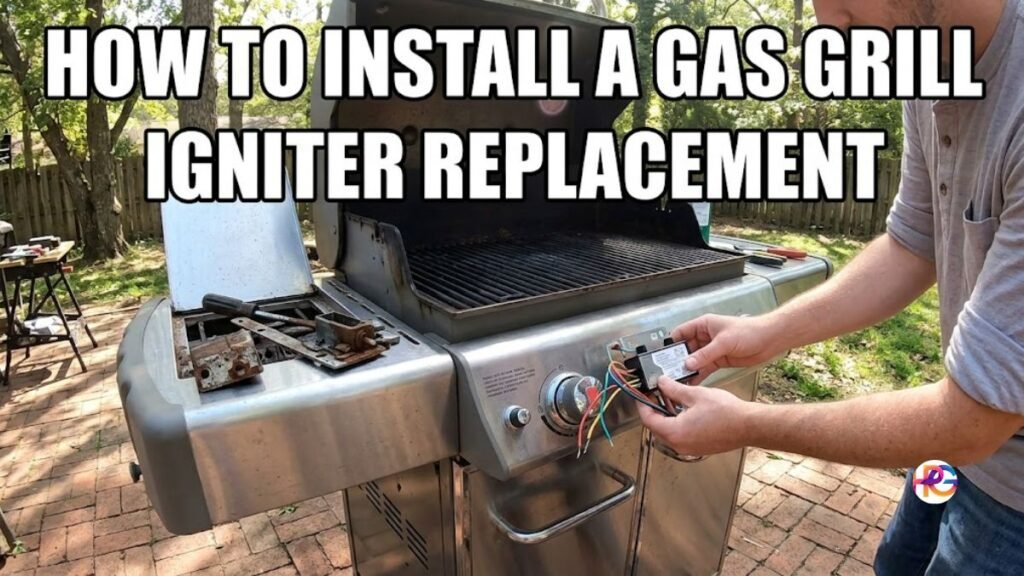
Gas Grill Igniter Replacement: How to Install It Fast
Nothing ruins a weekend cookout faster than turning your grill knob and getting absolute silence. You wait for that familiar clicking sound, but nothing happens. I spent an entire summer lighting my barbecue with a rolled-up piece of paper and a long lighter. I avoided the fix because I thought replacing the spark generator would be too difficult.
It turns out a gas grill igniter replacement is one of the easiest DIY fixes you can do. You do not need to hire a repair person. You also do not need to throw out your expensive grill. In this guide, I will share exactly how I swapped out my dead igniter, the annoying mistakes I made, and how you can do it safely in under thirty minutes.
Why Your Grill Won’t Light (And My Early Struggles)
Before you rip out the old parts, make sure the whole system is actually dead. I once bought a full replacement kit only to realize the AA battery was just installed backward. That was a very humbling moment.
Most modern grills use an electronic push-button module. When you press it, a battery sends a small charge through some wires. This charge goes to a ceramic electrode near the burner. That energy creates a tiny spark. If any part of that chain breaks, the fire will not start.
Sometimes the fix is as simple as cleaning grease off the metal tip. Other times, the wires literally rot away from the intense heat. If you clean the tip, change the battery, and still get no spark, it is time for new parts.
Clear Signs You Need a Gas Grill Igniter Replacement
How do you know the module is actually broken? Over the years, I have seen a few clear signs that the system is beyond saving.
First, listen closely for the click. If you press the button and hear no clicking sound at all, the electronic module is likely dead. Rainwater often gets inside the control panel and ruins the small circuit board.
Second, look for rust and heavy corrosion. Open the plastic button cap where the battery goes. If you see fuzzy white acid or deep orange rust, the metal contacts are ruined. You can try scraping it off, but that fix rarely lasts.
Finally, test the actual spark. If you hear loud clicking but do not see a blue spark near the burners, your wires or electrodes are fried. Heat melts the wire coating over time. Once the bare wire touches the metal grill frame, the spark shorts out before it reaches the gas.
Buying the Right Parts Without Wasting Money
Do not just walk into a hardware store and buy the first box you see. I made this mistake early on. I bought a cheap universal kit. It did not fit my grill panel, and the wires were way too short.
To get the right gas grill igniter replacement, find your grill’s model number. It is usually stamped on a metal sticker on the back of the frame. You might also find it inside the lower cabinet doors. Type that exact number into a barbecue parts website.
You also need to know how many burners you have. Igniter modules come with a specific number of output prongs. A three-burner grill needs a module with at least three prongs for the wires. Buying the exact brand match makes the whole process plug-and-play.
The Few Tools You Actually Need
You do not need a massive toolbox for this project. The parts are small and the connections are very simple.
I highly suggest wearing thin work gloves. The inside of your grill is coated in old grease and black soot. Your hands will get filthy the second you reach inside to grab the wires.
Aside from gloves, grab a standard Phillips head screwdriver. You might also want small needle-nose pliers. The pliers help pull off stubborn wire clips without snapping them. Finally, grab a small flashlight. Working inside a dark grill cabinet is frustrating, and good light helps you see the tiny wire plugs.
Step-by-Step Gas Grill Igniter Replacement Guide
Doing the work yourself is very rewarding. Just take your time and follow the order of things. Here is how I handle the replacement without getting frustrated.
Step 1: Turn Off the Gas
Safety always comes first. Reach down to your propane tank and turn the valve all the way to the right. If your grill connects directly to your house gas line, shut off the main supply valve. You do not want any gas flowing while you work near the burner tubes.
Step 2: Remove the Grates and Heat Tents
Take off the heavy cooking grates and set them aside on some old newspaper. Next, pull out the metal heat shields that cover the burners. This gives you a wide, clear view of the burner tubes and the small ceramic sparkers attached to them.
Step 3: Disconnect the Old Igniter Module
Look behind the front control panel. You will see the plastic box where the button sits. Pull the small colored wires off the metal prongs on the box. Then, unscrew the plastic lock nut holding the front button in place. The whole box should slide right out of the metal panel.
Step 4: Swap Out the Electrodes
This is usually the most annoying part of the job. The electrodes are the little white ceramic sticks near the burners. They are held on by a single small screw. Unscrew them and pull the old wires out of the grill body. Screw the new electrodes into those exact same spots.
Step 5: Connect the Wires to the New Module
Feed your new wires from the inside of the grill back out to the control panel. Slide your new push-button module into the empty hole and tighten the lock nut. Push the wire ends tightly onto the metal prongs on the back of the module.
Step 6: Test the Spark Safely
Put a fresh AA battery in the new front button. Do not turn on the gas yet. Press the button and look closely at the burners. You should hear a loud, fast clicking noise. You should also see a bright blue spark jump from the ceramic tip to the metal burner.
Costly Mistakes I Made During Installation
Learn from my errors so you do not have to do this job twice. My biggest mistake was rushing the wire routing.
I once let the new wires rest directly against the metal bottom of the firebox. The very first time I cooked burgers, the intense heat melted the wire coating. The spark shorted out, and the system broke again immediately. Always tuck the wires safely away from direct heat using zip ties or the factory clips.
Another common error is messing up the electrode gap. The metal tip of the sparker needs to be very close to the gas hole on the burner. If it is too far away, the spark will not reach across the air. If it touches the burner directly, it will not spark at all. The gap should be about the thickness of a dime. You can gently bend the metal tip with pliers to get it perfectly spaced.
Quick Troubleshooting Questions
Why is my new igniter not clicking?
You likely put the battery in backward or used a dead battery straight from the drawer. Check the positive and negative signs on the black cap.
Can I use a universal igniter kit?
Yes, but I do not recommend it for beginners. Universal kits often require drilling new holes in your control panel to make them fit.
How close should the electrode be to the burner?
The metal tip should be about one-eighth of an inch away from the burner hole. A gap exactly the size of a coin works best.
Why does it click but not light the gas?
Your burner holes might be clogged with thick grease or tiny spider webs. Clean the burner tubes with a small wire brush to let the gas flow.
Final Thoughts
Doing a gas grill igniter replacement yourself feels like a massive win. You save cash, learn exactly how your barbecue works, and get back to cooking fast. You do not have to live with a broken button or light your food with a dangerous match ever again.
Take your time finding the exact part number for your grill brand. Go slow when routing the wires away from the heat zones. If you follow those two simple rules, your grill will fire up perfectly on the very first try. Now, get outside and start grilling.