
A Broken Mixer and a Hot Day in Birmingham
It was a sticky Tuesday afternoon here in Birmingham. The ceiling fan was barely moving the humid air. Flour covered my apron and hands. A new bread recipe needed testing. Looking like a serious baker made me smile. Then, my trusty stand mixer stopped spinning. There was no smoke. Loud noises never happened. The motor simply quit working. Staring at the bowl brought pure frustration. Half-mixed dough sat inside.
A familiar sinking feeling hit my stomach. Buying a new mixer costs a lot. Spending that money was not an option. Many people throw away machines when they break. They assume the motor is completely dead. The actual problem is often incredibly small. A tiny wire might be loose. A cheap fuse might blow out. Finding that invisible problem is the real trick. That is exactly why learning how to use a Multimeter changed everything for me.
Years ago, my uncle needed help at his meat shop. We fixed heavy meat processing equipment together. He tested huge grinders with a small yellow meter. Watching him showed me how simple it is. An engineering degree is not required. You just need patience and basic safety knowledge. Let me share how this little tool saves serious money.
What Exactly Is a Multimeter?
A multimeter is a small handheld testing device. It measures invisible electrical properties safely. Think of it like a medical stethoscope for electronics. Doctors use stethoscopes to hear your heart. You use a meter to check your blender. The screen tells you if electricity flows properly.
Stores sell two main types of these tools. Analog meters use a needle across a printed scale. Digital models feature a clear LCD screen. Beginners should always choose digital versions. Getting exact numbers removes much of the guesswork. Reading moving needles takes more practice to learn.
Comparing Meter Types for Beginners
| Feature | Digital Multimeter | Analog Multimeter |
|---|---|---|
| Display Style | LCD screen with clear numbers | Moving needle on a printed scale |
| Ease of Use | Very simple to read quickly | Takes extra practice to learn |
| Data Accuracy | High-precision decimal data | Varies by your viewing angle |
| General Price | Very cheap to highly expensive | Usually very affordable |
| Best User | Home repair and DIY fans | Old-school motor mechanics |
My personal tool is a mid-range digital model. The rubber casing feels rugged and safe. Dropping it on the concrete garage floor happens often. It survives every single fall without breaking.
Understanding the Tool Dials and Probes
Looking at the tool for the first time feels scary. Symbols and numbers cover the entire front face. It resembles an airplane cockpit panel. Letting this intimidate you is a mistake. Home appliance repair only needs a few basic settings. We can safely ignore the advanced features.
Look directly at the main digital screen first. This display shows your final test results. Below that sits a large rotary dial. Turning this center wheel selects your specific test. It clicks into place with a satisfying snap.
Setting Up Your Test Leads
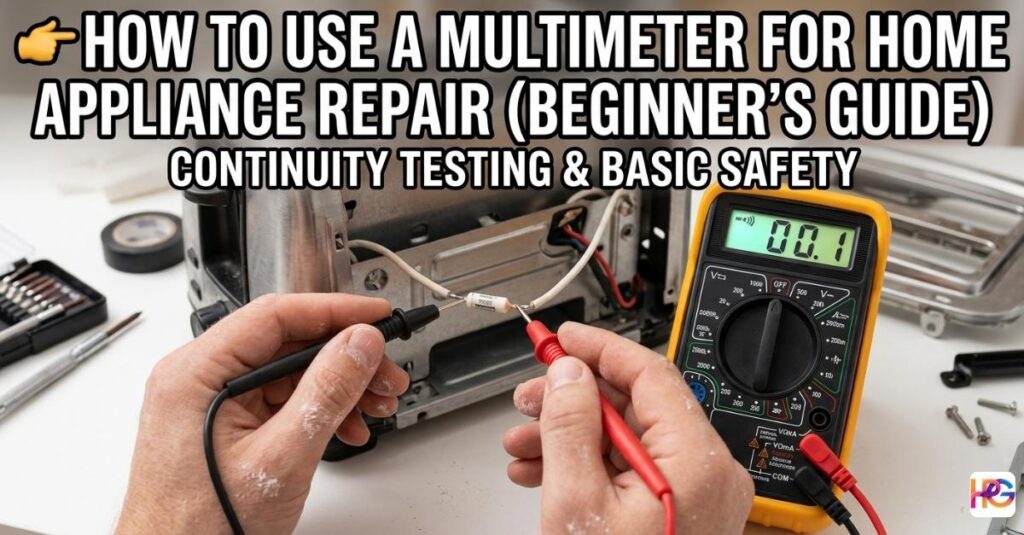
Several small holes line the bottom edge. Technicians call these connection points ports. Two long wires come inside the retail box. We call these wires probes or test leads. One probe wire is red. The other wire is black. Both feature sharp metal tips for testing.
Plugging the probes into the right ports matters. Your black probe always goes into the COM port. Common ground is what COM stands for. The red probe goes into a different spot. Find the port showing the letter V or an Ohm symbol. That Ohm symbol looks like a horseshoe. This basic setup works for almost all daily testing.
For beginners learning how to use a Multimeter, getting the leads into the correct ports should always be the first setup step.
The Magic Power of Continuity Testing
This skill is the most important one to learn. Continuity testing fixes many of my broken things. It remains the core secret of home appliance repair. A continuous path is what continuity means. Electricity requires an unbroken circle to flow. Breaking a wire breaks that entire circle. The machine simply stops running.
Imagine a bridge over a wide river. Cars cross safely if the bridge is whole. A fallen section stops all the traffic. Testing continuity checks if the electrical bridge is solid. The tool sends a tiny amount of power out. Power travels from the red probe to the black probe.
How to Check for a Broken Path
Turn your center dial to the continuity mode. Look for a symbol resembling a sound wave. A sideways Wi-Fi icon is another common label. Some brands use a triangle diode symbol instead. Checking your instruction manual helps if you feel lost.
Touch the two metal probe tips together now. A loud beep should come from the speaker. The display screen will drop down near zero. Hearing this beep proves your meter is responding. It also helps confirm that the probe wires are connected properly.
Take the broken part you want to test next. Assume you removed a fuse from a toaster. Touch the red tip to one metal end. Press the black tip to the opposite end.
Listen closely to the room. A steady beep means the part has a continuous path. Power can pass through it easily. Complete silence tells a different story. The internal bridge may be burned or broken. Finding the problem is finally over. Buying a replacement part may be your next step.
Always Test the Power Cord First
Learning a hard lesson took me three hours once. Taking apart a whole microwave wasted an afternoon. Every internal door switch was tested twice. The magnetron looked perfectly fine. Hand cramps and a sore back were my only reward. Everything hidden inside the metal box worked correctly.
Testing the main power cord happened last. A hidden break lived right near the wall plug. The outside plastic insulation looked perfectly normal. Inside, the copper wires were completely snapped. Feeling foolish took over my mood. Wasting hours on a simple cord issue hurt. Testing the power cable first is my new rule.
Steps to Verify a Power Cable
Unplug the machine entirely from the wall outlet. Skipping this step is never allowed. Make sure the bare metal prongs are visible.
Set your dial to the continuity mode. Press one probe against a metal plug prong. Find where that specific wire enters the machine next. Touch the inner connection point with the second probe. A beep can confirm that the wire has a continuous path.
Repeat this exact process for the second prong. Check the second inner wire connection carefully. Both sides should show continuity to pass the test. Silence on one side means the cord may be damaged. Replacing a cable can be much easier than replacing the entire appliance.
Safety Rules You Absolutely Cannot Ignore
Electricity demands serious respect at all times. Opening any machine requires slow and careful hands. Seeing sparks fly from careless mistakes is terrifying. Staying safe is the highest priority here.
Unplugging the device is always rule number one for continuity and resistance tests. Testing continuity on a live circuit is dangerous. Wall power can damage your meter and create a serious shock hazard. Keeping the plug resting on the table helps you confirm that the appliance is disconnected.
How to use a Multimeter safely means understanding when the appliance must be unplugged and when a particular measurement requires different precautions. Never guess when working around electricity.
Handling Dangerous Stored Power
Some machines store heavy power after unplugging them. Microwaves remain the most famous hazard. High-voltage capacitors live inside these kitchen units. This part can hold a dangerous electrical charge even after the appliance is disconnected.
Discharging a capacitor safely is mandatory before working on equipment that contains one. If you are not trained to handle high-voltage components, skip microwave repairs and seek qualified help. Personal safety matters more than a cheap appliance fix.
Touch only the thick plastic handles of your probes. Touching bare metal tips during a test is unsafe. Keeping your hands completely dry helps reduce shock risks. Clearing your workbench removes tripping hazards. Clean workspaces naturally prevent accidents.
Reading Ohms and Resistance Data
A simple beep sometimes fails to tell the whole truth. Getting exact numerical data becomes necessary. Measuring electrical resistance provides this needed information. Ohms are the standard unit for resistance. The horseshoe symbol represents Ohms on the dial. A heating element might show continuity but still have an abnormal resistance value.
Rotate your dial to the appropriate Ohms setting. If your meter has manual ranges, choose a suitable low range when testing low-resistance parts. Press your metal probes against the part terminals. Watch the digital numbers change on the screen.
Understanding Resistance Numbers
| Appliance Part Tested | Expected Ohms Resistance | What the Data Means |
| Standard Thermal Fuse | 0 to 1 Ohm | Perfect unbroken connection |
| Oven Heating Element | 15 to 30 Ohms | Normal working heat range |
| Snapped Copper Wire | OL or Infinite | No electrical connection |
| Door Safety Switch | Near 0 Ohms | Switch closes properly when pushed |
Checking your factory service manual is a smart move. Manuals list the exact numbers your machine requires. Wildly different numbers can indicate that a part is damaged. Having hard data builds real confidence. Guessing is no longer part of your repair process.
Troubleshooting Heavy Power Tool Issues
My Makita and Milwaukee tools work hard every weekend. Dust covers them constantly during big projects. Heavy vibrations shake their internal parts loose. Sometimes a drill trigger refuses to spin the motor. A battery might stop taking a charge suddenly. The multimeter serves as my best diagnostic helper.
Checking the battery voltage starts my repair process. Rotating the dial to DC Voltage is step one. This symbol usually shows a straight line above three dots or a broken line. Touching the probes to the battery terminals gives you a voltage reading. A fully charged 12-volt battery may show a reading above 12 volts. Extremely low numbers can indicate a discharged or faulty battery, but always compare the result with the manufacturer’s specifications.
Trigger switches can fail from heavy dust buildup. Taking the plastic tool housing apart carefully helps. Setting the meter to continuity mode is next. Probes go directly onto the switch metal contacts. Pulling the plastic trigger should change the continuity reading. Hearing nothing can mean the switch is jammed, damaged, or not making contact.
Wrapping Up Your DIY Repair Journey
Fixing broken things yourself feels incredibly rewarding. Saving serious money keeps your wallet happy. Keeping bulky plastic waste out of local landfills matters. A deep sense of personal pride follows every success. Watching my stand mixer finally spin again felt amazing. My bread dough was saved from the trash.
Rushing the repair process usually causes more mistakes. Taking photos with your phone helps tremendously. Pictures guide you when putting everything back together. Working slowly allows you to spot hidden damage. Testing every suspicious part uncovers the real issue.
Making mistakes happens to everyone eventually. I certainly made plenty of them early on. Every error can become a useful learning lesson. Keeping tools organized makes the next job easier. Friends will soon ask you to fix their gear. Having the right skills and data lets you help them safely.
Common Questions About Using a Multimeter
Can I use a multimeter while the appliance is still plugged in?
Never test an appliance while it is plugged into a wall outlet when performing continuity or resistance tests. This creates a major risk of electric shock and can damage your multimeter. Always follow the meter’s instructions and use the correct measurement mode for the circuit.
Why is my multimeter not beeping during a continuity test?
A silent meter can mean the electrical path is broken or the part is dead. First, check that your probes are in the correct ports. Then touch the two probe tips together to confirm that the continuity function works. Also check the meter battery if needed.
Will a multimeter tell me if my Milwaukee battery is actually dead?
Yes, you can check DC voltage to see the battery’s present voltage. However, voltage alone does not provide a complete diagnosis of battery health. Compare the reading with the manufacturer’s specifications and consider the battery’s condition and behavior under load.
What is the difference between a cheap and an expensive multimeter?
Expensive models often have better safety ratings, durability, accuracy, and additional measurement features. Basic digital models can work well for simple home repairs when used correctly. Safety ratings should be a major consideration when choosing a meter.
Can I use a multimeter to fix a microwave safely at home?
Microwaves are dangerous because they can contain high-voltage components that retain electrical energy after being unplugged. You should not work inside a microwave unless you have the proper training and know how to safely handle and discharge those components.
If you are just starting, focus on learning how to use a Multimeter for simple, unplugged continuity and resistance checks first. Once you understand the dial, ports, probes, and readings, the tool becomes much less intimidating.