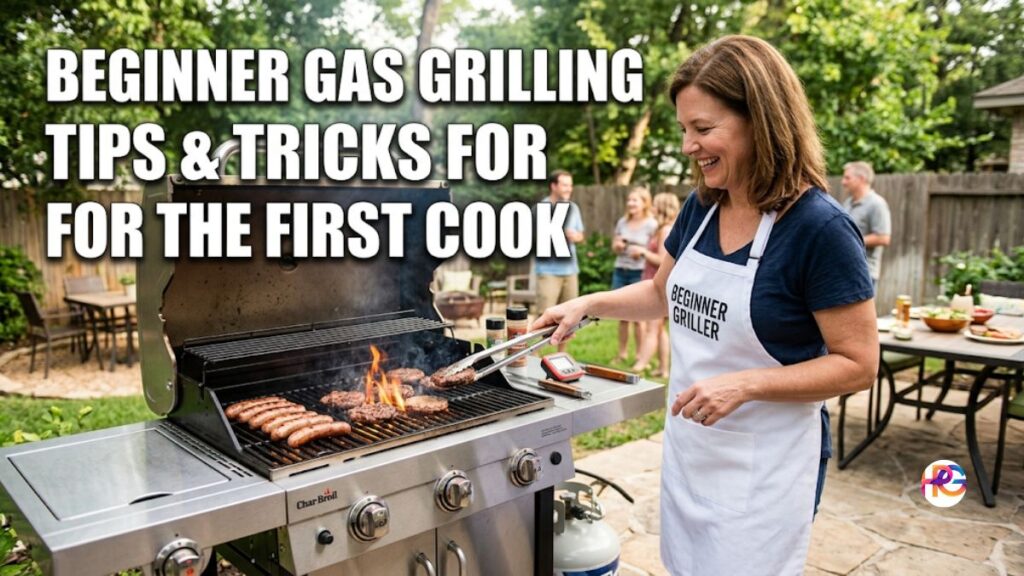
My Beginner Gas Grilling Tips and Tricks for the First Cook
I still remember that sunny Saturday in Austin, Texas. The humidity was thick. You could hear the cicadas buzzing loudly in the trees. The smell of sweet hickory smoke hung in the warm air. My neighbors were all cooking outside. Families were laughing across the fence. I felt a little left out. I wanted to join the weekend fun.
So, I went to the local hardware store. I bought my very first gas grill. It was a shiny three-burner model. I felt proud. But I also felt scared. I stared at the metal knobs. I had no clue what to do. My palms sweat a little bit. I worried I might blow up my patio. Luckily, I figured it out without any bad disasters. You can do it too. If you feel lost, I have your back. Let me share my beginner gas grilling tips and tricks for the first cook. These basic steps will save you deep stress. You will cook great food on day one.
Setting Up for Complete Success
Preparation is the absolute key to good food. You cannot rush the start. I learned this vital lesson the hard way. My first few tries were messy. I ruined some perfectly good steaks. Do not make my silly early mistakes. Take your time before the food hits the fire.
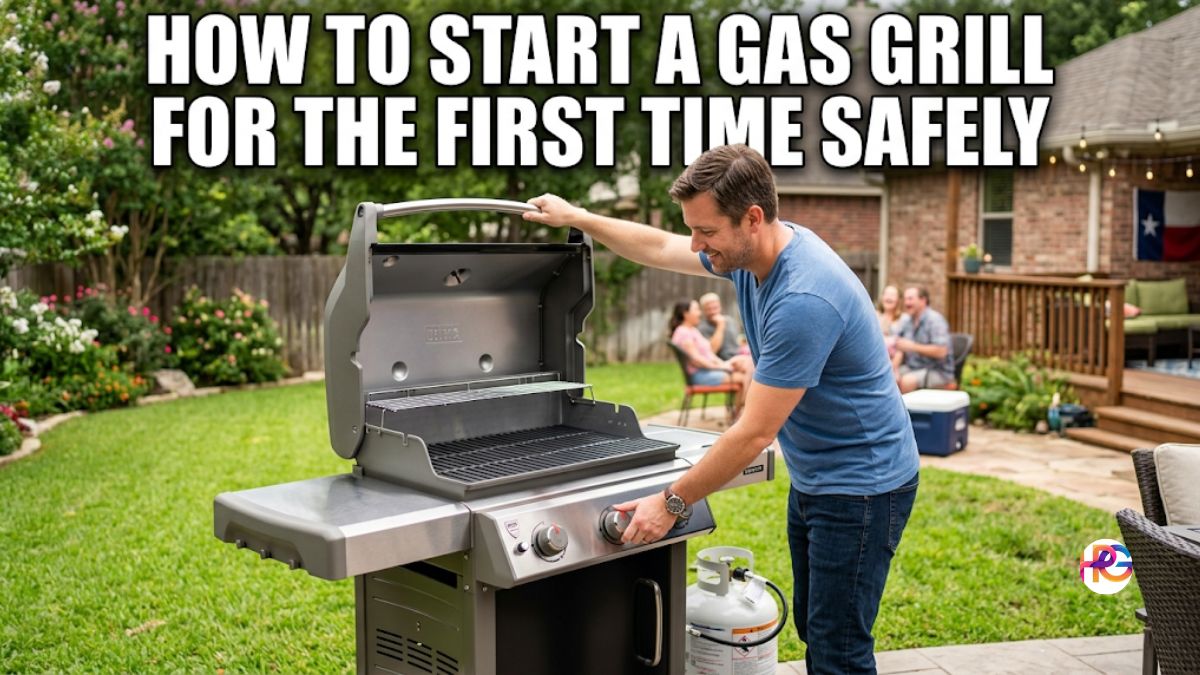
Always Open the Lid First
This is my biggest safety rule. Always open the grill lid before you turn on the gas. Never try to light a closed grill box. Gas can build up fast inside the dark space. A spark could cause a huge flash of fire. I saw a friend do this once. It singed his eyebrows off. We still joke about it today. But it was very scary in that moment. Just lift the metal lid. It takes one extra second. Safety must come first.
Checking the Propane Tank
You need steady fuel to cook. Running out of gas midway is the worst feeling. I did this while making big burgers for my family. We ate a cold dinner very late that night. Now, I always check my tank before starting. You can use a very simple trick. Pour warm tap water down the bare side of the tank. Run your flat hand down the metal side. The spot where it feels cold is your true fuel level.
| Check Method | How to Do It Safely | What It Tells You Fast |
| Warm Water Test | Pour water down the side | Cold spot shows liquid gas level |
| Weight Check | Lift the metal tank up | Heavy means full, light means empty |
| Built-in Gauge | Read the dial on the hose | Gives a rough percent of gas left |
Getting the Heat Just Right
Heat is your main tool. You must learn to control it well. Gas grills make this very easy for us. You just turn a plastic knob. But you need a clear plan. You cannot just blast raw fire at your food. That is a very quick way to burn dinner. Let me share some beginner gas grilling tips and tricks for the first cook when it comes to raw heat.
The Preheating Phase
You must preheat your grill every time. Think of it like your normal indoor oven. You would never put a cake in a cold oven. Meat works the exact same way. Turn the main burners to high. Close the heavy lid down tight. Wait ten to fifteen steady minutes. The metal grates need to get very hot. Hot grates give you those nice dark sear marks. They also stop your fresh food from sticking flat. I used to skip this important step. My soft chicken always stuck to the hot metal. It tore into messy shredded pieces. Waiting ten minutes solves this whole problem easily.
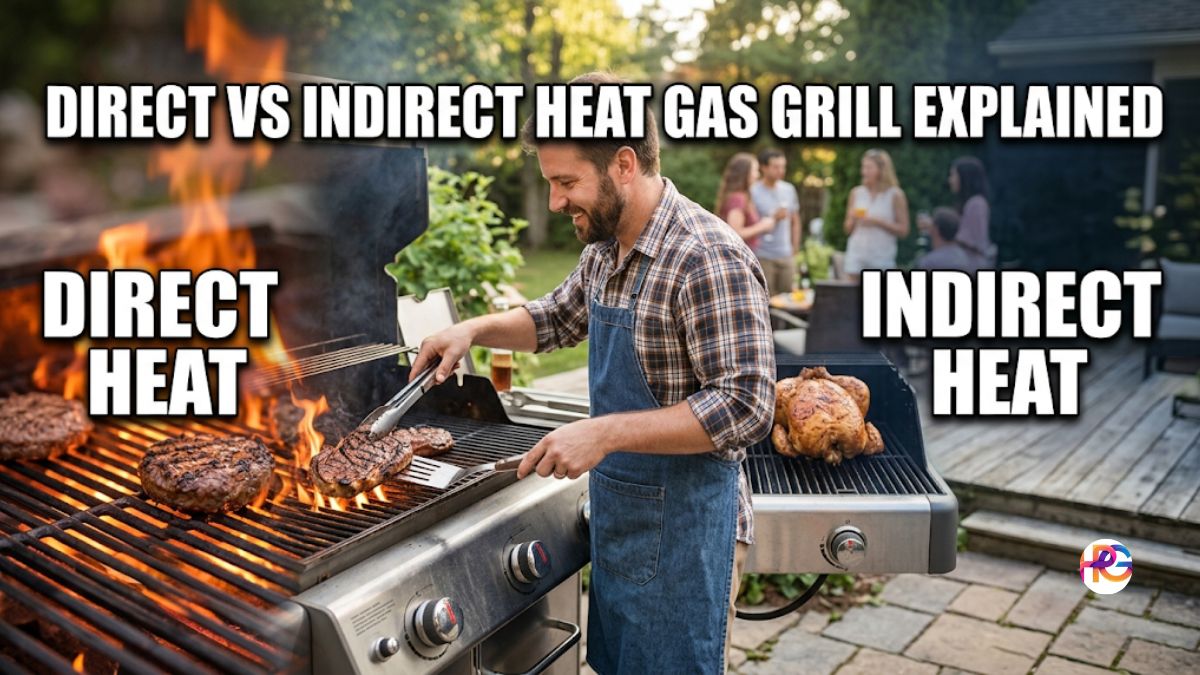
Creating Safe Heat Zones
Do not turn all burners to high heat. You need a safe zone on the grates. We call this a basic two-zone fire. Leave one side of the grill very hot. Turn the other side down to low or off. You cook your food on the hot side first. This gives the meat a nice hard crust. If the hot fire flares up fast, move the meat. Put it on the cool zone right away. It can finish cooking there without burning up. I use this trick every time I cook fatty chicken thighs. Chicken fat causes big bad fires. The cool zone completely saves my dinner.
Preparing the Raw Food
The way you prep really matters. A little extra care goes a long way. I used to just throw raw meat on the open fire. The sad results were dry and very tough. A few small smart changes fixed everything for me.
Quick Prep Checklist
Here is my fast simple routine before I cook. I do these steps inside my clean kitchen.
- Take the fresh meat out of the cold fridge.
- Let it sit out for twenty full minutes.
- Pat the wet meat dry with soft paper towels.
- Rub a tiny amount of oil directly on the food.
- Add your coarse salt, pepper, and dry spices.
- Carry the prepped food outside on a clean tray.
Oil the Meat Not Grates
Many people oil the hot grill grates. I think this is a truly bad idea. Loose oil drips down deep into the open flames. This causes gross dark smoke. It also causes huge bad fire flare-ups. Instead, rub a little oil right onto your raw food. I use plain olive oil or pure avocado oil. Just a very light wet coat will do. Then add your dry salt and pepper. The oil helps the dry spices stick tight. It also stops the meat from sticking to the hot grill. My thick pork chops turn out perfectly this way.
Dry Meat Sears Much Better
Water is the main enemy of a good hard crust. Wet meat will just steam sadly on the hot grill. It will quickly turn gray and look bad. Pat your fresh steaks totally dry with a paper towel. Do this right before you add nice oil and salt. This small extra step changed my whole cooking game. I get a beautiful dark brown crust every single time. It looks like great food from a fancy town restaurant.
Cooking Like a True Pro
Now we reach the really fun part. The raw food goes onto the hot open fire. You hear that loud crisp sizzle. It is the best sound in the whole world. The rich smell fills your entire backyard space. Your mouth starts to water almost instantly. But you must stay perfectly calm now. Do not rush the fast cooking process. Let the steady hot heat do its hard work.
Leave the Food Alone
Flipping raw meat too much is a bad nervous habit. I used to poke and prod my fresh burgers constantly. I flipped them over every single minute. They fell apart completely. The rich meat juices ran out flat. Meat will naturally let go from the hot metal. When a good hard crust forms, it stops sticking. If you try to turn a steak and it pulls tight, stop right away. Give it one more full minute. Patience is very hard when you feel hungry. Try your absolute best just to wait.
Do Not Peek Constantly
Opening the big lid lets the hot heat out. Gas grills drop fast heat very quickly. Keep the lid shut down tight as much as you can. It turns the grill space into a hot dry oven. The heat fully surrounds the raw food. This cooks things much faster. It also cooks things much more evenly overall. My old dad used to say, if you are looking, you are not cooking. He was completely right about that fact. Trust your set timers. Only open the lid when it is time to flip over.
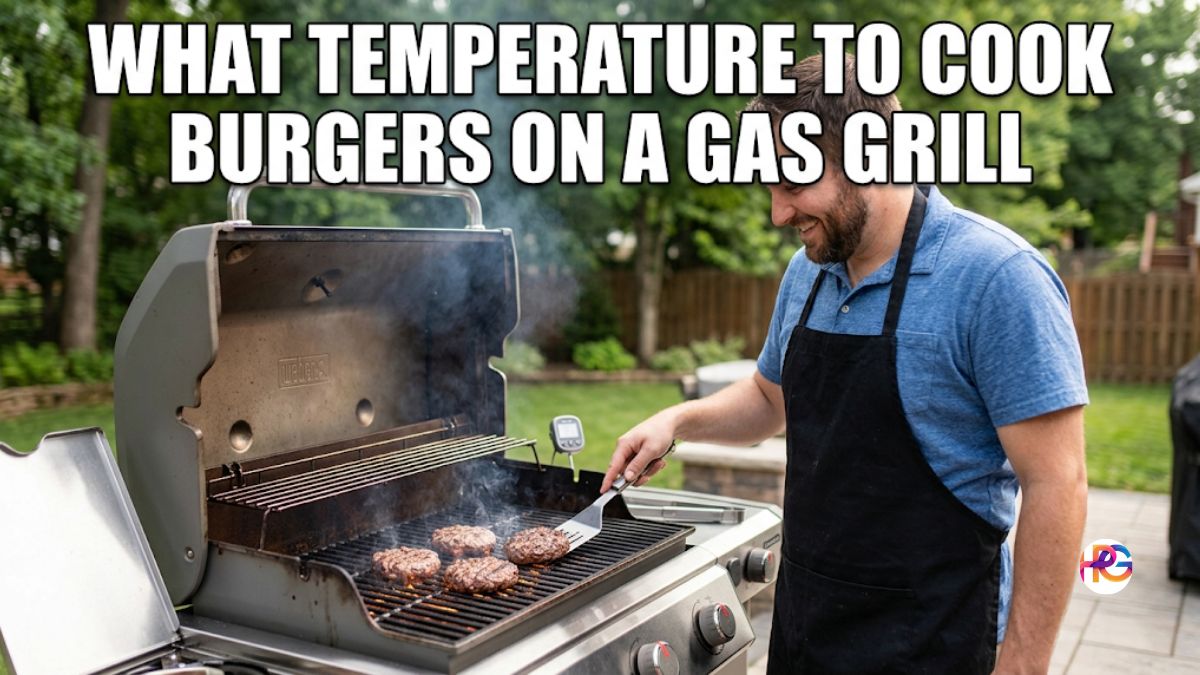
Use Hard Data Not Guesses
Guessing final meat temp is a real fool’s game. You cannot tell if raw chicken is done by poking it. I served bad undercooked chicken once to my friends. It was deeply bad and sad. Now, I simply rely on true facts. I use simple tools to stay safe.
Get a Digital Meat Thermometer
This is my top smart gear tip for you. Buy a fast instant-read food thermometer. It costs very little real money. It will completely save you from dry steak and raw chicken. You just poke the metal probe into the thickest part of the hot meat. It gives you a clear number in two quick seconds. It takes away all the deep stress. I never grill outside without mine.
| Type of Meat | Safe Internal Temp Target |
| Chicken (Breast or Thigh) | 165 Degrees Fahrenheit |
| Pork Chops or Tenderloin | 145 Degrees Fahrenheit |
| Ground Beef Burgers | 160 Degrees Fahrenheit |
| Steak (Medium Rare) | 135 Degrees Fahrenheit |
Choosing Simple Best Accessories
You do not need a fancy fake kitchen outside. A few basic strong tools will do the whole job. I spent way too much cash at first. I bought silly gadgets I never even used. Keep things very simple for your first big cook.
A Good Pair of Tongs
Tongs are your actual hands over the hot open fire. You need a very sturdy metal pair. Buy heavy tongs with long safe handles. They keep your bare arms far away from the hot heat. I have a heavy pair made of solid thick steel. They grab huge thick steaks easily. Do not use those small cheap kitchen tongs. They are way too short. The open fire will singe your arm hair off. Trust me on this exact point. I learned the bad hard way during my second cookout.
A Sturdy Metal Grill Brush
Clean wire grates make much better food. You need a strong brush to scrape them clean. Buy a good brush with thick tough bristles. Cheap thin wire brushes are very common. But you must be super careful with them. Cheap thin wires can snap right off. They can easily get stuck inside your soft food. That is a very bad hidden danger. I highly prefer strong brushes made of thick coiled steel. They do not ever shed sharp small pieces. They clean my dirty grill perfectly well. I replace my old brush every single year. It is a very smart clean habit.
The Final Steps Before Eating
The main cook is fully done. You took the hot food off the open fire. You want to eat it right now. I know that exact hungry feeling. But you have two small quick chores left. They are very important tasks.
Rest Your Hot Meat
Cooked meat needs time to relax. Fast high heat makes the muscle fibers grab tight. The meat juices run straight to the middle. If you cut it right away, the hot juice spills out. Your clean plate gets super messy. Your expensive meat gets very dry. Put the hot food onto a clean wood board. Loosely cover it fast with tin foil. Let it sit still for ten slow minutes. The internal juices will spread back out evenly. Every single bite will be super tender. I tested this fact with two matching steaks. The fully rested one was ten times better. It is truly worth the short wait.
The Quick Fast Burn Off
Do not ever leave a dirty cold grill. You will really hate yourself later. While your hot meat rests, clean up fast. Turn all the main burners back up to high. Close the heavy lid down for five full minutes. The extra high heat turns leftover grease to white ash. Open the lid back up safely. Scrub the hot grates hard with your clean brush. Turn off the main gas down at the base tank. Now your gas grill is totally clean. It is fully ready for next time.
My Closing Thoughts on Grilling
Learning to safely grill takes some real practice. You might burn a small hot dog or two. That is completely normal for everyone. Do not ever let it stop your fun. Grilling food outside is pure human joy. It brings close friends and kind family together. Food just naturally tastes much better when cooked over a real open fire. I truly love my summer weekend cookouts now. They are the absolute best bright part of my long week. Use these easy beginner gas grilling tips and tricks for the first cook. Stay very safe out there. Take your sweet time. Have great fun with the whole process. You will definitely be a smart grill master in no time at all.
Frequently Asked Questions
Q: Which beginner gas grilling tips and tricks for the first cook help keep my propane tank safe in a hot Texas garage?
A: Store your propane tank outside in a shaded, well-ventilated area. Hot garages trap dangerous heat that increases tank pressure. Keep your grill tools safe by shielding the fuel from direct sun.
Q: Should I buy a Weber or Char-Broil gas grill for my very first backyard cookout?
A: Weber grills offer excellent durability and heavy grates that hold heat well. Char-Broil models are budget-friendly and great for learning. Both brands provide excellent safety features for beginners.
Q: Can I use a cheap wire brush to clean my hot porcelain grill grates?
A: Avoid cheap wire brushes because loose bristles can break off into your food. Choose a heavy-duty coiled stainless steel brush instead. It offers a safer grip and lasts much longer.
Q: How do I store my digital meat thermometer so the battery does not drain?
A: Keep your digital thermometer inside a climate-controlled kitchen drawer. Extreme garage heat or winter cold ruins the battery life and display screen. Safe storage ensures accurate temperature readings every time.
Q: What is the safest tool to handle heavy steaks on a searing hot gas grill?
A: Use long stainless steel tongs with a non-slip rubber grip. These heavy tongs keep your hands far away from high heat zones. They provide the best control so you never drop dinner.