How to Detect Propane Leak in RV: Warning Signs, Testing Methods, and Safety Tips
Last summer, my family and I pulled into a beautiful, shaded campsite just outside of Austin, Texas. It was a hot, dusty afternoon. We were tired from a long drive, and all I wanted was a cold drink and a quick nap. But as soon as I stepped inside our rig, a faint but unmistakable smell hit me. It smelled exactly like rotten eggs.
My heart dropped. If you own an RV, you know that smell. It means propane is in the air.
Propane leaks are scary. Our mobile homes constantly bounce, shake, and vibrate down the highway. That movement looses brass fittings, cracks old rubber hoses, and wears out regulators. Testing your system is a vital chore. I learned the hard way that you cannot skip it.
Let me walk you through how to detect propane leak in rv safely. I will share exactly what I do, what tools I use, and the mistakes I made so you can stay safe on the road.
The Warning Signs That Saved My Trip
Before you grab any tools, your senses and your rig will usually tell you if you have a gas problem. In my case, it was my nose.
Liquid propane has no natural scent. Manufacturers add a chemical called ethyl mercaptan to it. This chemical gives the gas its foul, sulfur-like odor. If you smell rotten eggs or a skunk near your rig, do not ignore it.
Another major sign is your onboard LP detector. This is a small, hardwired alarm located near the floor of your RV. Propane is heavier than air, so it sinks. If that alarm blares, treat it as a real emergency.
You might also hear a hissing sound near your nose, hoses, or tanks. Finally, watch your fuel levels. If your tanks empty much faster than usual during a normal camping trip, you likely have a hidden leak somewhere in your lines.
The Basic Tools You Need for the Job
Testing your system does not require expensive gear. In fact, you can find the items easily. I keep a small leak test kit in my RV tool bag at all times.
| Tool Name | What It Does | Why You Need It |
| Leak Detector Solution | Clings to pipes and bubbles up at gas leaks | Safer than DIY dish soap |
| Soft Bristle Brush | Applies the liquid evenly on small joints | Reaches tight spots behind tanks |
| Spray Bottle | Mists large areas of rubber hose quickly | Great for fast visual checks |
| Flashlight | Illuminates dark spots under the chassis | Helps you spot tiny bubbles |
My Step-by-Step Soap Bubble Test Routine
The soap bubble test is the easiest and most reliable way to find a leak. It is cheap, fast, and highly accurate if you do it right.
Years ago, I used a simple mix of liquid dish soap and tap water in a spray bottle. It works in a pinch, but I do not use DIY soap anymore. Dish soap often contains chlorides. Chlorides can corrode brass fittings over time. Soap mixtures are also thin and watery. They run off the bottom of round pipes before bubbles can form.
Now, I buy a dedicated leak detector solution from a local hardware store. It is thick, sticky, and works much better. It clings to the underside of valves and fittings. Plus, it will not freeze if you camp in cold weather.
Here is the exact steps I follow to test my system safely.
Step 1: Shut Down the System
First, turn off every single gas appliance inside your RV. Shut down the stove, the oven, the water heater, and the fridge. Extinguish any open flames, campfires, or cigarettes nearby. You want zero sparks and zero gas flowing into the appliances during the check.
Step 2: Open the Main Tank Valves
Go outside to your propane cylinders. Slowly turn the main hand wheels to open the valves fully. This action fills the lines with gas and builds up pressure. If there is a hole or a loose joint, the pressure will force the gas out.
Step 3: Apply the Solution Generously
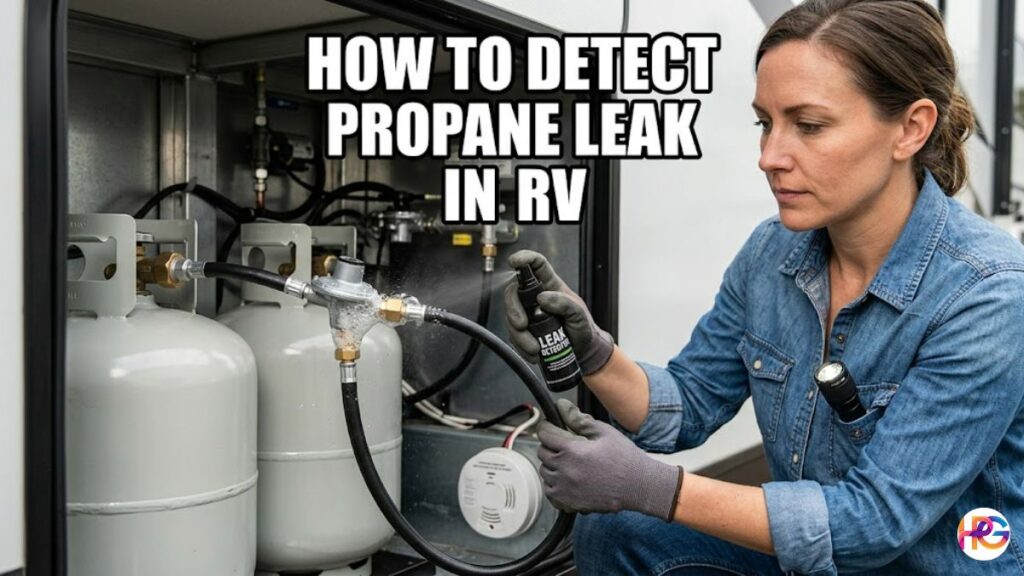
Take your brush or spray bottle and coat every single connection point. Start at the main tank valve. Move down to the brass nuts, the regulator body, and the flexible rubber lines. Do not be shy with the liquid. Drench every joint until it is completely wet.
Step 4: Watch for Growing Bubbles
Get close and watch the wet areas carefully. Use your flashlight if you are in the shade. If gas is escaping, it will push through the thick liquid and create bubbles.
Tiny, multiplying bubbles that look like foam mean you have a small, slow leak. Large, rapidly expanding bubbles mean you have a massive, dangerous leak. If you see bubbles, you have found your problem area.
Crucial Spots You Must Check
Not all parts of a propane system wear out at the same rate. Over the years, I have found that two specific areas fail far more than others. You should spend extra time inspecting these zones.
Checking the Flexible Rubber Hoses
The short rubber hoses that run from your tanks to the regulator are called pigtails. These hoses take a beating. They face hot sun, freezing air, road salt, and constant flexing when you swap out your tanks.
Look closely at the rubber. Do you see tiny cracks when you bend the hose? Does the rubber feel stiff, brittle, or dry-rotted?
During my Texas trip, my pigtail hose looked okay at first glance. But when I sprayed it with the solution, a tiny line of foam appeared along a small crack near the brass fitting. The rubber had degraded from UV exposure. If a hose looks bad, replace it immediately. Cheap hoses are not worth the risk.
Inspecting the Propane Regulator
The regulator is the silver, disc-shaped device that controls the gas pressure. It ensures your stove gets a steady, safe stream of fuel. Regulators have a small vent hole on the side to let the internal parts move freely. They also have a center seam where the metal body pieces join together.
Spray the entire regulator body with your solution. Look closely at the vent hole. If you see bubbles coming out of the vent, the internal rubber diaphragm has ruptured.
A bubbling regulator cannot be repaired. It is dead, and you must buy a new one. Never try to clog or tape over a leaking regulator vent.
When to Stop and Call a Professional
I love fixing things myself. I enjoy working on my own rig and saving money. But you must know your limits when it comes to gas safety. Propane is highly explosive, and mistakes can be fatal.
There is a golden rule every RV owner should live by. If you smell propane inside your rig, but your outdoor bubble test shows nothing, turn off the main tanks immediately. Do not sleep in the RV. Do not turn on the lights. Call a certified RV technician right away.
The leak might be hidden behind your kitchen cabinets, under the floorboards, or inside the main valves of your furnace or fridge. A professional technician has specialized tools. They can hook up a device called a manometer to your system. This tool runs a timed pressure drop test. It can detect leaks so small that bubbles will not even show them.
If you find a leak on a main copper line under your chassis, or if you feel uncomfortable swapping out a faulty regulator, pass the wrench to a pro. It is always better to be safe than lucky.
Quick Safety Checklist for Your Next Trip
To make things easy, I made a simple routine checklist. I run through these points before every long road trip. It takes less than ten minutes, but it gives me total peace of mind while driving down the highway.
- Check the expiration date on your indoor LP detector. These sensors only last five to seven years before they fail.
- Clear away any dust, pet hair, or debris from the front of your indoor detector grill.
- Look at your propane tanks to ensure they are mounted tightly and do not jiggle in their brackets.
- Walk around the rig and look into the exterior appliance vents to make sure birds or bugs have not built nests inside.
- Keep your leak detector solution bottle in a zip-top bag so it does not spill on your other tools.
Taking care of your RV gas system does not have to be scary. Keep your eyes open, trust your nose, and test your lines regularly. Stay safe out there, and happy camping!
Frequently Asked Questions
Q: Can I use standard DeWalt or Milwaukee cordless tool cases to store my RV propane leak test kit?
Yes, a durable Milwaukee Packout or DeWalt ToughSystem case works great. Just make sure the commercial leak detector solution bottle is sealed tightly so it will not spill on your power tools.
Q: Will extreme heat in my garage ruin my commercial gas leak detector solution?
High garage heat can degrade the chemical mix over time. Store your solution in a cool, dark cabinet to keep it thick and effective for your next safety check.
Q: What is the best tool to tighten a loose brass propane fitting if I find a leak?
Use two open-ended wrenches or a pair of smooth-jaw pliers. Hold the main brass valve steady with one tool while you gently tighten the outer nut with the second wrench.
Q: How do I safely clean dust out of my indoor RV propane detector grill?
A quick blast from a can of compressed air works best. Do not spray liquid cleaners near the sensor because harsh chemicals can ruin the sensitive internal components.
Q: Can cold winter storage damage my RV propane hoses and regulator?
Freezing temperatures make rubber pigtail hoses brittle and prone to cracking. Inspect your gas lines closely every spring to ensure the cold weather has not caused hidden damage.