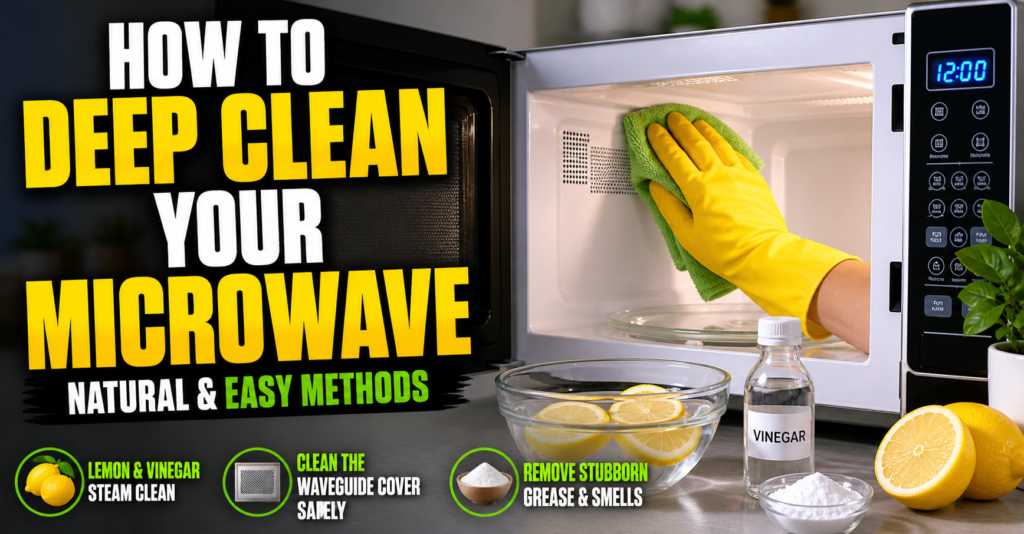
How to Deep Clean Your Microwave (Natural & Easy Methods)
Last winter, I burned a bag of popcorn so badly that smoke filled my kitchen in less than two minutes. The smell stayed inside my microwave for days. Every time I opened the door, I smelled burnt grease again. I wiped the inside with paper towels, but it did not help much.
That was when I realized a microwave needs more than a quick wipe now and then. Grease, steam, and food splatter build up fast. Once that layer gets thick, the smells become hard to remove. Since then, I have tested several natural cleaning methods at home.
Some tricks worked well right away. Others looked good online but did very little in real life. In this guide, I will share what worked best for me. I will also explain how I safely cleaned the waveguide cover without damaging my microwave.
Why I Started Deep Cleaning My Microwave More Often
For a long time, I ignored small food splatters inside my microwave. I thought they were harmless because the appliance still worked fine. Over time, though, the inside started to look yellow and greasy. The smell also became stronger after heating food.
One cold evening in January, I reheated leftover pasta after work. Within seconds, I noticed a burnt smell spreading through the kitchen. I opened the microwave and saw grease stains on the ceiling and walls. At that point, I knew basic wiping was no longer enough.
After a deep clean, the microwave looked brighter and smelled fresh again. Food also heated more evenly. That simple cleaning session honestly changed my routine.
| Problem I Noticed | What Happened |
|---|---|
| Burnt smell | Odor stayed trapped inside |
| Thick grease | Walls felt sticky |
| Smoke during heating | Old grease heated up again |
| Food odors | Fresh food smelled stale |
| Steam stains | Ceiling looked yellow |
What I Use to Deep Clean My Microwave
I stopped using strong chemical sprays because they left a harsh smell behind. Some cleaners also irritated my hands. After trying different methods, I found that basic kitchen items worked better for regular cleaning.
Now I keep a few simple supplies ready at home. Most people already have these items in their kitchen cabinets. The process stays cheap, easy, and safe.
My Basic Microwave Cleaning Supplies
- Fresh lemon
- White vinegar
- Baking soda
- Warm water
- Dish soap
- Soft sponge
- Microfiber cloth
- Cotton swabs
- Microwave-safe bowl
I avoid steel scrubbers because they can scratch the inside surface. Once the coating gets damaged, cleaning becomes harder later.
Lemon Steam Cleaning Worked Better Than I Expected
The first natural method I tested was lemon steam cleaning. Honestly, I did not expect much from it. It sounded too simple to remove thick grease. Still, I decided to try it after burning popcorn one night.
To my surprise, the steam loosened dried food very quickly. The fresh lemon smell also made the kitchen feel cleaner right away.
How I Clean My Microwave With Lemon
First, I fill a microwave-safe bowl with one cup of water. Then I cut a lemon in half and squeeze the juice into the bowl. After that, I place the lemon halves into the water as well.
Next, I microwave the bowl for about five minutes. Steam starts covering the inside walls within a few minutes. Once the timer ends, I leave the door shut for another five minutes so the steam can soften the grease.
After waiting, I wipe the inside with a microfiber cloth. Most stains come off easily without hard scrubbing. The microwave also smells fresh instead of smoky.
| What I Liked | My Experience |
|---|---|
| Fresh scent | Kitchen smelled cleaner |
| Softened grease | Food stains wiped away fast |
| Natural method | No harsh chemical smell |
| Quick process | Took about 15 minutes |
Still, lemon alone did not remove heavy grease near the vents. For tougher buildup, vinegar worked much better for me.
Vinegar Steam Removed Thick Grease Faster
A few months later, I cleaned my parents’ microwave during a weekend visit. They had not deep cleaned it in a long time. Grease covered the walls so heavily that lemon steam barely helped.
That was when I switched to vinegar steam cleaning. The smell was stronger, but the grease melted away much faster.
How I Use Vinegar to Deep Clean a Microwave
I mix one cup of water with two tablespoons of white vinegar inside a bowl. Then I heat the mixture for about five minutes until the microwave fills with steam.
After the timer stops, I leave the door closed for another five minutes. This extra wait helps loosen thick grease. Once I wipe the walls, the oily layer usually slides right off.
The only downside was the vinegar smell afterward. To fix that, I wiped the inside again with plain water. Sometimes I also leave the door open for a few minutes to air it out.
Cleaning the Waveguide Cover Felt Scary at First
The first time I noticed the waveguide cover, I had no idea what it was. I saw a small panel inside the microwave and almost scrubbed it hard. Luckily, I searched online before touching it.
I learned that the waveguide cover protects sensitive microwave parts from grease and moisture. Damaging it can cause sparking later. That made me much more careful during cleaning.
How I Safely Clean the Waveguide Cover
Now I always unplug the microwave before cleaning this area. Then I lightly dampen a microfiber cloth with warm water or diluted vinegar.
After that, I gently wipe the surface without soaking it. I also dry the cover right away with another cloth. This method keeps moisture away from the internal parts.
While cleaning, I check for warning signs like cracks, peeling, or dark burn marks. If the cover looks damaged, cleaning alone may not solve the problem.
Burnt Popcorn Smell Was the Hardest Problem
The worst microwave smell I ever dealt with came from burnt popcorn. One Friday night, I forgot about a popcorn bag while answering a phone call. Smoke filled the kitchen before I noticed it.
Even after cleaning the inside, the burnt odor stayed trapped for days. Every heated meal carried that same smoky smell.
What Helped Remove the Burnt Smell
I tested several odor removal tricks after that accident. Some methods helped only a little. Others worked surprisingly well overnight.
| Odor Removal Method | Result |
|---|---|
| Baking soda overnight | Worked very well |
| Lemon steam | Good for light smells |
| Vinegar steam | Strong against grease odors |
| Coffee grounds | Helped slightly |
| Open door overnight | Worked slowly |
Baking soda gave me the best results. I simply placed an open bowl inside the microwave overnight. By morning, the burnt smell was much weaker.
Cleaning the Microwave Vents Made a Big Difference
I used to ignore the outside vents because they did not seem very dirty. Over time, though, sticky dust started collecting around them. The grease felt unpleasant every time I touched the surface.
Cleaning the vents carefully made the microwave look much newer. The kitchen also smelled fresher afterward.
My Simple Vent Cleaning Routine
I mix warm water with a few drops of dish soap inside a small bowl. Then I dip a soft cloth into the mixture and wipe the vents gently.
Once the grease comes off, I dry the area with a clean towel. I never spray liquid directly into the vents because moisture can damage the inside parts.
Mistakes I Made While Cleaning My Microwave
I definitely made a few mistakes while learning how to clean my microwave properly. At one point, I used a rough scrubber on the inside walls. Tiny scratches appeared afterward.
Another time, I sprayed cleaner directly into the microwave instead of using a cloth first. That made me nervous because liquid dripped near small openings.
Now I avoid those mistakes completely. Small changes in cleaning habits can help a microwave last much longer.
Things I Avoid Now
- Steel wool scrubbers
- Spraying cleaner directly inside
- Scrubbing the waveguide cover hard
- Ignoring dark burn marks
- Running the microwave empty
How Often I Deep Clean My Microwave Now
After dealing with thick grease and stubborn smoke smells, I changed my routine completely. Instead of waiting for a mess to get worse, I clean small spills early.
This habit saves a lot of time later. The microwave also stays fresher every week.
| Cleaning Task | How Often I Do It |
|---|---|
| Quick wipe-down | Every few days |
| Steam cleaning | Once a week |
| Deep cleaning | Every 2 to 4 weeks |
| Vent cleaning | Once a month |
Final Thoughts
Deep cleaning my microwave became much easier once I started using simple natural methods. Lemon steam helped with fresh smells and light stains. Vinegar worked best for thick grease and old buildup.
The biggest lesson I learned was to clean small messes before they become stubborn stains. I also became much more careful around the waveguide cover after learning how sensitive it is.
Now my microwave smells fresh, heats food properly, and no longer fills the kitchen with burnt odors after every meal.
FAQs
What is the best natural way to deep clean a microwave?
Lemon steam works well for light stains and food smells. Vinegar steam is better for thick grease inside a dirty microwave after weeks of heavy use.
Can vinegar damage a microwave during deep cleaning?
White vinegar is safe for microwave cleaning when mixed with water. I use a soft cloth after steaming so leftover vinegar does not sit inside too long.
How do I clean a microwave waveguide cover safely?
Use a lightly damp microfiber cloth and wipe the waveguide cover gently. Avoid soaking or scrubbing hard because that can cause damage or sparking later.
Why does my microwave still smell after cleaning?
Burnt grease and trapped food odors can stay inside vents and corners. Baking soda left overnight inside the microwave often removes stubborn smells better.
How often should I deep clean my microwave?
I deep-clean my microwave every two to four weeks. Weekly steam cleaning also helps stop grease buildup before it becomes harder to remove later.